Hi-van is supported by its audience. When you purchase using our links, we may earn an affiliate commission (no added cost to you). Learn more
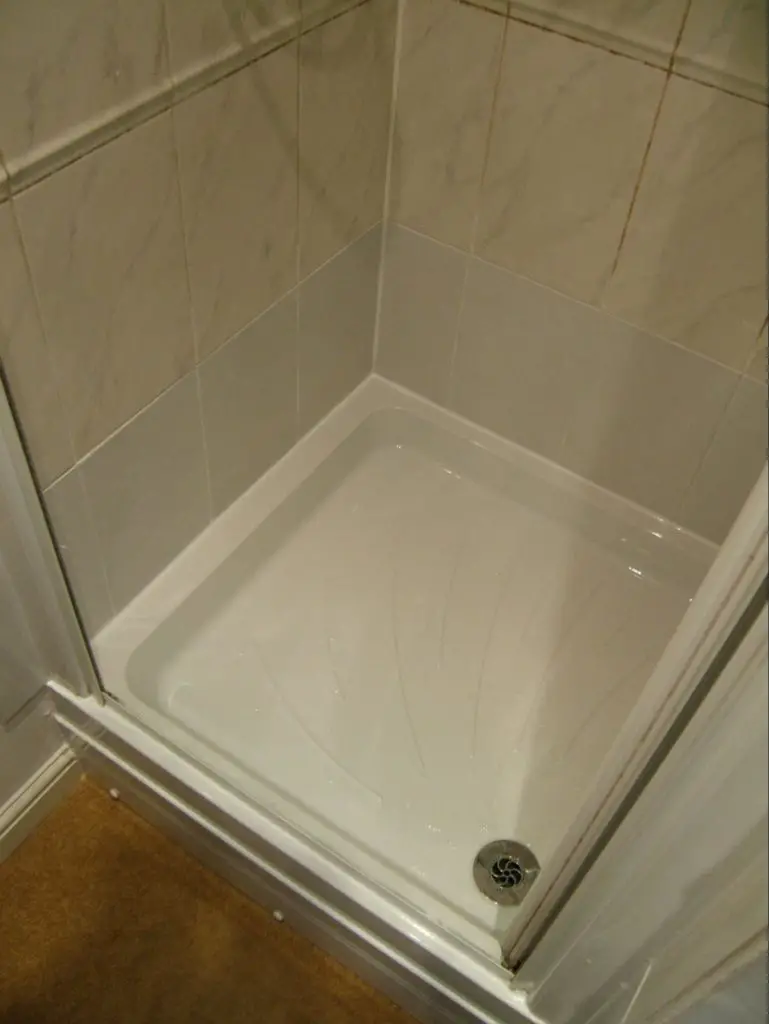
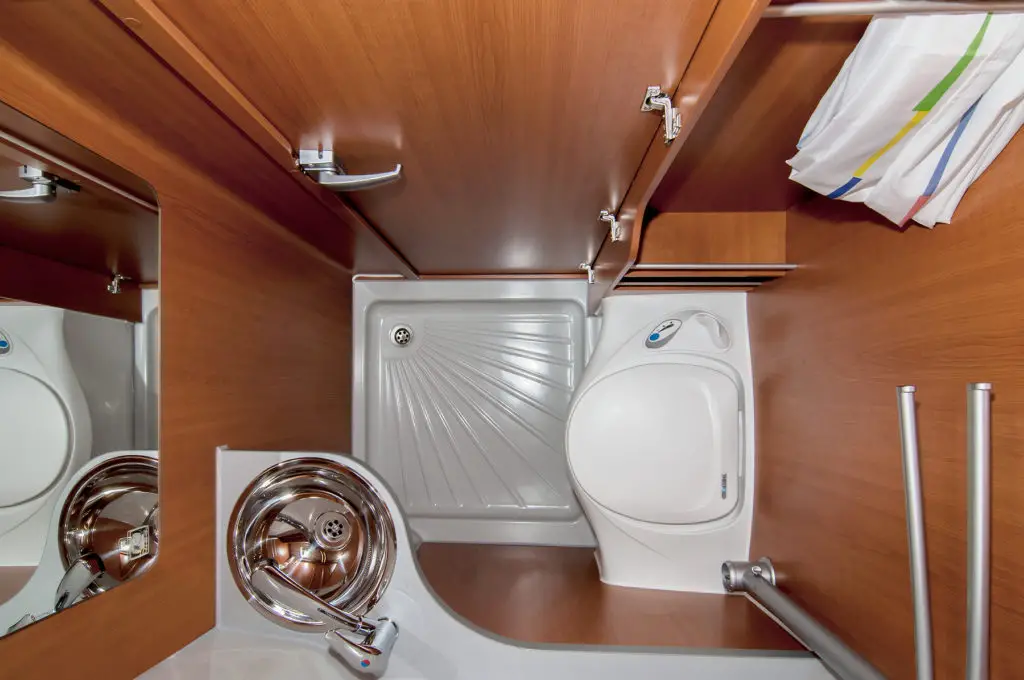
Living your life on the open road in an RV is exciting and full of fun but a cracked or leaky motorhome can ruin all your excitement. Although motorhome shower trays are made of high-quality and durable material, they deteriorate over time.
They can develop holes and cracks, resulting in a water leak, which can lead to expensive water damage in the long run. That’s why it’s critically important to repair your damaged motorhome shower tray as soon as possible.
The method that you’ll need to use to repair a shower tray will depend on the type and intensity of damage you’re dealing with. If there’s a small crack or hole in the tray, you’ll need to use a sealant to fix the problem.
However, if something dramatic has happened and the motorhome shower tray is beyond repair, you’ll need to replace it with the new one.
If the shower tray of your motorhome is damaged, then continue reading. Here, I’ll discuss how to repair a motorhome shower tray, along with the common causes and signs of this problem.
What Causes a Shower Tray to Crack?
Regardless of the type of motorhome shower tray you have, there are several factors that can damage its surface, including the following.
Poor Installation
Poor installation is one of the most common factors that lead to the breakage of the shower tray surface. It’s important not to leave any bubbles or air gaps between the tray and the surface underneath as it’ll lead to deflection, which will increase the risk of damaging the shower tray.
It’s especially true if you’re installing a stone or ceramic tray, as they’re most susceptible to damage caused by poor installation.
However, it certainly doesn’t mean that you can ignore the importance of effective installation while dealing with other types of shower trays, such as plastic and ABS (Acrylonitrile Butadiene Styrene). They also won’t withstand heavy weights if installed poorly.
Normal Wear and Tear
Just like most products, shower trays also deteriorate with time due to normal wear and tear. It happens because of the buildup of limescale, salts, or minerals, weakening the tray. According to studies, the average lifespan of a shower tray is about 10 years.
So, if your motorhome is more than 10 years old, you might end up with a cracked or damaged shower tray. If it happens earlier than that and your shower pan is still under warranty, consider contacting the manufacturer to get it replaced.
Direct Impact
The direct impact is also a common cause of cracked shower pans. For instance, if you mistakenly dropped something sharp or heavy on the tray, it can lead to irreparable damage. In such a case, you’ll need to invest in a new tray, which can be heavy on your pocket.
Therefore, it’s important to keep sharp and heavy objects away from your motorhome shower to prevent irreparable damage and save money.
Low Quality or Faulty Product
While buying a cheap product can save some bucks on upfront payment, it can actually cost you more in the long run. Even if you use the correct installation technique and keep heavy and sharp objects away from your shower, a low-quality product will likely crack way before the average lifespan of shower trays.
That’s why you should always buy and install a high-quality product offered by a reputable and trusted brand. You might need to pay a bit more upfront money but it’ll serve you for years to come without breaking or cracking. As a result, it’ll help you save money in the long run.
Usage of Abrasive Chemicals
Most people like to use cleaning products containing harsh and abrasive chemicals to make the shower tray cleaning process easy. While it’s an easy solution to clean resin, stone, and ceramic shower pans, it’s not safe for these materials.
Cleaning solutions containing toxic chemicals, such as micro-scrubbing liquids and bleach can damage the shower tray surface over time.
If you continue using such chemicals on your shower pan, they’ll make the surface porous, which will eventually lead to small holes leaking water. So, avoid the usage of harsh chemicals and use mild cleaners to clean your motorhome shower pan.
Related Guides:
Showering on the road - full guide
Are These The Best Camper Van Shower Toilet Combo Units Around?
The Best Camper Van Shower Options For Van Life
How Much Water Do You Need for a Camp Shower?
What Kind of Sealant Should I Use on My RV Shower Tray?
The type of sealant that you should use to repair your RV shower tray depends on the type of damage you’re dealing with. If the tray only has a hairline crack or a small hole, you can use water-resistant caulking to fill the crack/hole and solve the problem.
There are different types of sealants that you can use for this purpose and some of the popular types include silicone-based sealant, latex caulk, butyl-rubber caulk, and polyurethane sealant.
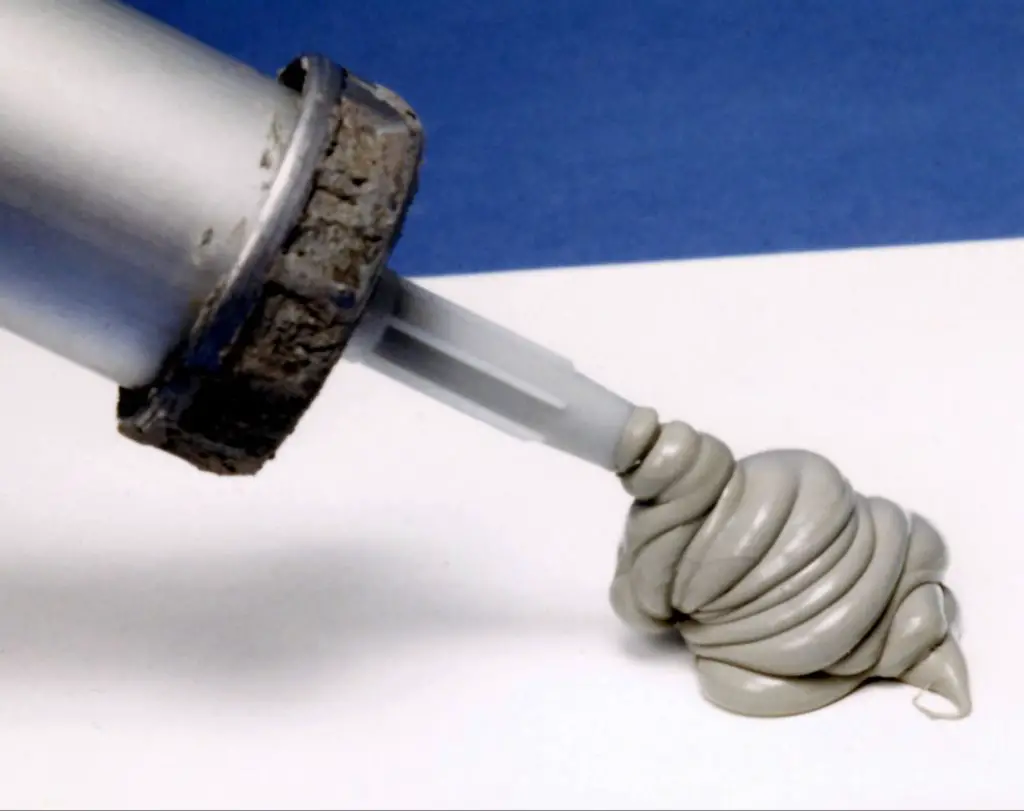
However, these sealants aren’t very long-lasting, and you might need to reapply them after every several months. Therefore, you should go with a mixture of liquid hardener and epoxy or resin putty for a long-lasting solution.
It’s important to choose a sealant that prevents the water from leaking through the crack or hole and reaching under the cabinet to wreak havoc. Additionally, you also want to choose a product that creates a smooth surface, so that you can clean the tray easily in the future.
Can You Refurbish a Caravan Shower Tray or Should You Buy a New One?
The answer to this question depends on the intensity of the damage. If there’s a small hole or crack or your shower tray’s seals are damaged, you can easily refurbish the pan.

After that, you can use a simple paintbrush or a roller to give the entire thing a new water-resistant coat with multi-surface primer or epoxy paint. Before you start the refurbishing process, make sure that you use a non-abrasive cleaning agent to thoroughly clean the shower pan.
It’ll allow you to remove any grease or dirt stuck to the pan that can keep the paint from sticking to the tray’s surface properly.
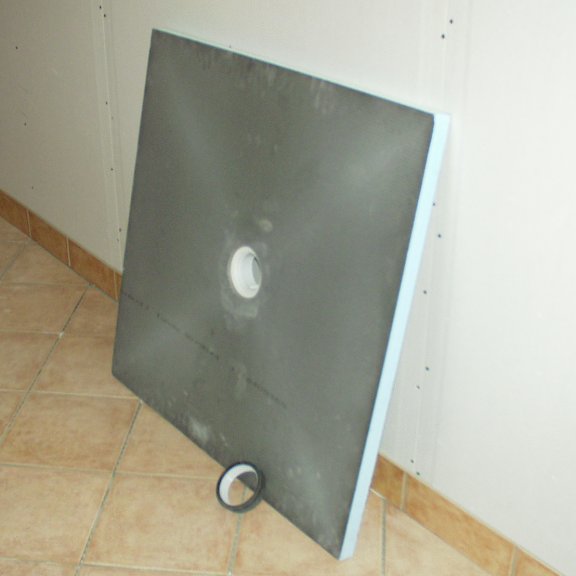
On the other hand, if your caravan’s shower tray has a big hole or is suffering from a series of cracks you might not be able to repair it. In such a case, you’ll need to buy and install a new shower tray.
What to Look for While Buying a New Shower Tray
There are several factors that you must keep in mind while buying a new shower tray to make sure that you invest in something that serves you for years to come. Here’s a list of things you should take into account if you’re planning to invest in a replacement shower pan.
- Choose a durable shower tray from a renowned and trusted brand.
- Go with a product that features an anti-slip surface for safety reasons.
- Make sure that the shower pan is the right shape and size that fits into the existing cutouts of your RV.
- The weight capacity of the tray should be higher than the heaviest person in your family. Ideally, it should be similar to the original shower tray of your motorhome.
- Choose a product that matches the color of your original shower tray.
Related Articles:
How to Shower While Winter Camping: Complete Guide
How to Easily Hang a Camp Shower (Tips and Tricks)
How To Repair a Caravan Shower Tray: Detailed Step-By-Step Guide
If you’re planning to repair a caravan shower tray, consider using the steps listed below. They’ll allow you to repair the shower pan effectively.

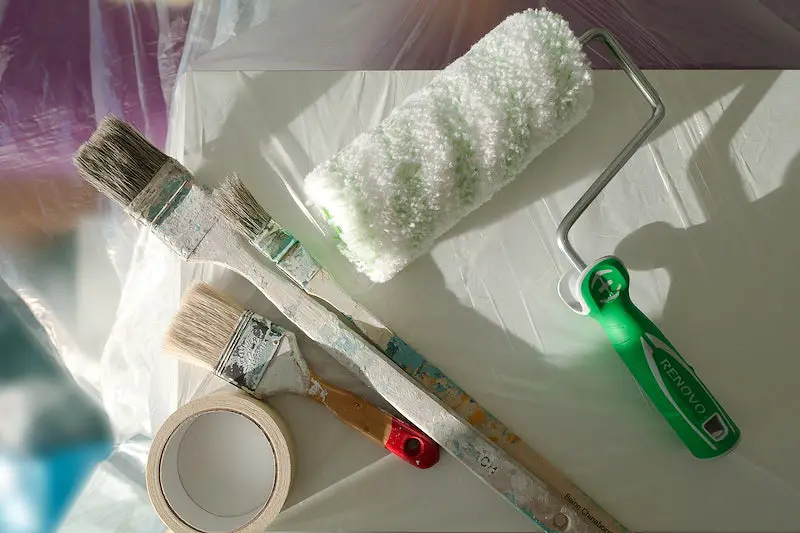
Step 1: Gather the Supplies
The first step is to gather all the supplies you need to repair your motorhome shower pan. Here’s a list of tools and materials you’ll need to complete this process.
- Safety equipment: Safety goggles, a facemask, and a pair of gloves
- Masking tape
- Sandpaper
- Epoxy or resin to repair the damaged area
- Liquid hardener
- Tray and mixing stick
- Fiberglass cloth or mesh
- Putty knife
Step 2: Survey the Damage
Once you have gathered all the supplies needed for the project, you’ll need to place them near the shower tray and start surveying the damage. If the crack took place as a result of a heavy object being dropped in the pan, then you won’t need to spend any time finding the affected area.
However, if you don’t know where the crack or hole is, you’ll need to inspect the entire tray manually to find out the problem. You can use a flashlight to make the process easy as it can help you find small holes and cracks easily.
Additionally, if the crack or hole in the pan area (instead of the tray’s walls), you can perform a water test. For this method to work, you’ll need to use a rubber plug to seal the drain hole of the shower pan to prevent drainage.
If you don’t have a rubber plug, consider using masking or duct tape for the same purpose. After that, add water to the shower pan and fill it to a depth of half to one inch and inspect the area carefully. You’ll see small air bubbles coming out of the water from the affected spot.
Step 3: Clean the Shower Tray
After spotting the affected area, clean the shower tray thoroughly. You can use a mild shower base cleaner to get rid of oils and soap scum. After that, leave the shower tray for 15 to 20 minutes to dry properly.
Don’t forget to wear protective gear before starting the cleaning process to ensure your safety. Keep in mind that cleaning the shower pan is critically important. If you fail to perform this step, the sealant will not stick to the surface properly.
Step 4: Prepare the Affected Surface
To prepare the affected surface, you’ll need to use low-grit sandpaper. Lightly sand the affected surface, whether it’s chipped or has a hole or crack. Sanding the surface will give it grit by fading the gloss sheen, which will help the sealant to adhere properly.
Before you start the sanding process, make sure that you section off the damaged spot around the hole or crack using duct or masking tape. It’ll keep you from sanding (damaging) the polished area that you don’t need to repair.
Step 5: Mix the Filler Material
Now go outside your RV (for ventilation) to create a filler material. Mix the liquid hardener with resin putty or epoxy on a tray using the mixing stick. If you have a complete shower base repairing kit with color hues, you can mix in some colors as well to make the material with a color that matches your shower tray.
Important Note: If you’re in a hurry, you can use silicone-based waterproof caulking to repair the shower tray quickly. However, as mentioned above, it’ll come off after several months and you’ll need to reapply it.
Step 6: Seal the Crack/Hole
If you want to achieve a smoother surface, you might also want to use fiberglass cloth or mesh to cover the affected spot before applying the sealant. The mesh or cloth should expand a couple of inches outside the hole or crack. It’ll prevent the damaged spot from dimpling once the repair process is completed.
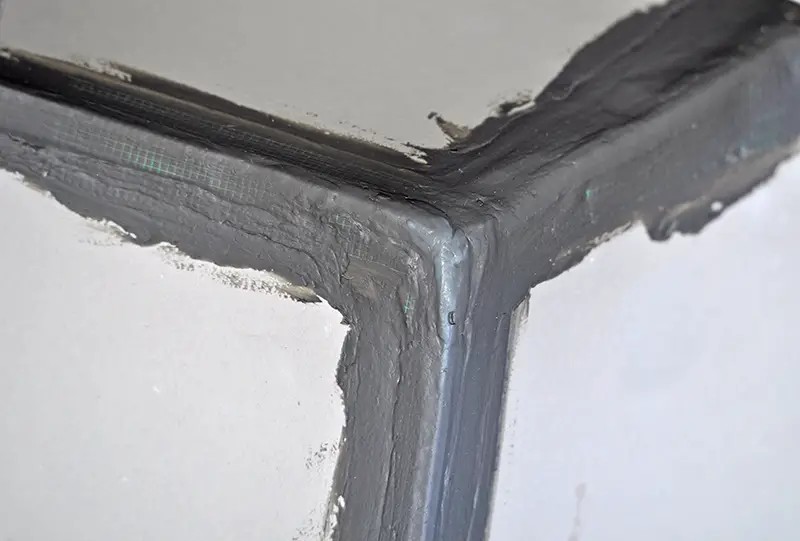
So, apply a thin layer of filler material to the crack or hole and place the fiberglass mesh or cloth on it. After that, start covering the fiberglass patch using the filler material you prepared. Use a putty knife to smooth the putty down.
This process will give the surface a little bump but there’s nothing to worry about as you’ll be sanding it later. Focus on filling the damaged spot properly and smoothen the sealant with a putty knife.
Step 7: Sand the Sealant
Next, let the filler material dry properly. It can take several hours depending on the sealant you’re using. Consult the user manual of the product you have to find the exact time.
Once the sealant has dried, use high-grit sandpaper to sand the repaired area until it’s smooth. Make sure that you apply even pressure throughout to achieve the best results.
Don’t rush this process and take your time to sand the repaired spot so that it can have a similar texture to the rest of the shower tray.
Step 8: Apply the Paint
While sanding the repaired area will give it a smooth finish, it still won’t be exactly the same as the rest of the tub. Therefore, consider using non-slip epoxy paint to coat the surface. I recommend you use a roller to apply the paint unidirectionally to the entire shower tray to ensure an evenly thick coat.
If a single coat doesn’t produce the finish you’re looking for, you can apply a second paint coat as well. Don’t forget to apply duct or masking tape over the edges of your shower pan. It’ll keep you from applying the paint on the walls.
Important Note: You don’t necessarily need to use a paint brush or roller to apply the paint to give your shower pan an even and smooth finish. You can also use a finisher that comes in a spray form to make the process easier.
Step 9: Let the Paint Dry
Most epoxy paint types usually take three hours to dry. However, they need about five to seven days to cure properly. The best way to find out how long you need to wait to let the paint dry is to read the user manual of the product you have.
Make sure that you don’t start using your motorhome shower tray until the paint has dried. Otherwise, it’ll damage the smooth surface you achieved by investing your precious time and effort.
Important Note: This method will help you repair small cracks and holes in your RV shower pan. If you have a series of holes or have a larger crack, then it might be a good time to invest in a new shower tray.
How to Determine a Leaky Shower Pan
A shower pan with cracks and holes will allow the water to leak. The easiest way to determine a leaky shower tray is to perform a water test. Here’s how it works.
- Seal the shower tray’s drain hole using a rubber plug or duct tape.
- Fill the pan with water to a depth of about an inch.
- Use a marker to mark the water level and leave the tray for a couple of hours.
- After that, inspect the water level carefully.
If it’s on the same level, your shower tray isn’t leaky. But if the water level has dropped significantly, there’s a leak because of a crack or hole that you’ll need to fix using the method discussed above.
Final Words
Repairing your RV shower tray doesn’t have to be a challenging task. While it can be time-consuming, you can complete it effectively using the right tools and techniques.
I hope this guide has helped you understand the correct way to repair your motorhome shower tray so that it can start serving you again as it’s supposed to.