Hi-van is supported by its audience. When you purchase using our links, we may earn an affiliate commission (no added cost to you). Learn more
So you’ve bought a campervan and you’re ready to hit the open road… but there’s just one
problem. Your van doesn’t have any windows! Don’t worry, this guide will show you how to install
campervan windows like a pro.
When it comes to outfitting your campervan, windows are one of the most important things to
get right. Not only do they let in natural light and fresh air, but they also provide much-needed
ventilation on hot days. Installing campervan windows may seem like a daunting task, but with
our step-by-step guide, you’ll have them fitted in no time!
Pros and Cons of installing windows
There are a few things to consider when deciding to install windows.
 pros
pros
First, campervans with windows tend to be more comfortable than those without. If you’re planning on spending a lot of time in your campervan, then installing windows will help you create a more inviting space.
Additionally, campervans with windows tend to be better insulated than those without. This can be helpful if you’re planning on travelling to colder climates.
Campervans with windows can be more difficult to secure than those without. If security is a major concern for you, then you might want to limit the number of windows you install in your vehicle. This is especially important in larger vehicles.
Related Articles:
Windows Vs No Windows: Which is Better for a Camper Van?
What windows you’ll need
How many windows do you need in your campervan? The answer, of course, depends on how
big your van is and what kind of view you’re hoping to get. But there are a few things to keep in
mind when choosing the right windows for your campervan.
First, think about the climate you’ll be spending most of your time in. If it’s hot, you’ll want to
make sure the windows have good UV protection to keep the interior cool. If it’s cold, you’ll want
to make sure the windows are well insulated.
Second, consider how much privacy you need. If you’re planning on spending a lot of time in
remote areas, you will be looking for windows that include privacy glass. These windows have a
dark coating which means you can see out but people can’t see in. This is great for privacy and
security.
Finally, think about the size and placement of the windows. You’ll want to make sure they
provide good ventilation and allow plenty of natural light into the interior.
Obviously you need to think about security in your van. The more windows you install the easier
it might be for someone to get inside the vehicle.
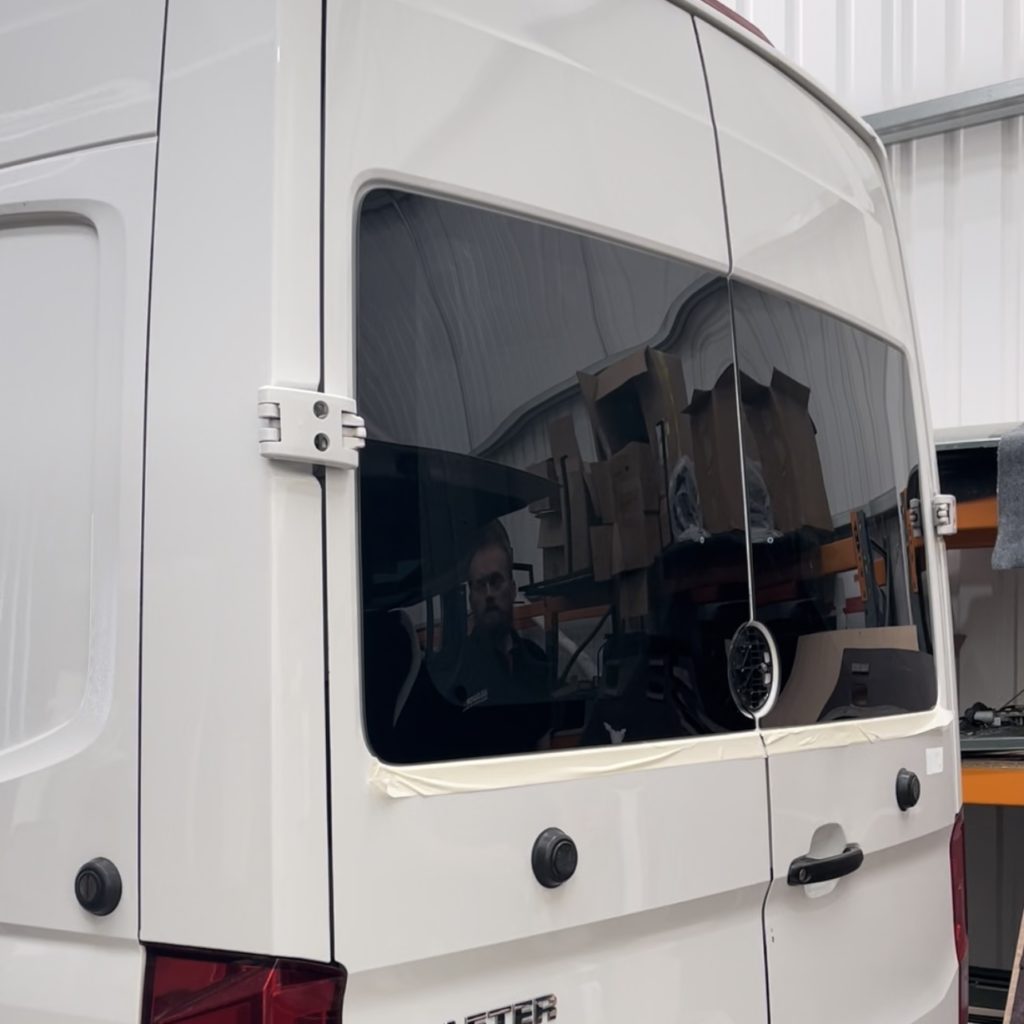
The windows you’re looking for are “bonded windows“. These windows are the standard used
by professional converters. You will cut a hole in the van and then bond the window over the top
of the hole. A pretty simple process.
When shopping for windows you’ll notice that some windows specify the vehicle make and
model and others are called universal windows. Although the universal windows will often be
cheaper, they won’t look as sleek as the windows made for your van type.
Related Articles:
How to add a window to your RV
Opening windows or fixed windows
Campervan windows come in either fixed or opening. The opening windows, which are
sometimes called sliders, have a small hatch that can be opened and closed. I would
recommend having at least one opening window in a campervan.
Usually this opening window would be above your kitchen, to enable steam and smells to
escape. If you have passengers (most likely children) in the rear of the van that suffer from
motion sickness, it might be worth adding another opening window. This would usually be in the
window in the sliding door.
Related Articles:
Framed vs. Frameless RV windows: What is better?
Try to install your windows in a garage or workshop
We know not everyone has access to an indoor workshop when converting their campervan.
However for this bit of the build we really recommend finding somewhere indoors to complete
your window installation.
It can be a slow process when you first get started. It’s important that you’re not rushing
because you don’t want to leave your van with a hole in it overnight. This is especially important
if you live in the UK and need to keep your van out of the rain.
Cutting into your panel van is a very noisy process. Your neighbours won’t love listening to you
cutting through metal with a jigsaw all day. Being inside really helps keep the noise down.
Top Tip: Beg, borrow or steal some indoor space from neighbours or friends for this stage. A
single car garage will do!
What stage in my van conversion should I install the windows?
Many campervan converters choose to install windows at the very beginning of their conversion,
before they’ve even started working on the interior. Others wait until they’re further along in the
process, and some don’t install windows at all. So, what’s the best part of the build to install
campervan windows?
Professional converters will install windows at the very start of the build process. Around the
same time that you install the pop top roof. This is because cutting into the side of your panel
van can be a pretty invasive process. You will want to carpet line and insulate the van once the
windows and roof are completely finished.
Related Articles:
Cargo Van Window Installation Cost: All You Need to Know
How to remove the old window
One of the first steps in campervan conversion is removing the old window. This can be a
daunting task, but with a few simple tools and a little bit of patience, it can be easily
accomplished.
The first thing you’ll need to do is remove the trim around the window. Be careful not to damage
the trim, as it can be reused. Once the trim is removed, you’ll need to use a pry bar to remove
the window itself. Be careful not to damage the surrounding wall or insulation.
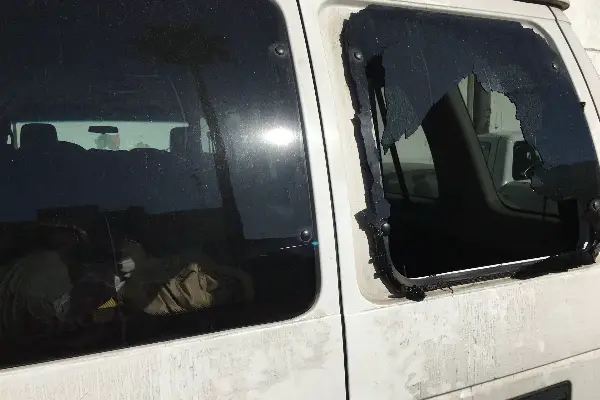
It’s sometimes easier said than done, but try not to smash the window when removing it! It
becomes really hard to pick away the individual shards of glass from the sealant – this can take
a really long time (speaking from experience) Not to mention tidying up the mess can be pretty
demoralising!
How to install a new window in your campervan
Tools You’ll Need
- Before you get started, make sure you have the following tools on hand:
- Masking tape
- A measuring tape
- A drill
- 3mm and 10mm drill bits
- A jigsaw with a fine-tooth metal cutting blade
- Grinder with flap disc or metal file
- Primer
- A Caulking gun and window bonding
- Marker pen
- Safety goggles
Installing the Windows
1- There is an outside metal skin and an inside metal skin to the van. From inside the van,
use the inside metal skin as the template for the cut out for your new window. Use the
3mm drill to drill holes in the outer skin. Drill holes every 10mm apart round the 4 corners
and every 200mm on the straight edges. From outside the van you can now use a
marker pen to join up the dots giving you the cut out for your window.
2- Now it’s time to use your masking tape to protect the vans paint from the jigsaw.
3- Use your 10mm drill to make an access hole for your jigsaw blade. Cut out your window
aperture.
4- Use your grinder with the flap disc or a metal file to clean up the edges.

5- Paint all naked metal edges with primer. Paint a 20mm band of primer around your cut
out. This is where we are going to apply the window bonding.
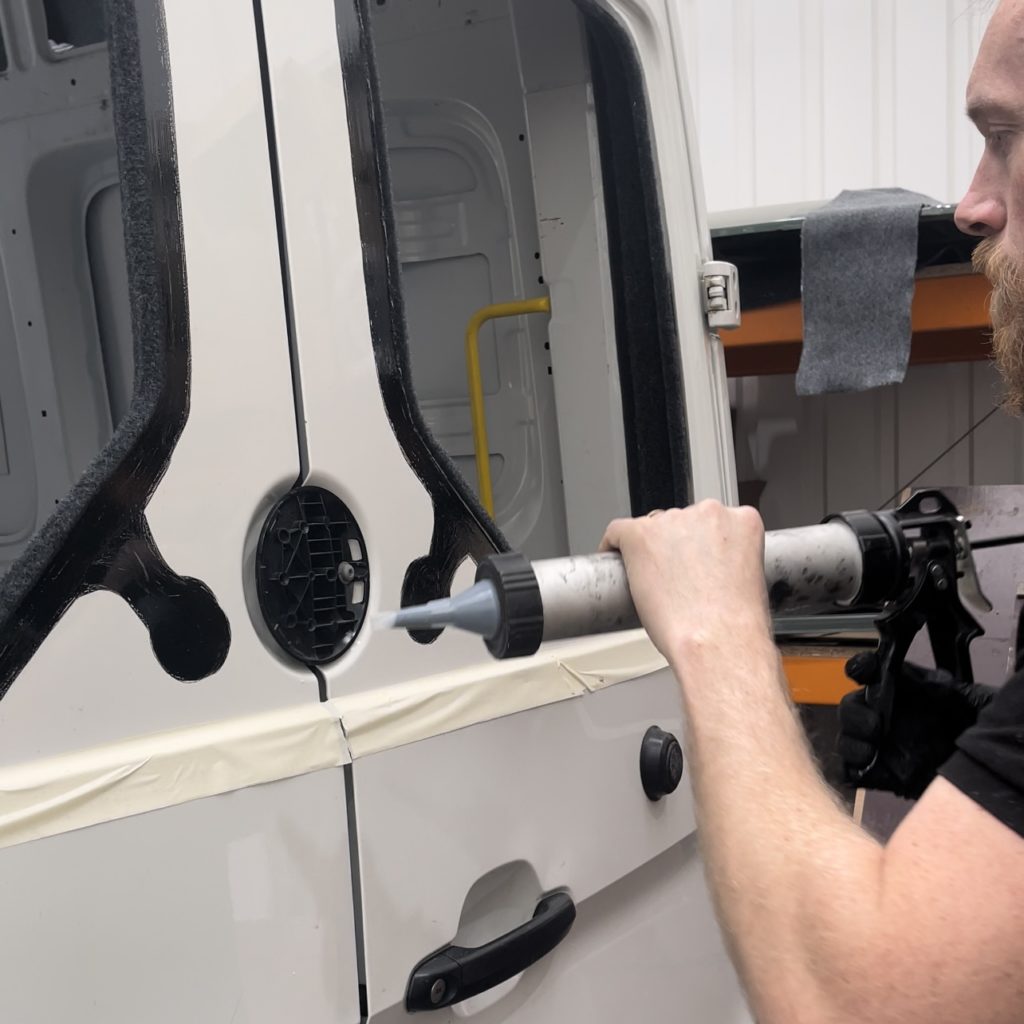
6- Use a caulking gun to a neat steady stream of window bonding to the primer surrounding
the opening.
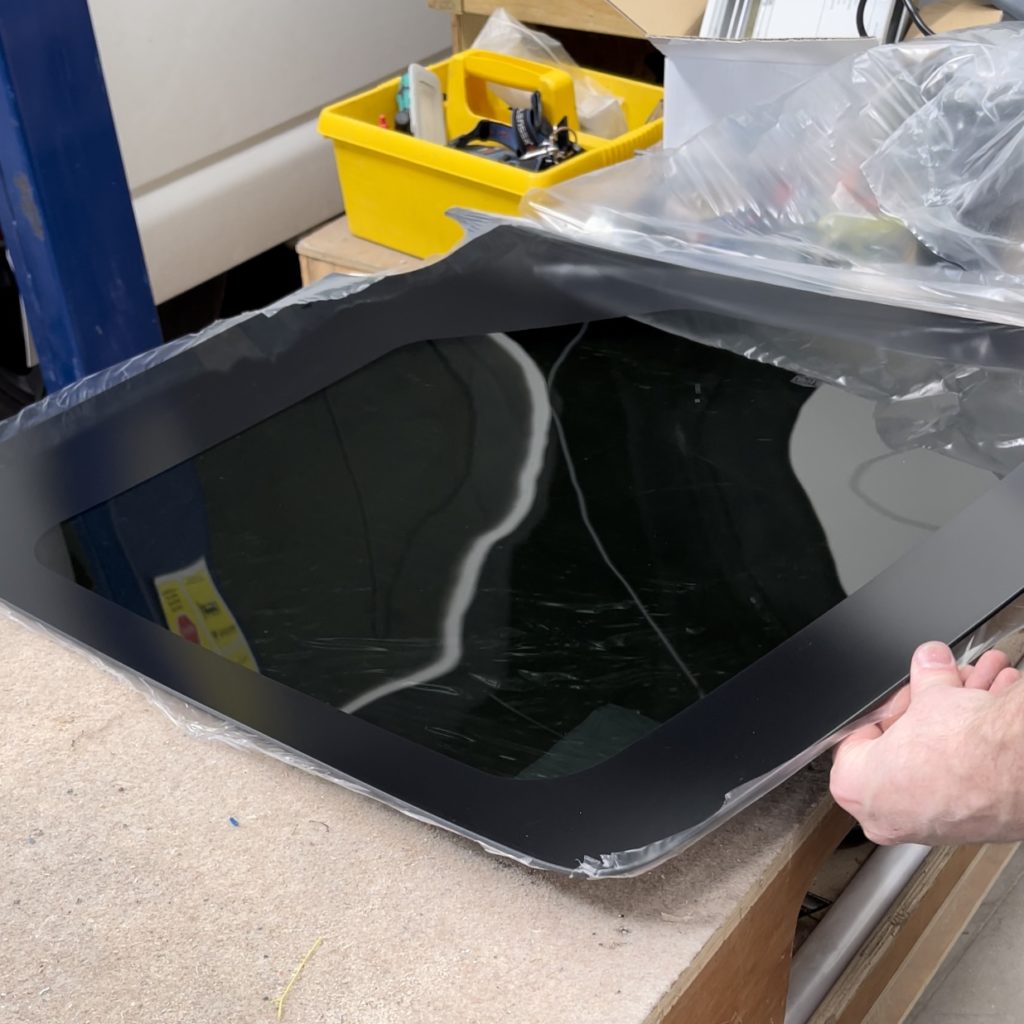
7- With some assistance hold the window up to position and press firmly onto the van
making sure to apply an equal pressure all round the window to ensure good contact
with the window bonding. This will help create a watertight seal and prevent leaks.
8- Remove masking tape.
Tips and tricks for a successful window installation
Installing a campervan window is a lot easier than it seems. With the right tips and tricks, you
can have your window installed in no time. Here are a few tips we’ve picked up to help you
install your windows like a professional.
Ensuring the window is water tight is the most important thing to get right. It’s a real pain once
you’ve completed your campervan conversion and find a leak. It can be very damaging to the
furniture and upholstery you have in the vehicle. Always make sure you water test the windows
when you are finished by spraying generously with a hose. This will flag any leaks when it is
much easier to fix them.
All windows are slightly different. Make sure you follow the manufacturer’s instructions carefully.
It is possible that the window will fall out later on when driving. While this doesn’t happen very
often, it’s not unheard of.
Make sure you leave adequate drying time for your sealant. We would recommend not driving
the vehicle for at least 24 hours after your windows have been installed. Leave your masking
tape in place giving that extra bit of hold for at least 4 hours to give the sealant time to dry.
Conclusion
With these simple steps, you’ll be able to install campervan windows like a pro! Just gather your
tools, cut a hole for your window, apply some sealant, and screw it into place. And don’t forget to
caulk around the perimeter for added protection against leaks. Now sit back, relax, and enjoy all
that natural light and fresh air!
Related Articles:
Can you drive an RV with windows open?