If the inside of your RV feels stuffy, or if you desire improved natural lighting or views, then an additional window can solve all of these problems in one fell swoop. Adding a window to your RV is a simple process as long as you can find the right window for the right location.
You’ll be guided through the window installation process in the sections below, from start to finish. Read on to learn how to add a window to your RV in just 13 steps.
Can You Add A Window To Your RV?
You certainly can add a window to your RV, and in some cases, it will be necessary to do so to get full enjoyment out of your RV.
In recent years, there has been a boom of ambitious DIYers converting all kinds of vehicles and trailers into travel trailers. Vans, cargo trailers, and even box trucks are being converted to campers and tiny homes. If you are considering doing this, then you most certainly will need to install your windows at some point.
Where Can You NOT Add A Window?
As you consider a location for your window, please be advised that there are some spots where you cannot add a window, whether it’s due to wiring, plumbing, or proper ventilation practices. You may consider getting in touch with the RVIA (RV Industry Association). They certify RV manufacturers and help develop guidance on proper RV construction practices.
- Anywhere With Wiring Or Plumbing In The Walls: Using a stud finder, as well as consulting wiring or plumbing layout diagrams, will help you avoid creating bigger headaches for yourself.
- Tinted Window Placement: Many states have their own regulations as far as tinted windows go, especially in the driver’s area and backside windows and rear windows. The last thing you want to do is go through this whole process, only to get pulled over.
- Bathroom Areas: Privacy is a concern here, and a good vent can carry out ventilation duties in the ceiling. I mean, it’s up to you if you really want to have a window in your shower/bathroom. Just pay attention to your plumbing, and your window is properly waterproofed.
Select a Suitable Window Location
The first step is to determine where you can add a window in a location that will be beneficial.
Consider the future resale value of your RV. There may come a day when you will want to part ways with your RV. Any modification in any spot, even just one small window, may affect your ability to sell the RV for a reasonable price.
Here are some excellent locations for additional windows:
- Side Walls Of Slide-Outs: You’ll see that many RVs have framed windows on the sidewalls of slide-outs, as is seen here. This is a good way to get a cross-breeze going in your RV.
- Bedroom Walls: You may not get good airflow in your bedroom. This can be an excellent way to improve comfort at night.
- DIY Camper Vans: If you look at Camper Vans, you’ll notice that it is common to have at least two windows along the side of the van. You may consider a larger window up towards the front and a smaller window towards the back of the van.
Decide Which Type Of Window Best Suits Your Needs
It is essential to familiarize yourself with the different types of windows used in RVs. This is a detail that many RV buyers may not prioritize when they are shopping around, even though poor window quality can affect your overall enjoyment of the RV, especially if it becomes a challenge to keep the interior weatherproof or soundproof.
If you’re adding a new window, then this is a great time to upgrade your other windows as well. You may even be able to get a good price on a second window.
Most Affordable: Fixed Pane Windows

A fixed-pane window is the most affordable type of RV window that you can buy. These are also often referred to as “picture windows.” You cannot open and close these windows, so they won’t help ventilate your RV.
They may also not offer the soundproofing qualities of other RV windows, especially if they are only single-pane windows. If you are simply looking to add more sunlight to your RV or offer better views, this is an acceptable option that won’t break the bank.
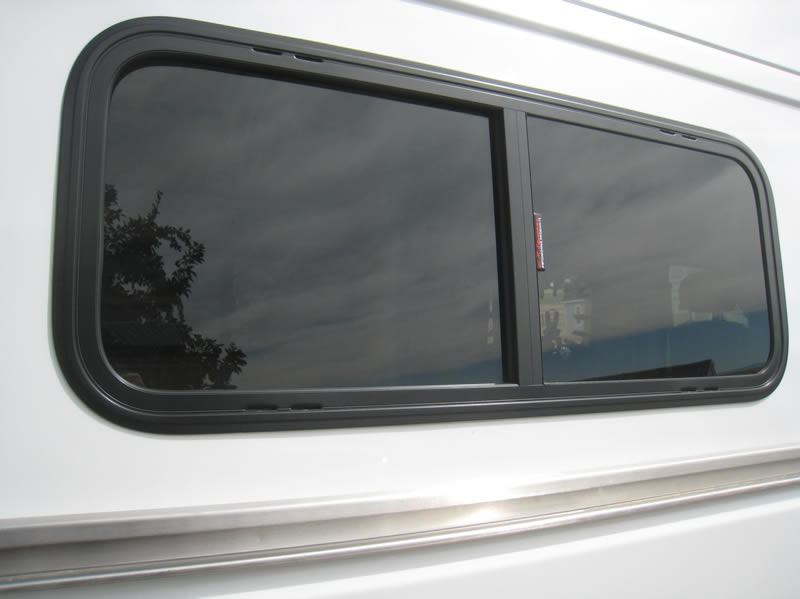
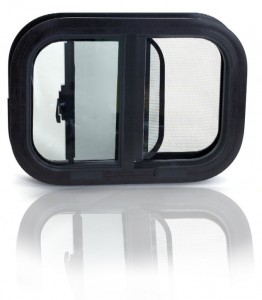
Sliding Pane Windows

Most travel trailers and RVs come with sliding pane windows. They are still an economical option but do provide ventilation. Since they don’t come with awnings, you’ll have trouble keeping things dry inside during a rainstorm.
The good news, though, is that owing to their popularity, sliding pane windows do come available in many different sizes and it shouldn’t be too hard to find one that fits your space. If you want to convert a picture window to a ventilated one, this is a good way to go. These are the best types of windows to go with if improved airflow is your top priority.
Best for Weather-Proofing: Window Awnings

Window awnings like the one found here offer RV owners an opportunity to keep their windows open, even if it is raining outside. This is great because rainstorms tend to bring with them a cool breeze that will air out your RV.
The awning also serves the dual purpose of reflecting direct sunlight away from the window. This will help keep the interior of your RV cool while also contributing to the element of privacy.
Most Visually-Appealing: Frameless Windows
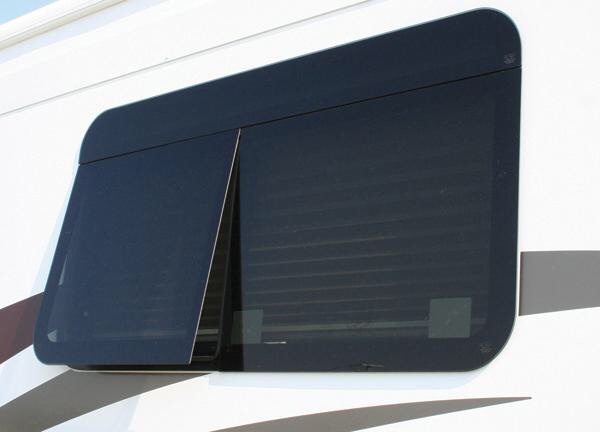
Yes, there are RV windows that do not have any frames on the exterior. These are much more stylish than the typical RV window since they give the outside of the vehicle a clean, streamlined look.
Furthermore, they do provide a functional purpose as well. Since the entire window opens up from a hatch on the bottom, you’ll get better views of the scenery surrounding your RV than you would with a framed window.
Double Pane Windows
Double pane windows are the premium choice in terms of both soundproofing and weatherproofing. If you spend a lot of time in your RV, then you probably have had to deal with extreme temperatures at some point.
The up-front costs of double-pane windows are higher, but you’ll save money in the end by spending less on heating and cooling. You should also be able to sleep much better at night if you upgrade your RV’s windows to double pane windows.
Prepare a Blank Wall for a New Window
There’s a common expression used in carpentry that goes like this: “measure twice and cut once.” This is undoubtedly the case with RV windows since it will be difficult to repair a botched job. In the section below, you’ll find tips on how to ensure that you get a clean, uniform cut.
Don’t Cut Blindly: Use a Wall Stud Finder
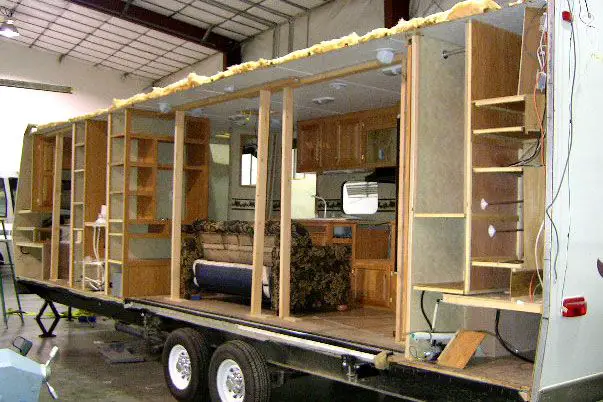
If you’re wondering why there wasn’t a window at the spot in the first place, chances are it may be because of what you don’t see, which is the wiring and framework inside the wall of the RV. You can start by using a magnetic or electric stud finder to find both the wooden and metal studs inside the RV wall.
This will also come in handy if you ever decide to mount any heavy accessories to a wall inside both your home and an RV. You can also get a better picture of what’s going on inside the walls of your RV by obtaining a framing diagram from the manufacturer, which should help you pinpoint a suitable window location.
Make a Template of the Outer Ring
This goes easier if you can make a template of the window’s outer ring, which you will then use to help you mark up the area that needs to be cut out. The template will prevent you from scuffing up the walls.
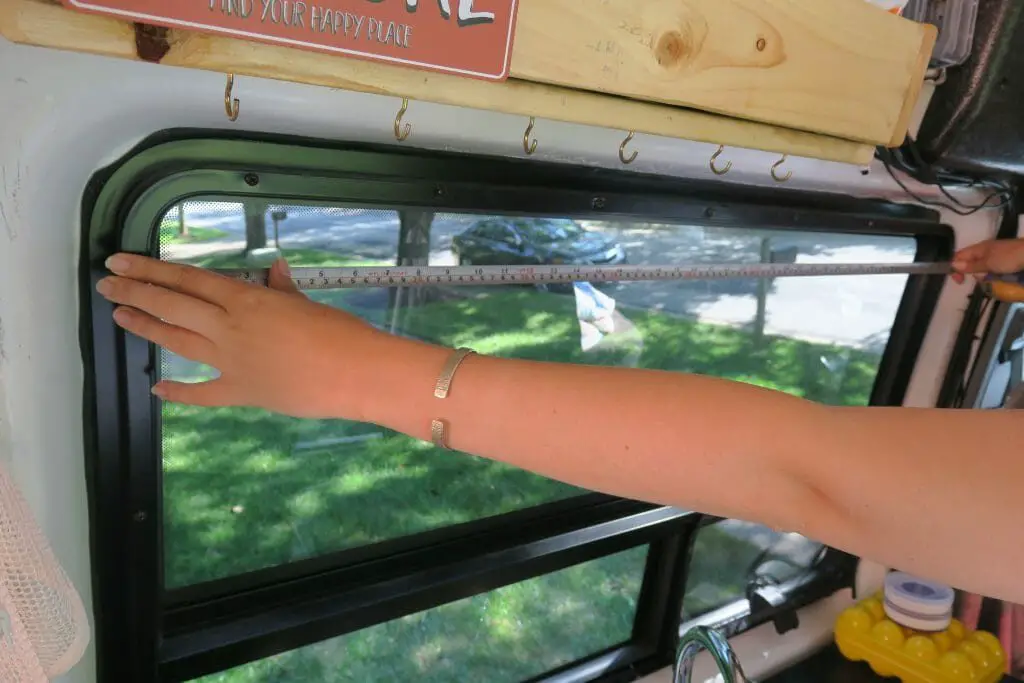
Measure the Spot & Verify Your Measurements

You’ll want to measure the spot for the window by using a straight edge leveling tool like the one found here. This is important: do not measure using only the dimensions of the window. You will need to use the dimensions of the outer ring, which will act as a seal. After you have marked out the area, you may proceed to cut.
Cut an Opening for a Window
This stage is likely the most challenging. Once you drill or cut a hole in the side of your RV, there’s no looking back, so make sure that you do it right the first time.
Use a Drill for Pilot Holes
Before hitting the wall with a jigsaw, you’ll want to drill out a few pilot holes. First of all, this will tell you what you’re working with as far as cutting difficulty. It will also be the point at which you will start cutting across with the jigsaw. Drill the pilot hole at the bottom of the window spot. I recently bought a cordless drill from Dewalt which comes in handy for this kind of job.

Whether you’re drilling into aluminum or fiberglass, you should be able to use a twisted metal drill bit. Look to use drill bits without a protruding center. Drill bits with pointed centers may not work because these are designed to drill through wood.
Use a Jigsaw to Cut Out the Window
You can use a jigsaw to cut out the location for the new window. As far as traveling speed and applied pressure are concerned, it is best to let the jigsaw do most of the work and travel at a slow and consistent speed. Again, I’m using a jigsaw from Dewalt, and it does a brilliant job.

Punching out the cut piece may be a bit of a challenge at first. You may use a piece of plywood to pry out the metal piece, as this should help protect your fingers from the sharp edges.
Use a File on Sharp Edges
You may be left with some sharp edges along the edges of the window. All sharp edges will need to be filed off with a metal file like the one found here before any waterproofing sealants are applied to the window.
Install a New Window
The final stage in the process is to carefully install your new window. Care taken here will ensure that your window is properly weatherproofed. There is nothing worse than going through all that effort, only to deal with a leaky window.
Dry Fitting the New Window
Before installing new window tape and sealant, you should make sure that the new window will fit the dimensions of the new window. There should be enough room to leave space for the weatherproofing sealant that will be installed around the outer edge:
- The window flange should overlap the exterior wall by at least ⅜” to provide an adequate seal.
- A gap of ⅛”-¼” on the inside is normal. The outer ring of the window will cover this space once the installation is complete.
When you are dry-fitting a new window, you may need to use shims to center the window in the hole. You can either make your shims or purchase cedar wood shims like these for a low price. These are good tools to have on hand if you need to level cabinets as well.
Apply the Seal Tape to the Window
The window kit should come with seal tape that will be applied to the window’s exterior. The best way to apply this is to carefully lay the window down on a flat surface where it will not be scratched.
- Start by placing the tape at the center bottom of the window frame.
- From there, carefully apply the tape to the window until the two ends of the bulb seal tape meet.
- There should not be any amount of space between two ends, nor should there be any overlap.
Install the Window and Trim Ring
You’ll need two people for this job. One of you will install and hold the window from the exterior, while the other will be fastening the trim ring into place.
Here is how to install the window and trim ring:
- Fasten the first four corners first.
- Then progress around the perimeter of the window.
Optional, But Recommended: Apply A Cap Seal
You can further prevent the unwanted escape or intrusion of air and moisture by applying a cap seal around the exterior perimeter of the window. This is particularly useful if you are a year-round camper. It could help you save money on heating and air conditioning, as well as ensure water damage does not occur at the window.

This caulk will likely not come with the window kit, but you can buy several products online for an affordable price. GeoCel Pro Flexible RV Sealant is chemically designed to handle the varying weather conditions that these vehicles experience. You may also consider 3M Marine Adhesive Sealant.
Add A Privacy Shade
Just like your windows at home have shades, you’ll also want a shade for the windows in your RV. Not only will this keep direct sunlight out, but it’ll also contribute to a greater sense of privacy. You can find many window shades online, with varying mechanisms that bring the shade up and down.
These RecPro Cappuccino Window Shades are what you typically see in RVs. This model comes in many different sizes, so you should have no problem finding one that matches your window.

One alternative is this black roll-down nightshade, which comes in 4-ply linen. You may find these to be an upgrade over the standard window shades. Regardless of which option you decide to go with, double-check to make sure you have picked the correct size.
How Much Does It Cost to Add An RV Window?
Final costs vary depending on which specific window you choose and whether or not you already have all the necessary tools and equipment on hand. You can expect to pay somewhere between $100-$600 for new window kits and $50+ for the necessary equipment, based on the products listed below.
How To Save Money: Do It Yourself
An excellent way to save money on an RV window install is to simply do it yourself. If you’re replacing a window, this is a routine project that can be done with ease, provided that you use the methods described here.
Adding a new window is a more intensive process that may seem a little bit intimidating at first. But many RV owners are having success doing these themselves, whether you are talking about RVs or converted cargo trailers.
Prioritize Needs
Frameless RV Windows may look nice, but it doesn’t make sense to go broke using only frameless windows for your DIY window installation. As was discussed earlier, there are several different window types, each of which serves its own purpose.
- If it’s better views you’re after, it only makes sense to get a picture window.
- If ventilation is the top priority, then framed windows should be your goal.
- Frameless windows also offer better views and improve aesthetics.
Final Thoughts
Whether you’re adding a new window or replacing an existing one, a window change can be an effective upgrade for an RV. A lack of good airflow, natural lighting, and sightlines are all problems that can be solved with a window upgrade. In the sections above, you’ll find that this is perhaps a more straightforward process than you had previously imagined.