Hi-van is supported by its audience. When you purchase using our links, we may earn an affiliate commission (no added cost to you). Learn more
You can transform an old pop up camper into a tiny house with a DIY project. Luckily, a pop up camper essentially acts as a template for building a tiny house on wheels. In this article, you’ll see how to do this and why there are advantages to building one using this method.
Read on to learn about how to plan for a DIY camper to mobile tiny house conversion, including guidance on making the most out of your limited space. If you want to go off the grid, this is undoubtedly one of the best ways to do it.
Find A Place to Park Your Tiny House
Zoning laws are perhaps behind the times when it comes to permitting tiny houses, although positive trends are emerging. Before going through all the work to transform your camper, you must consider the following:
Does It Qualify As A Tiny House?
In the International Code Council (ICC) eyes, for a home to qualify as a tiny house, it must be less than 400 square feet (excluding loft space). Pop up campers fall well within this range, so no problems here.
The next qualifier is whether the home is movable or stationary. If your tiny house has wheels, it may fall under the recreational vehicle code, which has a less stringent code than residential codes. This is an advantage that pop-up campers have: they don’t have to follow strict zoning laws.
Where Can I Park My Tiny House?
Building a tiny house on a pop-up camper gives you more flexibility since you’ll be able to qualify as a recreational vehicle. Since the tiny house trend has begun to catch on, you can seek out communities with local regulations that are friendly to tiny homes.
You can visit national parks and RV parks and stay for as long as they will allow you, which is usually limited to just a few weeks at public campgrounds. Private campgrounds and resorts are more enticing to tiny homeowners since you can sign annual licensing agreements at these.
How to Turn a Pop up Camper into a Tiny House
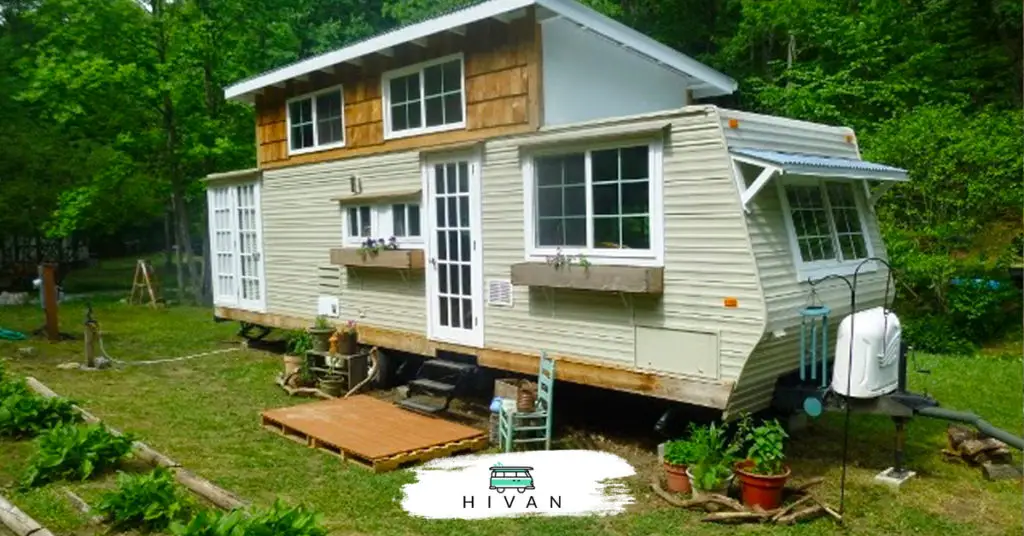
By the end of this project, your pop up camper is going to look much different. It will be transformed into a tiny house, where you can live completely off-the-grid if you would like. You are invited to continue below to learn more about transforming a tent trailer into a tiny house.
Why Should I Do A Hard Side Conversion?
Pop up campers are not built to withstand the adverse weather conditions that are inevitable. Cold weather, high winds, hail storms, and ice are all kryptonite to the canvas on pop up campers.
You can solve this problem by doing a hard side conversion to make your pop up camper more habitable all throughout the year. You can make a sturdy frame using wood, vinyl siding, or aluminum panels. Continue below to learn more about how a hard side conversion can be done.
Create A Construction Plan
Since you’re going to be removing the canvas and creating a house in the existing chassis, you’ll need to plan a project that keeps you within the Gross Vehicle Weight Rating (GVWR) of your trailer. It is both illegal and unsafe to exceed this limit.
The point of the sections below is to show you everything that you must take into consideration when you are building a tiny house from a camper. This is an exciting opportunity because, as you’ll see below, you have a template to work from while also having the freedom to fully customize the house as you please.
Start With the Interior
Decide which parts of the camper’s interior you would like to keep. The design schematic of pop up campers is simple: you have the pop-out beds on either side, a few seats in the lounge area, a kitchenette, and a few storage cabinets.
You need to decide what stays and what goes before you build the hard side frame. Your tiny home may benefit from the counters, cabinets, and kitchenette already located inside the camper.
Choose A Building Material
You’ll need a durable and lightweight frame so that you will be able to transport your RV with your vehicle while still being able to enjoy the weatherproofing benefits of a more rigid material.
If you’re looking for design ideas for your DIY, then you might consider window shopping companies that manufacture movable tiny homes, such as the Tumbleweed Tiny House Company. This will give you a good idea of which materials you need to get for your hard-side conversion.
Wood
Cedarwood is a suitable building material with many advantages. One of Tumbleweed’s top-selling models uses this material. Cedar is a beautiful material that will give your tiny house that natural log cabin look.
What are the advantages of cedarwood?
- It can withstand many different types of weather, even thriving in damp climates.
- It is a porous wood, so it can absorb noises.
- It is naturally insect-repellent, making it much less susceptible to termites, ants, and the like.
Many tiny houses have pinewood, particularly in the interior of the home for cabinetry. Much of the time, the specific tree used is the Eastern White Pine, which does deliver a smooth look and a brighter tone than cedar, which is darker.
What are the advantages of pinewood?
- It is inexpensive and widely available.
- It is simple to work with.
- There is a wide variety in how pine looks, from clear to knotty.
Vinyl Siding
Vinyl siding is significantly less heavy than wood, which makes it much more suitable for towing. There’s a reason why you don’t see wood being used to make mobile homes or campers. The weight of vinyl siding is about 40-50 lbs./100 sq. ft compared to 100-250 lbs./100 sq. ft. for the woods commonly used for building.
Metal
Aluminum siding is both lightweight and durable, registering at a weight of 30-35 lbs./100 sq. ft. and lasting for 15+ years as long as it is cared for. It is also good in cold weather and is fire-resistant, which should both be significant factors helping you decide which building material to go with.
Corrugated steel is another suitable material for exterior siding. It is the most durable option, lasting several decades with a minimal amount of maintenance required. It weighs a little bit more than aluminum but is suitable for a broader range of climates.
Add Windows and Doors
Since pop up campers are relatively small, you won’t have to add many windows to get adequate lighting and natural ventilation. Also, since the windows will be small, it makes sense to go with a premium option.
Double-pane windows are the premium option when it comes to weather resistance and soundproofing. Also, make sure that you leave a space where the door is.
Build A Roof
A quality roof will allow the interior to be adequately vented while also being able to withstand all types of weather. There are several websites, such as this one, where you can look up construction plans for tiny house roofs.
Should You Use Shingles?
No, shingles should not be used in tiny houses that will be traveling down the highway. Roof shingles are not designed to withstand the wind speeds encountered during driving. Your best option is a roof consisting of galvanized steel roof panels.
Add Insulation
Since this is a small space, there is no reason to skimp out on insulation. A quality installation can make a huge difference when it comes to both energy costs and repair costs. Houses without adequate insulation are subject to moisture damage.
There are three different types of insulation:
Batt Insulation
Batt Insulation is the type that is standard to most homes. These are categorized by something called an R-Value, which refers to the ability of the material to insulate. You can find climate zone maps like this one that’ll help you determine which R-value to go for.
Rigid Foam Insulation
Rigid foam insulation may not be realistic for this setting, even though it has a high R-value. This is because you’ll have to place a fireproof barrier after the layer of insulation. Spray foam is much more convenient for DIY tiny house projects.
Spray Foam Insulation
You can find spray foam kits like this one that come with a spray gun for the ambitious DIYer. If you are going to do it yourself, be sure to thoroughly read the instructions on the packaging and maybe watch videos of how it’s done. Spray foam has high R-values, but only if it is applied evenly.
Add Plumbing & Toilets
Some pop up campers already have indoor plumbing. If this is the case for you, then you have just made your job much easier. If you happen to have one of the many pop up campers without plumbing, you’ll find recommendations for how to proceed below.
Toilets
One thing that pop up campers don’t have is plumbing and toilets. If they do have toilets, it’s a small one that’s placed under a cabinet. These toilets will also be cassette toilets, where the waste goes into a removable container, which must be emptied occasionally.
A cassette toilet like this one or a portable toilet will probably be your best option for a pop up camper tiny home. Cassette toilets in campervans are often located in a corner of the van, where the toilet’s tank can then be removed by opening a hatch on the van’s exterior. You might consider adding something similar to your tiny house.
Showers & Sinks
It’s best to keep all the indoor plumbing at one end of the trailer. This way, you won’t have to run many pipes or pay a contractor to do it for you. The items you’ll need are similar to items that you commonly find in an RV water system: pex pipe, a grey water tank (for waste), a blue water tank, and pumps that are capable of bringing fresh water in and carrying away wastewater.
Clean drinking water is essential. One of the best ways to ensure that you have clean water in your tiny house is to purchase a simple gravity-fed water filter like the Travel Berkey filter. It lasts for up to 6,000 gallons before the filters need to be replaced, and it takes up very little space.

Electricity
The good news is that your pop up camper most likely already has a functioning electrical system. If it doesn’t, you’ll have to hire an electrician to help you put together the system. Pop up campers pull power from a 120V shore power station at the RV Park or campground and then convert it to a 12V power source for the appliances within the camper.
Note: The wiring and electricity are a challenging part of the project. You are encouraged to have a licensed electrician look at your home so that you know the wiring and circuitry have been set up safely and correctly.
How to Go Off-The-Grid
You may want to go off-the-grid since it should be easy to provide enough solar power for such a small home. Solar panels and backup battery systems continue to trend cheaper.
Here is the equipment you’ll need:
- Solar array
- Battery-based solar inverter (for converting DC power to AC)
- A battery bank/ backup generator
Solar panels will ultimately depend on how many appliances you use and how often you use them. Given that this is a tiny house, it is not at all unrealistic to expect this to work. Many homeowners move to tiny homes for this very reason.
Add Appliances
Many pop up campers do come with appliances or at least connections for appliances. For your DIY project, you’ll probably want an upgrade unless the appliances were changed out relatively recently.
You’ll need appliances that fit the dimensions of the camper layout, so start by looking for RV appliances such as:
- RecPro 21″ x 17” Cooktop RV Stove
- Dometic RV Range Cook Top
- RecPro RV Microwave
- Tavata Compact Refrigerator
Add Heating & Cooling
Unfortunately, pop up campers generally do not come with built-in HVAC systems. You’ll have to install your own. Luckily, thanks to the compact design of pop up campers, you can keep things cozy inside with a small air conditioner and heater.
Keep Things Simple: Portable Heaters & Coolers
Portable heaters and coolers can be a good solution if you plan on spending most of your time in a mild region that doesn’t require you to use these too often. Be sure to look for a portable heater rated for indoor use, such as this Lasko Ceramic Tower Space Heater, which has a built-in timer and temperature control sensor.

This Shinco 10,000 BTU Portable Air Conditioner should be more than enough to keep your new home cool. It also doubles as a dehumidifier. The nice thing about these is that you can put them away in storage during the months you don’t need them, freeing up more space.
You’ll Have to Maximize Space
With pop up campers, you have a limited amount of space to work with. This calls for some creativity when it comes to storage. In the sections below, learn how to make the most of the available space in pop up campers.
Storage Bins
Storage bins are the name of the game when it comes to living out of RV campers. You are encouraged to stack things vertically as high as you can while still being able to lock everything down if you need to move your camper.
This is where Sterilite 3-Door Units come in handy. They are short and small enough to fit inside the camper if it needs to be broken down while also offering three tiers of storage drawers. They fit a great range of items, including clothes, electronics, non-perishable foods, and much more.
Bunk Beds or Murphy Beds
Another way to maximize space is to get bunk beds or a Murphy Bed. This is a bed that collapses up into the wall when it is not in use. What is your lounge space during the daytime will be your sleep space at night time. You can find a DIY Murphy bed kit here.
Overhead Storage Space
Sometimes taking full advantage of what space you have means getting a little creative. You are encouraged to build overhead storage space in at least one section of your tiny home. You can build this yourself or take advantage of the convenience that this adjustable overhead storage system has to offer. Note that you can adjust the height to make it compatible with your space.
Final Thoughts
This project involves removing all the canvas and walls from the original pop up camper. From there, you’ll use the remaining portion as a template to build up a tiny cabin. In the article above, you’ll find advice on how to do this in a way that makes it clear that you still have enough space to live without feeling cornered.