Hi-van is supported by its audience. When you purchase using our links, we may earn an affiliate commission (no added cost to you). Learn more
Building a DIY bed in your minivan can save a lot of money and add creativity to the conversion. Rather than settling for a pre-made bed, you can have one with a bit of character. The good news is that you don’t need to cut corners or spend a fortune to make a high-quality bed for your minivan conversion.
To build a bed in a minivan, follow these steps:
- Measure the van’s bed space
- Find an 8’ x 4’ wooden slab
- Attach unistrut bases to the corners and sides
- Mount the unistruts to the bases
- Secure the bed to the minivan
- Add your favorite mattress
- Test if the bed is solid
In this post, we’ll cover the seven-step process of building and installing a DIY bed for a minivan. We’ll also show you a handful of tips to save time, money, and energy, including how to use as few parts as possible.
Measure the Interior of Your Minivan
Before you buy any parts, you need to know how long, wide, and tall your minivan is. The last thing you want is to buy a slab that’s too big for the minivan, especially if you don’t have anything to cut it with. Jigsaws and table saws come in handy when you’re shaping the slab, though.
According to Get Leisure Co., you can bring a full-size mattress into most minivans. It’s best to avoid using queen or king mattresses since they tend to take up too much space, though. Also, don’t forget to measure the minivan’s interior height to know how tall the bed’s legs can be when paired with the mattress; Otherwise, the minivan will feel like a coffin.
Get a ¾-inch Wooden Slab
Get Stamped recommends heading to a local hardware store and finding a wooden slab that measures 4’ x 8’ and at least ¾-inches thick. Anything thicker would be better, but you don’t want to go below ¾ of an inch. Keep in mind that you’ll have to use ½-inch screws or shorter when it’s time to mount the legs to the frame’s slab.
As a quick tip, we suggest looking for maplewood if possible. While plywood gets the job done (and it’s cheaper), maplewood is much denser and less prone to mold. On that note, don’t forget to lift the mattress and dry the wooden slab weekly to prevent mildew, mold, and other bacteria from growing.
The wooden slab needs to be completely flat, so bring a leveler tool with you when you go to the store. A warped or bent slab will make the frame uneven and prevent the mattress from staying in one place.
Drill Unistrut Bases into the Bed Slab
- 1-5/8" Single Channel, Square Mount Post Base
- For use with: P1000, P1100, P2000, & P3000 and All 1-5/8" Single Strut Channels
- Finish: Electro-Galvanized; ASTM B633, Type III

You’ll need six unistrut bases for this step. Follow the instructions below when you’re ready.
- Turn the wooden slab on its underside.
- Drill pilot holes into the four corners, ensuring the holes line up with the unistrut’s screw holes.
- Mount the unistrut bases to each of the four corners with ½-inch screws to prevent them from coming through the other side of the wooden slab (you can add screw glue or wood glue for additional security).
- Follow steps one through three while placing one unistrut base in the middle of both of the slab’s long sides.
- You should have a unistrut base on all four corners and one unistrut base in the middle of both sides secured with ½-inch screws.
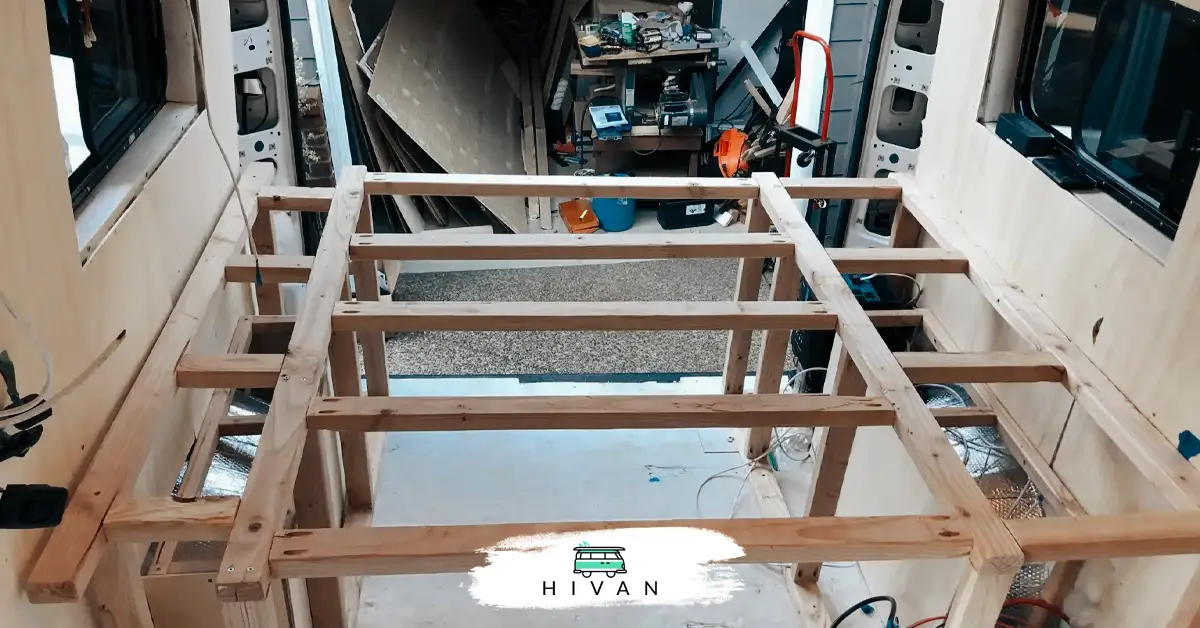
Mount Unistruts to the Bases
When the bases are ready to go, follow these steps to attach the unistruts to act as legs for the frame:
- Cut the unistrut into 12-inch to 14-inch legs, depending on your personal preference.
- With the frame on its underside still, slide each of the unistrut legs into the bases (there should be six legs; One for each base).
- Secure the unistruts to the unistrut bases with screws and washers (again, you can use screw glue to prevent them from loosening).
- Check the length of each leg to ensure they’re the exact size down to a millimeter (slight deviations can make the bed wobble from side to side).
Secure the Bed Frame to the Minivan
Some people prefer adding an additional unistrut base per leg. If you’re comfortable with drilling holes into the minivan’s floor, you can add six bases and secure them just as you did when adding the bases to the wooden slab. On the other hand, there are a few other ways to secure the frame to the floor.
For instance, Odyssey Camper suggests using D-rings or pre-mounted hardware to secure the minivan’s new DIY bed. Using the aforementioned unistruts we recommended to build the frame lets you tie or screw the frame to almost any surface in the vehicle. You can also use clamps, vices, anchors, and more.
Related Article: How to Make a Van Bed Frame (Step-By-Step)
Add a Mattress to the Bed Frame
If you didn’t have to cut the wooden slab, the bed should be the same size (8’ x 4’). Anything bigger will make the edges floppy, while anything smaller will make the wooden slab exposed. A full-size mattress is an ideal solution for the vast majority of minivan campers since it’s big enough to support two people without crowding the vehicle.
If you want to make the minivan’s new bed look even better, lay a loose sheet under the mattress and over the wooden slab. This trick will hide the wood from all angles and stay secured by the mattress’s weight.
Related Article: Best Campervan Mattress
Test Your Minivan’s DIY Bed
Now it’s time for the best part: Laying on the mattress! Move around, store your items underneath it, and see how it’ll feel when you’re parked at a campground. If possible, spend a night in the minivan before hitting the road. This will let you know what needs to change or if everything is good to go.
The good thing about using unistruts is that you can remove them and increase or decrease the frame’s height. They’re easy to work with and provide excellent support and security.