Hi-van is supported by its audience. When you purchase using our links, we may earn an affiliate commission (no added cost to you). Learn more
Van life is all about simplifying and downsizing, but one thing that you shouldn’t try to skimp on is your bed build-out. Though you can purchase pre-made van bed frames, building your own allows you to custom-tailor your bed to your needs and preferences.
Here’s how you can make a van bed frame:
- Pick a design.
- Clear out your van.
- Check the measurements twice.
- Get your materials.
- Cut your planks and plywood.
- Sand and finish your wood.
- Assemble the wood frame.
- Add storage cabinets or drawers.
- Secure your bed frame in your van.
So, let’s get to work and build your van’s bed frame together. I’ll lead you through all the steps and give you some ideas to help you optimize your space and sleeping area. I’ll also share some pro tips so that you don’t have to learn them the hard way.
1. Pick a Design
When building out your van, picking the proper layout and design for your bed is crucial.
Usually, your bed will take up more than ½ of your van’s floor space. That’s a lot of room, and you’ll need to decide whether your bed should lay flat all the time or turn into another piece of furniture, like a couch.
Although everyone’s custom van bed is different, there are three standard designs that most people use for conversions:
- A platform bed. Platform beds usually sit on rigid wooden platforms, and they commonly have storage spaces underneath. Some people get creative with this storage room and install built-in dog beds, sliding drawers, room for a bike, refrigerators, and more. These beds are great for people who aren’t worried about their bed taking up most of the space in their vans.
- Futon-style beds. Futon-style van beds come in many varieties, but all of them double as couches by day and beds at night. These beds can have expanding or fold-out platforms, and some of them even have a platform in the middle that you can raise to make a table surrounded by sofas.
- Loft-style beds. Lofted beds are fantastic, but they won’t work in every van. If your van has a raised ceiling or room for a bunk bed-like setup, then you’re in luck! By raising your bed and putting a table, kitchen area, or desk underneath, you can almost double your van’s floor space. However, you’ll probably have to use a ladder to get to your bed, and you might not have as much overhead space as you want, so keep that in mind.
If you want to live in your van full-time, choosing a bed that collapses or a loft-style bed is probably the best idea. That way, you can have as much space as you need during the daytime, but you’ll always have a large, comfy bed at night.
However, if you feel comfortable sitting on your bed most of the time while you’re in your van, a platform bed is a great option, too.
As you explore the options, one thing that might help you is to list the things you want to do in your van.
For example, ask yourself if you’re only going to sleep in your van? In that case, you might want a platform bed.
However, if you’ll be working in your van, you might need a desk area and choose to make a bed with a raisable table.
Think about what you want and need from your van, then plan your design around these needs. It’s your van and your living space, after all!
Find this content useful 🙂 ?
Subscribe to our Newsletter and get a free Solar Electric Diagram + shopping list.

2. Clear Out Your Van
If you haven’t yet, you might want to clear out your van and finish other conversion projects before you get started on your bed.
If you’re making a full-conversion van, you’ll probably want to do these things before you start building your bed frame:
- Remove all car seats.
- Remove the manufacturer carpeting.
- Add custom flooring (the less weight, the better).
- Install lighting and fans.
- Install your electrical system.
Be sure that the floors are complete before you start if you plan on securing your bed frame to your van’s frame. That way, you won’t have to take the bed out to finish your other building projects.
3. Check the Measurements Twice

Beds are all about comfort, and measuring everything out is crucial if you want to feel at home in your van.
When you consider measurements, be sure to think about how many people will be sleeping in your bed. If you have pets who’ll compete for bed space, you’ll need to include them in your calculations as well.
Before you record your measurements, you might want to pick out your mattress. That way, when you build your bed frame, you can ensure that it’s low enough to the floor for you to sit up in bed.
Here are some easy steps you can use to figure out how big your bed will need to be:
- On a piece of paper, draw a 3-D rectangle, which will represent your new bed frame.
- Measure your height (and the height of anyone else who’ll be sleeping in your van with you) and add about 1 inch (2.54 cm) for extra space.
- Mark your height on the longest side of your 3-D rectangle drawing.
- Measure the width of the widest part of your body and add an inch (2.54 cm).
- Record your body’s width on the shortest side of your drawing to determine how wide your bed should be.
- Measure the height of your body from the top of your head to your hips.
- On your drawing, record the measurement of your sitting height above the 3-D rectangle.
- Measure the height of your van from floor to ceiling.
- Subtract your sitting height from the height of your van from floor to ceiling to find the best height for your bed.
- Measure the width of your van and record it.
Personal tip: You can also consider planning everything in 3D softwares like Sketchup. There are tons of Van plans already available online, just look for "Your Van Brand and Model + Sketchup Plan" in Google. Planning everything in 3D takes more time but will allow you to better visualize your space, better plan and measure everything and save money in the long run.
Once all these measurements are recorded, you can determine where your bed will fit in your van.
Some people are short enough to sleep in their vans width-wise, parallel to the doors in the back. Arranging your bed this way is very convenient since your bed will take up less space on the floor of your van, leaving more room for other things.
However, if you’re taller than your van is wide, you’ll probably want to sleep lengthwise, with your head near the back door of your van.
4. Get Your Materials
When it comes to your materials, your design and bed size will make a big difference.
However, I’ll help you figure out the materials you’ll need to make a simple platform bed with open storage space underneath. This design is the easiest van bed frame to build, and it should only take around an hour to assemble everything.
For this build, you’ll need:
- One sheet of ⅝” thick plywood, measured to fit on top of your bed frame.
- Two 48-inch (121.9 cm) 2×4 planks
- At least 18 wood screws
- Wood glue. I recommend Titebond Wood Glue (available on Amazon.com). This glue is both durable and weatherproof, so it’s a great option when working in a van.
- A drill (I recommend the Dewalt power tools)
- A miter saw (or access to a hardware store that’ll cut your wood for you)
- A Power sander
- Oil, wood finish, or paint (optional)
If you’re looking for an excellent wood finish to spruce up your bed frame and make it soft, I recommend this LinSheen Boiled Linseed Oil (available on Amazon.com). Linseed oil makes for an excellent, soft, glowy finish, and LinSheen’s fast-drying formula has less of an odor than other oils.
For a video tutorial of a similar build, check out this short, easy-to-follow YouTube video from Exploring Alternatives:
5. Cut Your Planks and Plywood
For a platform bed, you’ll first cut your plywood. Your plywood should be as long as you are tall and as wide as you are, plus an inch or two on each side for extra room.
Then, you’ll cut the legs. For this bed design, you’ll need to make nine legs from your 2×4 plank.
To determine how tall you want these legs to be, go back to your drawing and find the ideal height of your bed frame and mattress, which you calculated using your sitting height.
Subtract the thickness of your mattress from this measurement, then subtract 0.625 inches (1.59 cm) for the plywood.
The final answer is the height that the legs of your bed will be.
Now, you can use this measurement to cut your 2×4 plank into nine segments with your miter saw.
6. Sand and Finish Your Wood
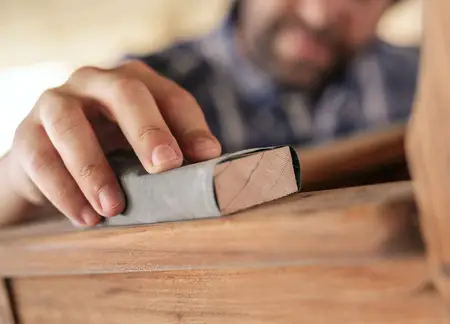
Before you assemble your bed frame, you may want to sand and finish the wood.
Sanding and finishing your wood will make it last longer, and it’ll ensure that the wood doesn’t splinter or get stuck to your mattress or other pieces of wood.
If your bed has a pullout design, moveable parts, or storage cabinets, I highly recommend oiling them or using wood finish or paint to make them beautiful and smooth.
During one van build where I made a collapsible sliding futon, I didn’t oil or sand the wood at all – big mistake.
Every time I tried to pull the bed out, the wood got stuck to itself, and it took around 20 minutes of frustrated heaving to expand the frame. Bringing it back to couch mode wasn’t a piece of cake either.
To fix the problem, I had to remove the bed frame, sand it, and oil it, which made for a lot more work.
All that to say, if your frame has any moving parts, use some olive oil, boiled linseed oil, wood finish, or matte furniture paint to finish it. Your bed will look more appealing, and, most importantly, it will work better.
Find this content useful 🙂 ?
Subscribe to our Newsletter and get a free Solar Electric Diagram + shopping list.
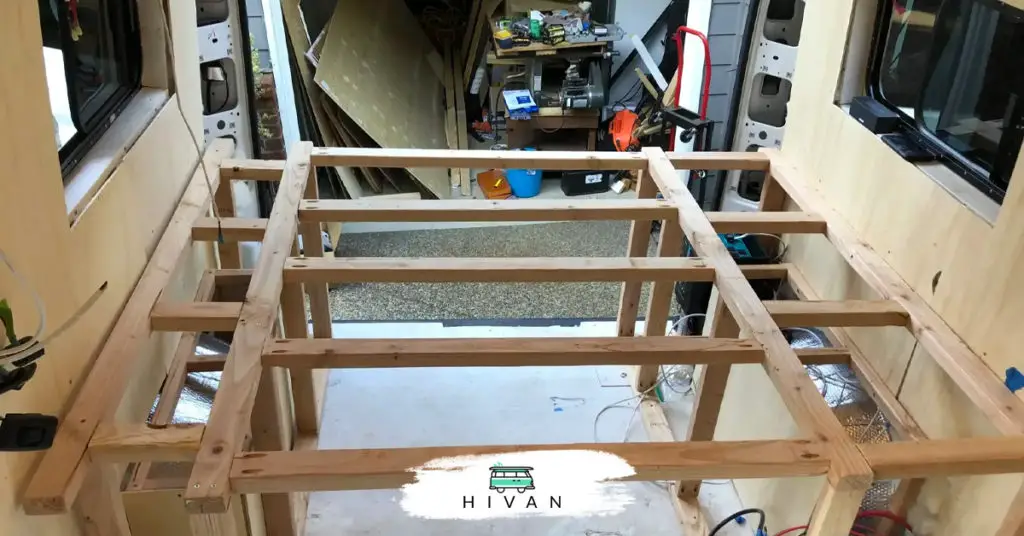
7. Assemble the Wood Frame
Now, it’s time to put all the pieces together.
Here’s how to put your platform bed together:
- Lay your plywood flat on the ground.
- Place a leg on each corner so that the edges of the 2×3 legs are flush with your plywood’s corners.
- Now, measure the distance between each leg.
- Place another leg in between each pair of legs along the plywood’s edge.
- By now, you should have placed eight legs onto your plywood.
- Place the last leg in the very middle of your plywood.
- Use a pencil to trace around each leg onto the plywood.
- Mark two dots on each rectangular space you just traced to help you place your pilot holes.
- Drill two pilot holes into your plywood for each leg (18 holes total).
- One by one, cover the end of each leg in wood glue, then use the pilot holes to drill your legs onto your plywood platform.
Once you have drilled the legs in, you’ll need to wait around 24 hours for the glue to dry. Then, you’re finished!
8. Add Storage Cabinets or Drawers
This is an optional step, and you don’t have to close off your under-bed storage space. However, adding a few wood panels or wooden drawers to cover things up underneath your bed can make a massive difference if clutter bothers you.
To make storage cabinets or drawers, you’ll probably want to use thin plywood. Thin plywood won’t be too bulky, and it’ll also cut down on weight.
A good option for this platform bed design is to make one long cabinet door for your under-bed storage area or construct many smaller doors to divide up the compartments between your bed’s legs.
Here’s what you need to do:
- Get some thin plywood, hinges, and drawer knobs.
- Screw the hinges into your plywood.
- Attach the other side of the hinges to your bed frame.
- Screw on some drawer knobs, and you’re done!
You can also use wood glue and plywood to make slide-out storage boxes that fit in between your bed’s legs. These drawers can be made deep enough to go all the way underneath your bed.
9. Secure Your Bed Frame in Your Van
Things tend to shift and slide when you’re driving around, especially on steep inclines and tight curves. So, if you want your bed to stay where it belongs, securing it is essential.
Still, it’s important to note that if your bed already fits snugly in your van, especially if it straddles one or more of your wheel wells, you don’t necessarily have to bracket it down.
However, if you need to bracket down your bed frame, you’ll need to screw the legs directly into your van’s frame using heavy-duty screws.
Tips for Upholstery, Mattresses, Sheets, and Pillows
Van life often requires you to get creative with storage solutions, and you can do that with your pillows and upholstery!
Most van beds won’t accommodate a standard-sized mattress, so choosing a foam mattress that you can cut down later is usually the best way to go. Memory foam mattresses are a fantastic option since they stay supportive while being relatively thin, giving you plenty of headroom.
One of my favorite ways to store clothes is to use zipping pillowcases as clothing bags.
You can find pillowcases in many sizes, shapes, colors, and patterns that’ll match your style, but I use these Velvet Throw Pillowcases (available on Amazon.com). These pillowcases are super soft, which makes up for the fact that some of them are filled with stiff blue jeans. Two or three of them hold my entire wardrobe, too, so there’s plenty of room in them!
- Zipper is hidden
- Size:18 x 18 Inch / 45 x 45cm
- Pillow covers only
- 35+ colors available
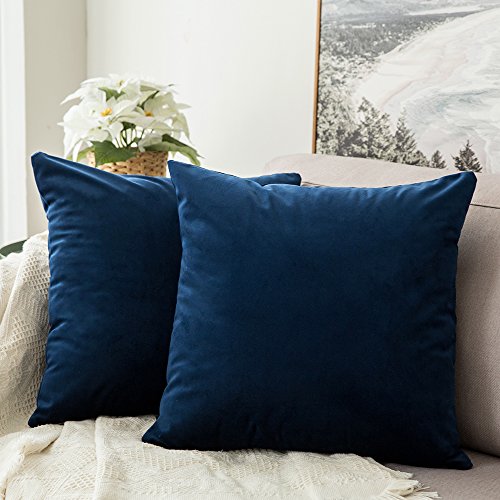
Once you have your pillowcase, fold and roll up your clothes, then stuff them into the case. Now you have a covert place to keep your clothing, and you can use it as a pillow!
Final Thoughts
Building your bed frame for your conversion van is an excellent way to personalize your space. There are tons of different designs to use, and you can even come up with your own that fits your personal needs. In addition, building the frame doesn’t have to be difficult, and you can always customize your build to make sure it includes everything you need.