Living in a camper van can be a rewarding way to live a minimalist lifestyle while traveling the country. Buying a camper van can be incredibly expensive, which has led many people to convert their camper vans. But how much does this process cost, and how does it compare to buying a camper van?
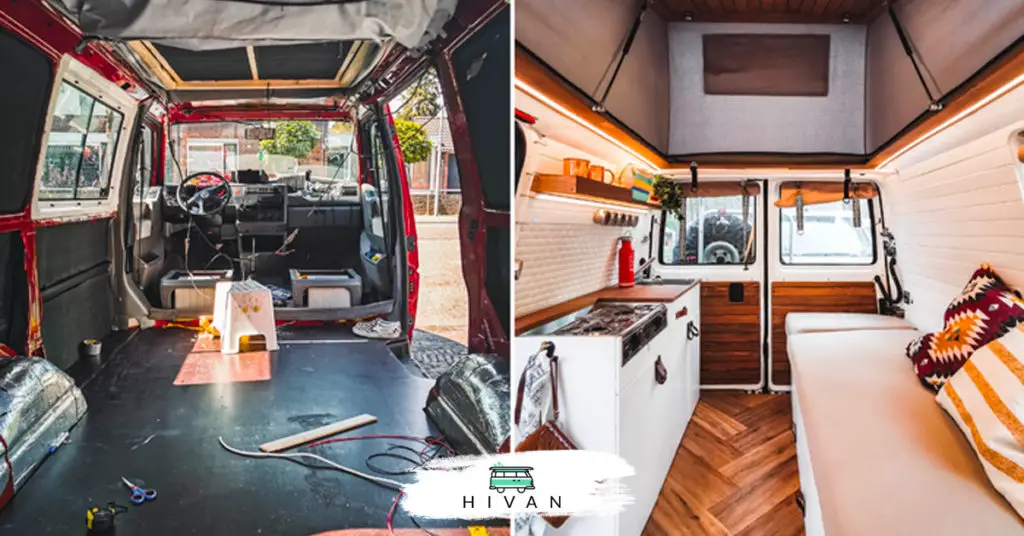
Building a camper van costs anywhere between $5,000 and $15,000. This includes the cost of electrical and plumbing installation, insulation, flooring, furniture, and other amenities. The cost also depends on if you do the work yourself, or if you hire someone to do it for you.
This guide will have an in-depth look at the cost of building your camper van. From purchasing a van for conversion purposes to installing utilities to building furniture, let’s break down the average costs of building a camper van.
Cost of Building a Camper Van
Building your own camper van can be an incredibly rewarding experience. Instead of spending tens of thousands of dollars on a new camper, you might spend at least $10,000 converting a van yourself.
The process may not be easy, but you’ll save money and gain lots of new skills by building your camper van.
Purchasing the Van
Before you can build a camper van, you need a regular van to convert. Vans are typically much less expensive than camper vans, especially if you’re buying them used. You might already have a van that you plan to convert into a camper.
But if you don’t, you should start looking.
The cost of a van varies wildly, depending on the make, model, year, mileage, condition, and market. You should probably expect to spend between $10,000 and $20,000 on a van, but you might stumble on a better deal if you keep an eye out.
If you want a cheaper van, you need to be prepared to pay for repairs.
Keep in mind that the older the van you purchase, the higher chance of mechanical failure on the road. You’ll also have more difficulty fixing an older vehicle than a newer one if something does go wrong.
A used van in good condition will cost you at least $10,000.
Electrical System Installation
Electricity is essential for a camper van, as it allows you to run a refrigerator, stove, interior lights, laptop, and phone chargers, and so much more. But installing your electrical system can be intimidating, and it’s one of the most expensive parts of the conversion process.
The best way to save money on your electrical system is by installing it yourself. Here are some products you can find on Amazon.com and Renogy.com to start installing your camper van’s electrical system:
The Renogy 400W 12V Premium Kit is the most economical choice for the off-grid adventurer. With the ability to access energy wherever there is sun, the options for your journey are limitless.
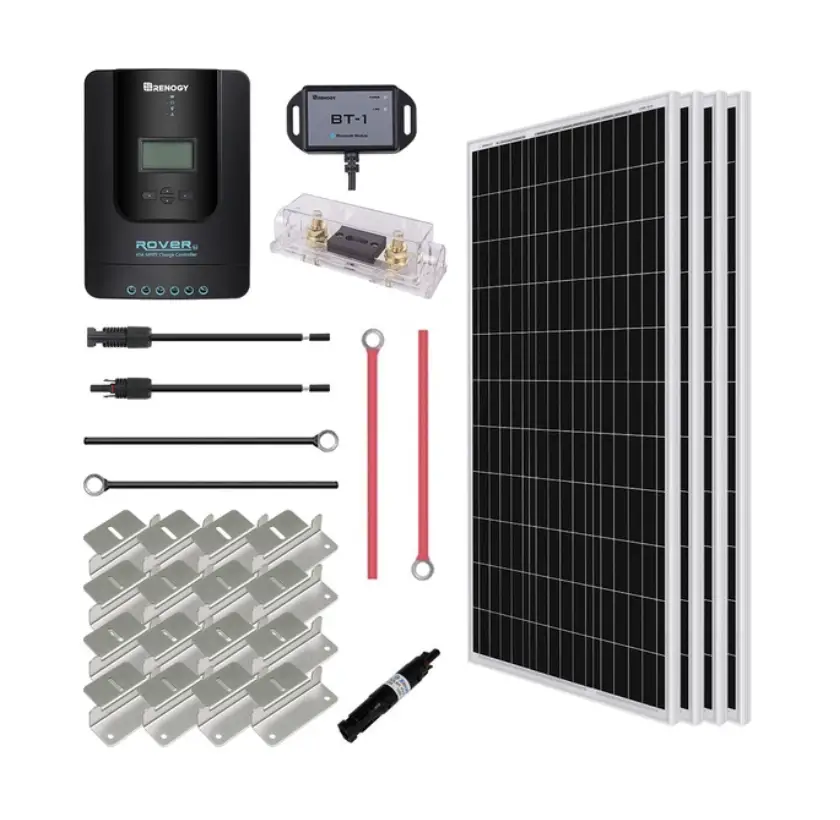
- To start, you’ll need solar panels. The Renogy 400 Watt Solar Power System kit includes everything you need to install the solar panels, plus a charge controller to optimize the charge your batteries receive. The 400w total solar panels will fit on the roof of your van and turn sunshine into electricity that you can use.
- Uncompromising Quality
- Easy Upgrades
- Reliable BMS System
- Auto-balancing Function
- Real-time monitor
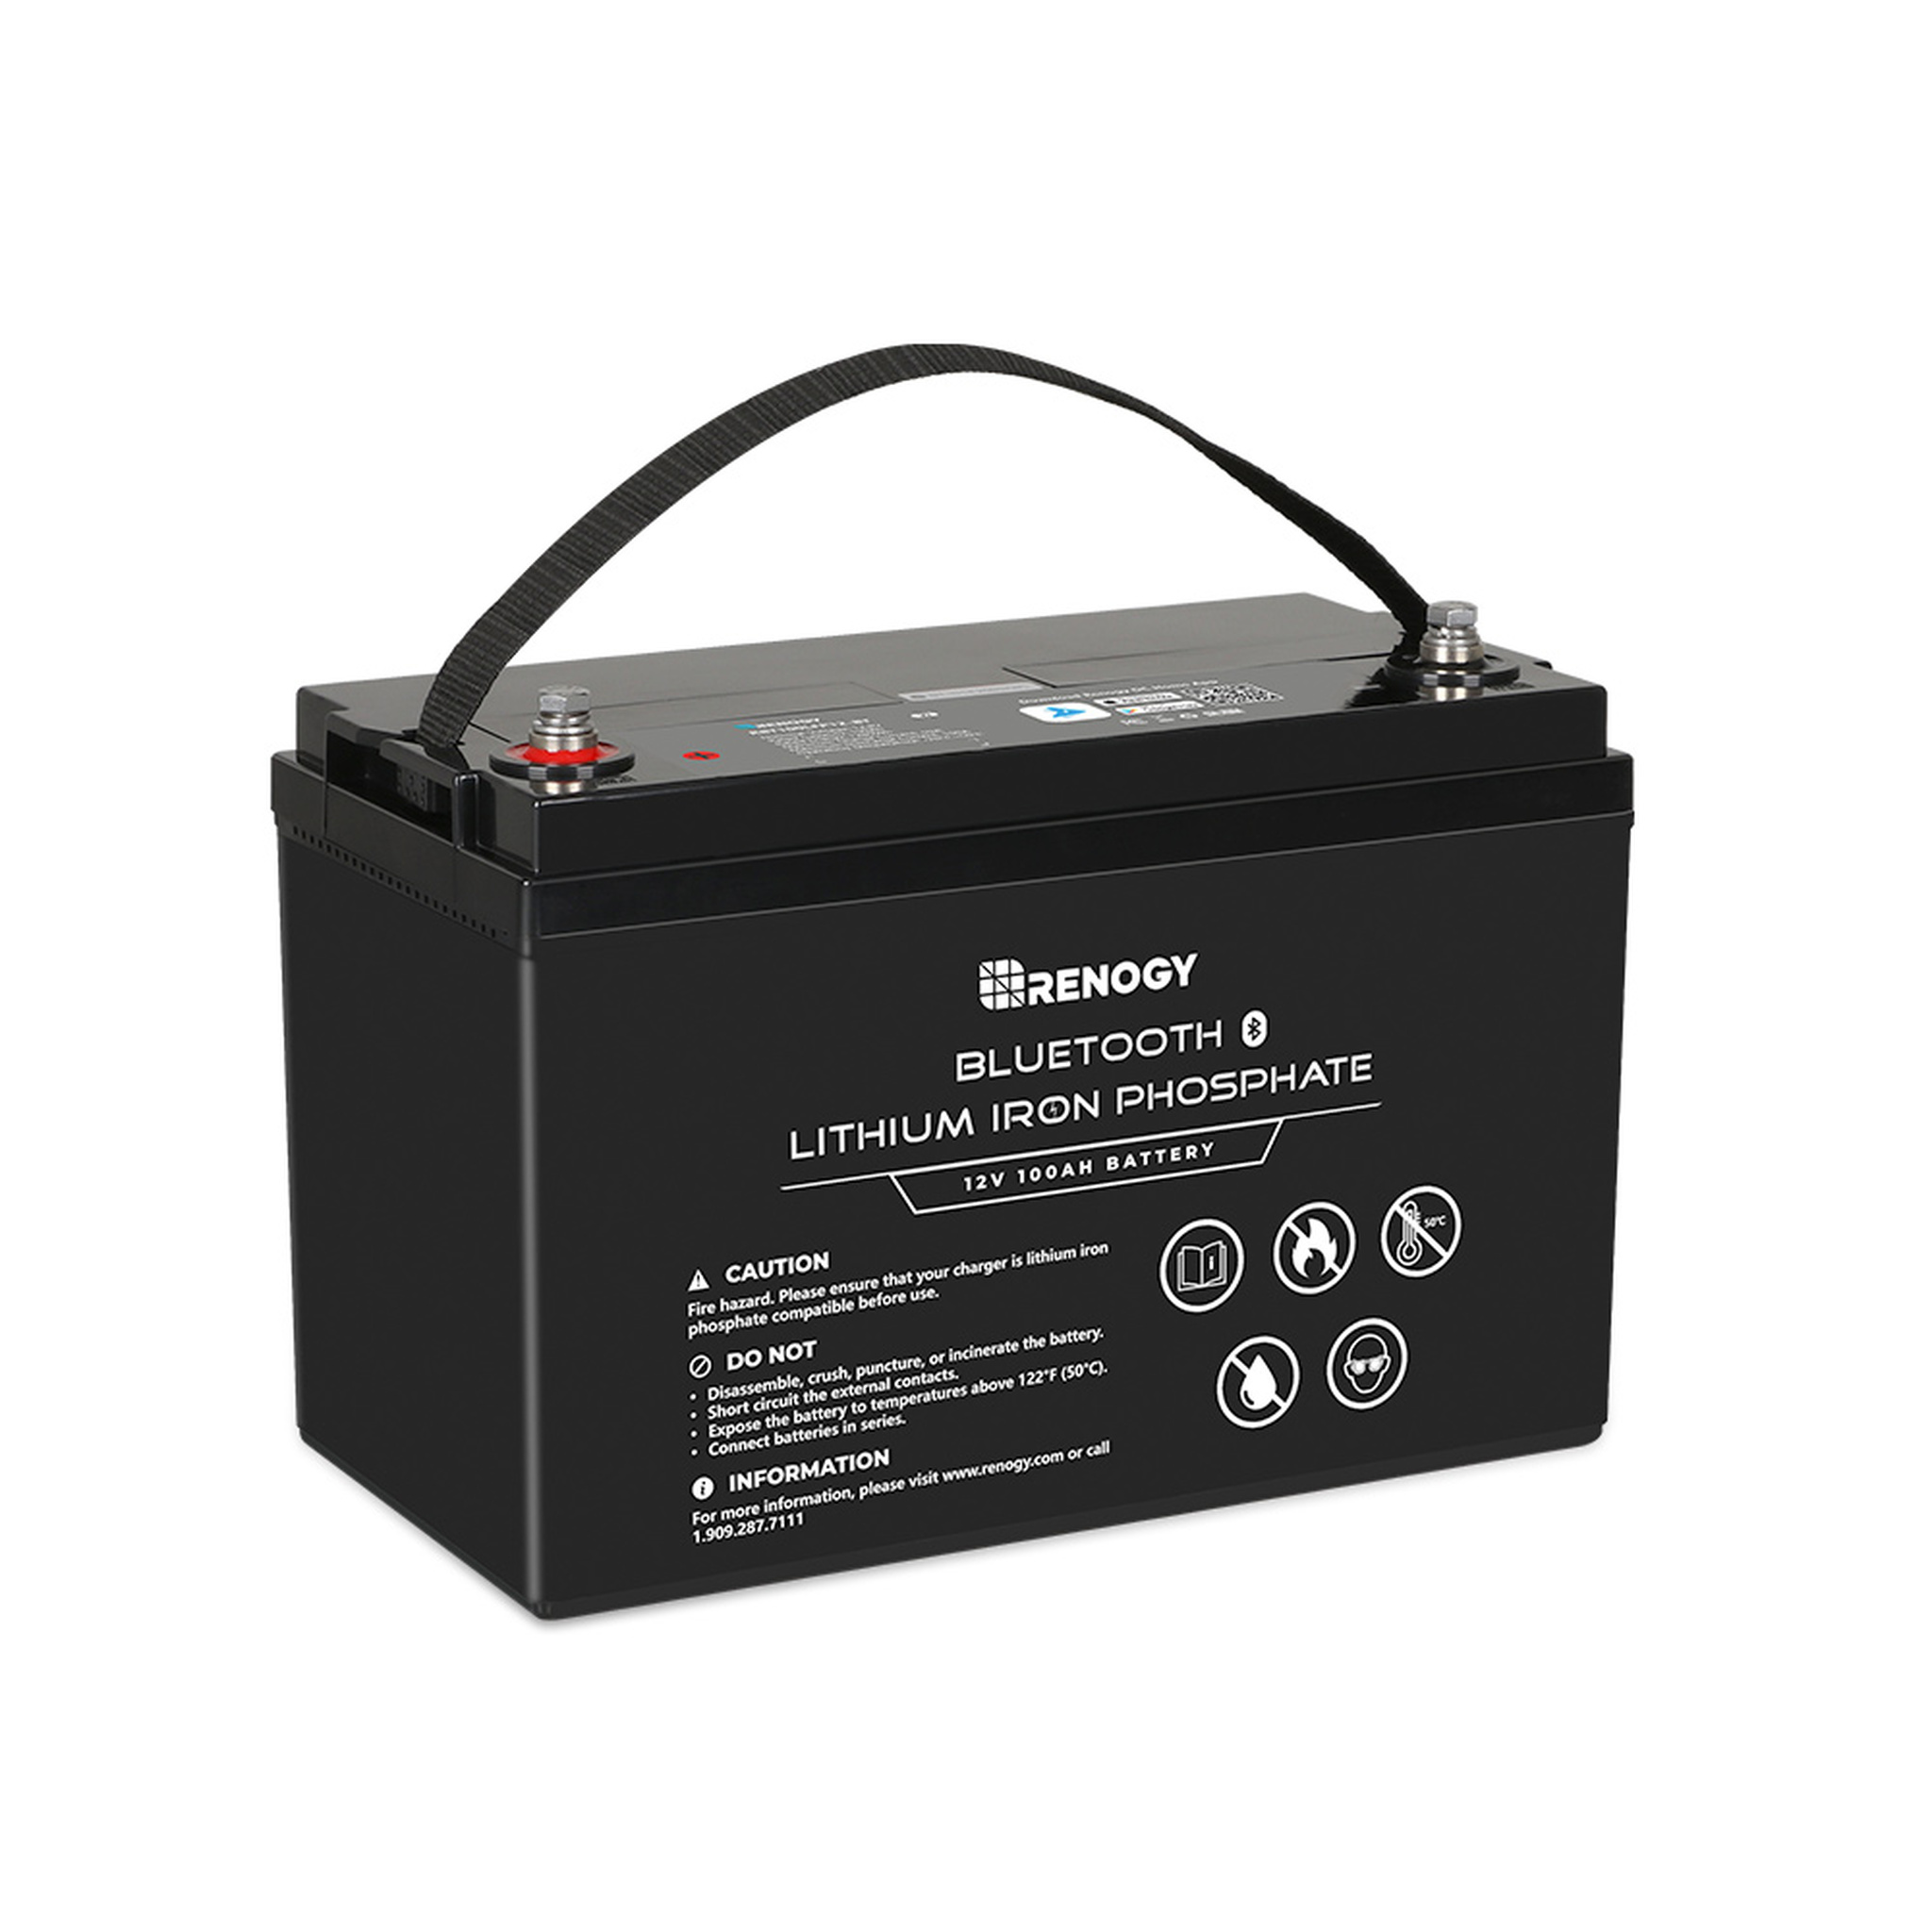
- Next, you need batteries to store the electricity. Try the 12V 100Ah Lithium battery from Renogy for a relatively affordable choice. You should purchase at least two batteries if you can.
- An inverter converts the electricity in your batteries into a current that you can use to charge a laptop or anything else with a normal plug. Check out the KRIËGER 1100 Watt 12 Volt Power Inverter. At 1100 running watts, it should be able to run small appliances with no problems.
- The last major component of your camper van’s electrical system is a battery isolator. This device, like the KeyLine Dual Battery Smart Isolator, charges your battery from your van’s alternator. Between the battery isolator and solar panels, you shouldn’t have to worry about running out of power while you’re on the road.
If you have no experience with electrical installation, don’t worry.
There are several in-depth guides on the internet that you can use for reference when installing your electrical system. Check out this one by Gnomad Home. A solar power system is relatively simple to install. You just mount the panels to the roof of your van and connect each component with the proper wires.
These components combined (a solar power kit, two batteries, an inverter, and a battery isolator) will cost around $1600.
You Might Want Plumbing In Your Van
Most people who live in camper vans rely on public restrooms and gym memberships for their bathroom needs.
But even though you won’t be installing a toilet in your camper van, you will need running water for a sink, which is a must-have in any camper van for handwashing, drinking water, and food preparation.
The most budget-friendly option is to purchase a water cooler, hand pump, and basin to catch wastewater. You can refill your water jugs at most Wal-Marts or campsite water spouts. You’ll need to dump your waste water regularly, too.
The Dolphin Water Pump means you don’t have to risk spilling your 5-gallon (22.73 L) jug whenever you need to access water. This system (water jugs, pump, and basin) costs about $50.
But you might prefer the convenience of a real sink.
A sink is essential if you plan on cooking food and washing dishes in your camper van, but it will cost you more and require some installation. Installing a sink means you need a pump, faucet, fresh water tank, waste water tank, sink, and tubing.
A high-quality pump will cost around $100, and that’s before you purchase a faucet, tanks, and other necessary pieces.
- Reliable, easy to use foot pedal-operated freshwater pump
- Ideal for use in small galleys
- The versatile pump has multi-directional inlet and outlet hose connections; can be installed in a wide variety of spaces.

The Whale Gusher Manual Freshwater Galley Pump is a great choice because it leaves your hands free, and you can buy it on Amazon.com. You simply push the pump with your foot and use the sink with your hands.
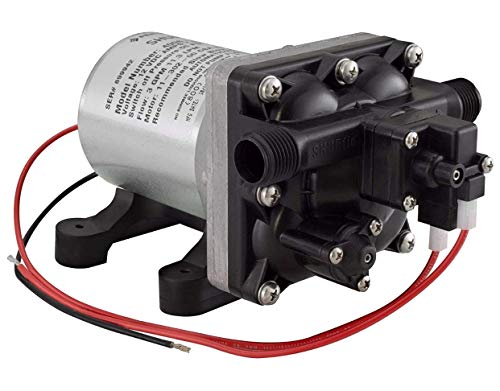
An electric pump is another good choice and costs a little less than a manual pump, but it requires more installation work. You also run the risk of wasting water and electricity with running water constantly available.
New Revolution fresh water pump design was created with a unique one-piece diaphragm and internal by-pass, assuring long life and top performance in all plumbing systems.
If you’re not afraid of doing some extra wiring, try the SHURflo Revolution RV Water Pump found on Amazon.com. It pumps water out at 3 gallons (11.3 L) per second, so it should do a good job of giving you the water pressure you need.
You may want to consider a water filtration system, too.
Two Roaming Souls has an incredibly detailed breakdown of how they installed their camper van sink, including a filtration system. Water filtration means you don’t have to be as picky about the source you use to refill your water tank. You can fill your tank with a hose or spigot at a campsite without fear of drinking dirty water.
Between a pump, sink, faucet, freshwater, and wastewater tanks, and tubing, you can expect to spend at least $250 on plumbing. A water filtration system will be an additional $50 to $100. Like with the electrical system, you don’t have to be an expert to install it yourself. The internet is full of guides with explicit instructions on every step of converting a camper van.
Proper Insulation
Proper insulation is key for staying safe and comfortable in your van. Insulation helps you stay warm in the winter and cool in the summer, preventing heat from traveling between your van and the outside.
The budget-friendly way to insulate your van is with foam boards.
However, not all vans are shaped right for this method. If the walls, ceiling, and floor of your van are not flat, you might not be able to use rigid foam boards.
For these areas, consider using sheep’s wool as an insulator. It can fit in all the nooks and crannies of your van, and it does an excellent job of insulating. Sheep’s wool is not cheap, though.
You could use it to insulate all parts of your van, but it will eat into your budget.
Another handy method of insulating your van is spray foam. Great Stuff Spray Foam, found on Amazon.com, can insulate the areas that even your sheep’s wool won’t fit. It is technically possible to insulate your whole van with spray foam, but that would be expensive and messy, with a higher potential for error.
Spray foam is best used in conjunction with other forms of insulation.
You’ll need to insulate your windows, and for that, you’ll need Reflectix, found on Amazon.com, which reflects radiant heat, or heat that travels through the air. It’s an excellent way to insulate your windows, but you shouldn’t use it much for the rest of your van. Reflectix works best when there is an air gap between it and the surface you’re insulating.
Custom Crafted Vans has a handy YouTube video you can reference to make Reflectix window coverings for your van:
You may find the best way to insulate your van is with a combination of foam boards, sheep’s wool, spray foam, and Reflectix. You should be able to find everything except the sheep’s wool at your local hardware store.
You can expect to spend between $300 and $400 on insulation using a combination of these products.
Ventilation Keeps Your Van Comfortable
A ventilation fan keeps your camper van comfortable with regular airflow. Moving air can make a miserably hot summer’s day bearable, and the fan also makes your van safer if you plan on cooking inside.
- Powerful 10-speed intake and exhaust fan.
- Thermostat to control the room temperature.
- Provides over 900 CFM to keep you cool and comfortable.
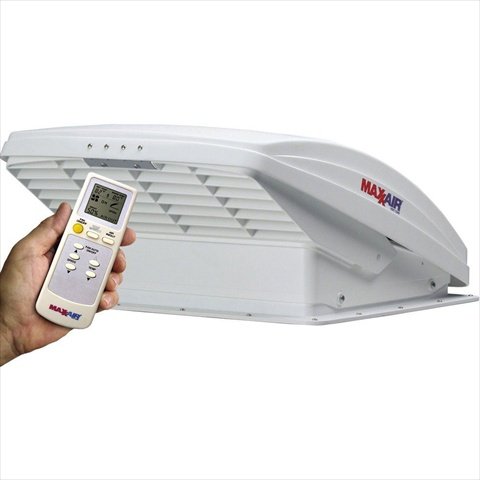
You can find vent fans that only cost around $100, but you would probably be more comfortable with a higher quality fan. The MAXXAIR MaxxFan Deluxe, available on Amazon.com, has a rain cover, thermostat, ten speeds, and the ability to run like a ceiling fan for constant air circulation.
As with most elements of your van build, you can opt for something less expensive, but you will be less comfortable on the road.
A good ventilation fan costs around $300.
Put In a Small Kitchen
The kitchen of your camper van has two main components: the fridge and the stove.
You might be intimidated by the cost of quality kitchen appliances, but they will save you money in the long run. A fully-equipped kitchen will allow you to cook food on the road, so you won’t waste money going out to eat.
Refrigerators cost anywhere between $300 and $1200.
Check out the COSTWAY Car Refrigerator on Amazon.com, which is less than $400 and can hold up to 55 quarts. For a slightly smaller but more luxury choice, see the ICECO Portable Refrigerator, which costs under $700.
- SECOP Compressor
- Car and Home Use
- User-friendly Design
- 3-Level Battery Protection
- Warranty & Services
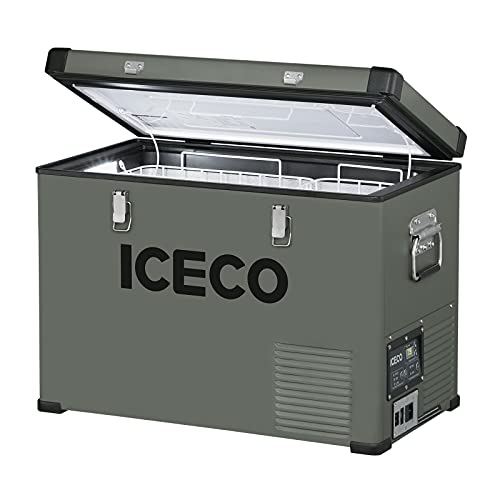
This particular model comes with 3-level battery protection, which means that your food won’t spoil right away when you start losing power.
Whatever model of fridge you choose, make sure it is compatible with your inverter. Fridges use a lot of electricity. If you try to save money by purchasing an inverter with a lower wattage, you may not be able to run your refrigerator.
Most people who travel in camper vans use propane stoves for cooking, as they are relatively inexpensive, which also includes propane fuel. You can cook while in the van or camping outdoors, and a good propane stove will heat water very quickly.
However, it is vital that you also purchase a carbon monoxide detector.
Any time you use a stove inside your van, you run the risk of filling your van with toxic fumes, which is one of the reasons why a vent fan is so important. A carbon monoxide detector only costs around $20 and will alert you if your stove is causing a safety hazard.
The cost of a stove, refrigerator, and carbon monoxide detector adds up to about $700.
Walls and Flooring
The walls, ceiling, and floor of your camper van make your van feel homey and unique to you.
You can choose materials, color palettes, and styles that appeal to you, and you can make your van feel like a log cabin, a rustic inn, or your bedroom at home. This is your chance to customize your van to your liking.
There are two materials most people choose for their camper van walls: plywood and paneling. Plywood is much less expensive than paneling, but it doesn’t look as nice and might be more prone to mold.
Lumber costs can vary wildly depending on the state of the market. Be prepared to spend around $300 to cover your van’s walls and ceiling with wood planks.
The flooring of your van should consist of insulation, subfloor, and the floor. You may also add a layer of soundproof material if you’re willing to spend some extra money.
You don’t need to spend much money on a subfloor for your van.
Most people use plywood, and you may already have extra material on hand from your other van building projects. However, if you want to soundproof your floor, you can expect to spend at least $100 extra on the materials.
A van has a relatively small footprint, so you shouldn’t have to spend very much on flooring. Laminate flooring costs around $60, while vinyl costs about $100. It’s up to your personal preferences which material you choose.
The walls and flooring of a camper van will cost about $400.
Find this content useful 🙂 ?
Subscribe to our Newsletter and get a free Solar Electric Diagram + shopping list.
You Need Furniture For Your Van
The furniture for your camper van can be as elaborate or as simple as you want. You need to build a bed, storage cabinets, counters, and a frame for your kitchen appliances.
Browse the internet for inspiration to see what layouts other people have chosen.
Do you want a fold-out table? Do you want a seating area? How large do you need the bed to bed, and where do you want it?
All of these questions affect how much you’ll be spending on this section of your van build.
If you’re feeling stuck, check out a guide on the internet. Destinationless Travel has an in-depth guide that documents each step of the van building process with photos.
The cost of your van’s furniture depends heavily on the cost of lumber at the time.
Considering the bed frame, mattress, cabinets, counters, kitchenette, table, hardware, and tools, you should be prepared to spend at least $1,000. You might already own many of the tools you’ll need, and you can certainly find several pieces discounted or at second-hand stores.
The Extras That Make Your Campervan Your Own
There are several other purchases you can make to improve the quality of life in your camper van. Consider lighting, paint, and decor to help your van feel more like home.
You may want to keep a safe in the van for your valuables.
What sort of cookware do you plan on bringing with you, and do you need any special tools to wash it? If you live somewhere hot, consider a sunshade. If you’re somewhere cold, think about a portable heater.
Set aside at least $500 for assorted extras to add to your camper van build.
Is Building a Camper Van Worth It?
Building a camper van is worth it and is almost always cheaper than buying one. Converting your van gives you the freedom to make decisions about every aspect of your van, and you can customize your camper van to your preferences.
But you shouldn’t underestimate just how much work goes into converting a van.
If you’re not a handy person, you might want to hire a professional. In that case, you’ll be spending significantly more money on building your van than if you did it yourself.
If you want to travel in a camper van and don’t mind getting your hands dirty with DIY projects, consider building your van. You can save a lot of money by converting a van, and you may have fun during the building process.
On the other hand, if you want a luxury camper van with all the bells and whistles, you would probably be happier buying one.
Final Thoughts
Building a camper van will cost you at least $5,000 on top of the cost of the van itself. If you want more amenities, better quality materials, or a more comfortable living space, you can expect to spend about $15,000 or more. How expensive your camper van depends on your preferences and how much DIY work you’re willing to do.
Final rough estimation of how much would cost a camper van conversion:
| Items | Cost Estimation |
|---|---|
| Buy a used van in good condition | $10’000 |
| Solar electric system | $1’600 |
| Water system | $250 and more |
| Proper insulation | $400 and more |
| Roof vent | $300 |
| Kitchen appliance | $700 |
| Walls and flooring | $400 |
| Furniture | $1000 |
| Extra | $500 |
| Total Estimate | $15’150 and more |