RV solar panels are a growing trend amongst the van-life community. It’s one RV product that has continued to garner a cult-like following because of the freedom and solutions it provides to true van-lifers. The freedom to have your home comforts within the confirms of your van, right in the middle of nowhere.
With various solar panels on offer comes the inherent issue of mounting the solar panels to your van. The nagging questions range from the type of solar panels to buy, drill holes, or not, which kind of mount do you need. There are plenty of solutions available if you need to attach the panels to your RV roof.
Designing your RV solar system can either be simple or complex, all depending on your budget and your system requirements.
Mounting solutions can range from ground setups, roof mounting to complex tracking solutions.
Your answer lies with the type of roof you have and if you want to drill holes into it or not. Depending on your project and what it requires, you’ll attach your solar panels differently. In most cases, you’ll need to have an excellent sealant to avoid any water infiltration; the best adhesive to fix your panels (if you don’t want to drill holes) to your roof; a mounting system that works with your solar panels AND your roof.
Is your roof curved? Is it metal, fiber-glass, or aluminum? Do you have other elements like windows, ventilations that you need to take into consideration? How big are your panels? Do you need a tilting function or not?
The following steps involve setting out to find the perfect solar configuration best suited for your power needs. This part consists of establishing your budgets, system requirements, and the best mounting options as per your RV van’s structure.
Choosing the right solar panel
There are several types of solar panels on the market. You have a wide choice from rigid and solid solar modules to flexible solar panels.
Rigid panel modules are divided into two models, polycrystalline and monocrystalline panel technologies. We will delve a little deeper into the two technologies, but each has its pitfalls when installing these solar panels.
Rigid solar panels
This technology is based on positioning the cells behind a glass protective frontage cover. There are practical for large scale RV applications. This type of
Most of these panels have aluminum frames around them to maintain structural stability. This type of
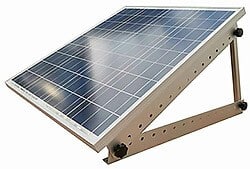
This type of solar is reasonable and works best in tilting setups to harness the maximum sunlight at any given time.
Pros for rigid panels
- Very sturdy
- cheap
- easy to mount
- Has an air gap to allow cooling the panel
- Very efficient
Cons for rigid panels
- Can not bend
- Fits certain types of roofs and is heavier
- Not fuel-efficient (wind)
- The top needs to be drilled for mounting purposes
Flexible solar panels
A new
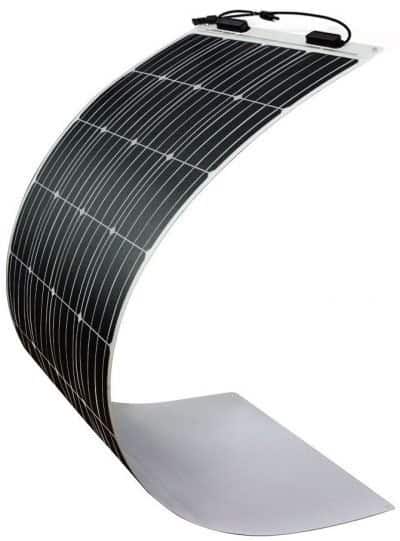
Flexible solar panels are very light and are applicable in many solar installation applications because of their flexibility and lightweight. They rarely crack because of their thin-film structure and can be easily attached to a van roof without any difficulties. Check this article if you want to know if they are worth it.
This type of solar panel is not as efficient as the other types. Coupled with their limited warranty are still unattractive to serious Rvers who need a more efficient and better performing
Their main advantage is that they can be mounted anywhere but are handicapped in that they cannot be moved around as there are permanently fitted to a subtract.
Pros for flexible panels
- Aerodynamic design
- Very flexible
- Very light
- Easy installation
Cons for flexible panels
- Shorter warranty
- Overheats if not insulated
- Less efficient
How many solar panels do I need?
You need to properly understand the size of the system that you need in your van. This involves finding out your exact energy need. The best solar sizing tool to use is the [sherpa id=”068f9859″]. This online app calculates and computes your system requirements and also recommends the appropriate equipment.
You can also do this on your own by listing all your devices and total wattage and adding the full power you will consume in a day. Then you can start sizing your system, looking at the right
You need to consider your future growth plans as not to re-do your system once more. This can be seen as a system audit. You can list all the bare essentials you need in your RV and try to adjust your lifestyle around the critical power needs without out-stripping your solar installation.
Your budget is a significant factor when planning your solar installation. You can think ahead and get a budget sized installation and try to build around this setup as you grow into van-living
Picking Our Solar Panel and Batteries
I chose the ever-versatile and affordable [sherpa id=”068f9859″] for this solar installation.
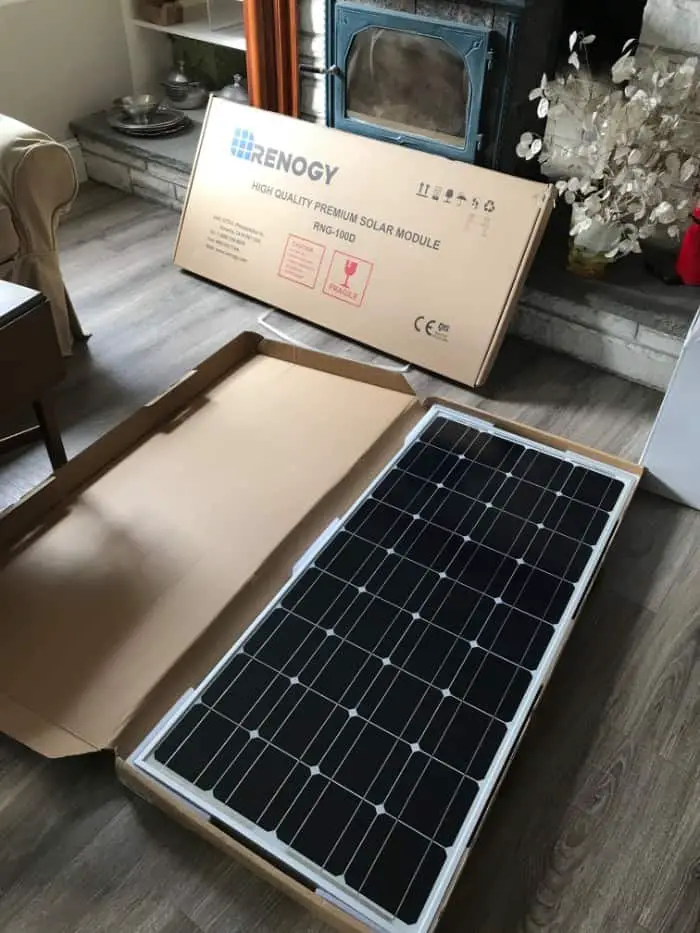
This is an excellent kit for anyone starting. It offers a solution that works for most novice and first-time van-lifers looking to install a solar system. I matched the equipment with a pair of VMAX 155ah deep cycle batteries.
This kit has all the accessories needed for the installation, no stress about picking up individual parts.
If you are on a tight budget or need a smaller system, you can also check these [sherpa id=”7feec15d”] and [sherpa id=”068f9859″] for more budget-conscious installation setups.
How do I install my system?
You need to thoroughly read your product manuals to have an understanding of your system. Manuals are usually comprehensive and very detailed installation guide with picture illustration to ultimately help you out. I recommend the[sherpa id=”068f9859″]which is an excellent resource for first-time installers.
Additionally, while you are there, the [sherpa id=”068f9859″] is a good start for getting that wiring diagram that suits every RV owner.
Preparing for the Perfect Installation
- Prepare, Prepare, prepare, l cannot stress this point enough
- Buy a marine-grade adhesive.
- Mock your system before installation
- Run your cables first and size them before the installation of solar panels.
- Measure before drilling your holes, preferably mark your holes before drilling, and have different options available if possible.
- Use the solar sizing calculator XXX to size your system correctly.
- Drive your van with panels flat and flush, not in a tilted position
- Triple check your electrical connections before turning on the system to avoid electrocution and shorting the equipment
- Have someone willing to help you if you need assistance, especially when carrying heavy loads.
Mounting the Solar Panels Step-By-Step
You would need an extra pair of hands to attach the
Indeed, don’t do this alone and ask for someone to help you. It will be much easier to lift your solar panels to the roof of your van, for example.
Having an extra pair of hands is very much advisable. You will be carrying heavy loads, and there is the inherent risk of hurting yourself.
What We Used to Mount Our Solar Panels
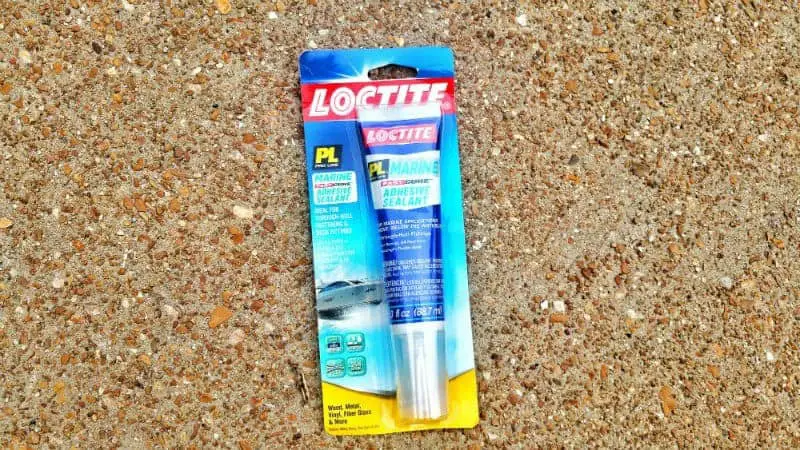
- Loctite PL Marine Adhesive
- Dicor Lap Sealant
- Caulk gun
- Tools (cordless drill, a ratchet set, hammer, putty knife)
- 1/4″ bolts, nuts, and washers
- Wooden blocks
- Spray paint
- Signstek Y Branch MC4 Cable Connector
- LINK SOLAR Weatherproof Double Wire Entry Gland
- 3M VHB Tape
- Rubbing Alcohol
- Grommets
- Sandpaper
Methodically lay your supplies to ensure a perfect installation and widely research on the most effective products to use. Don’t look at the lowest price! Otherwise, you will be picking up your solar panels off the highway or back-roads.
Step 1: Prep
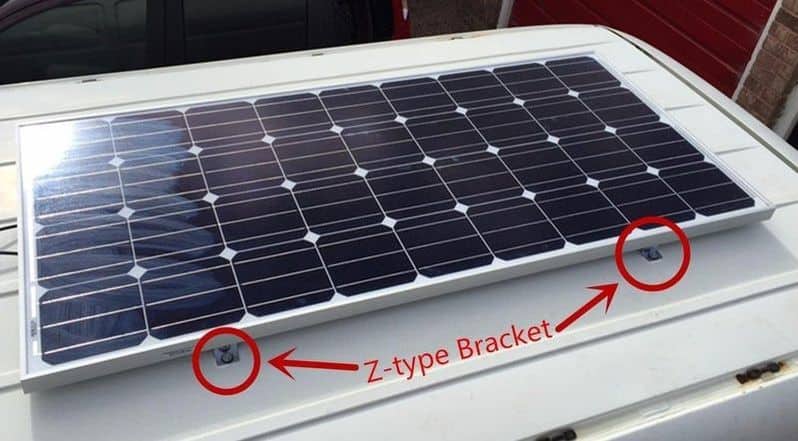
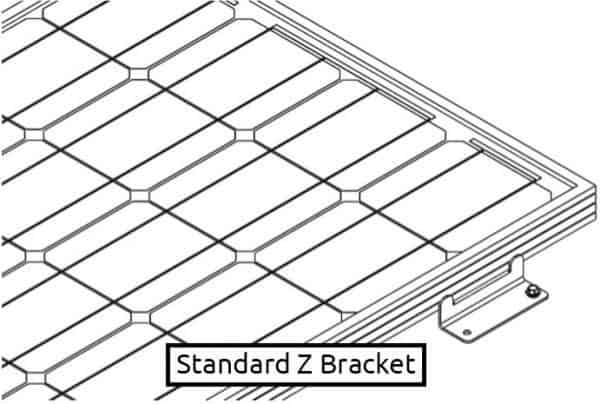
- I took out the four [sherpa id=”068f9859″] from the kit. These will be the medium with which we will attach the solar panels to the roof. We will use the provided bolt and nut to attach the brackets to the solar panels.
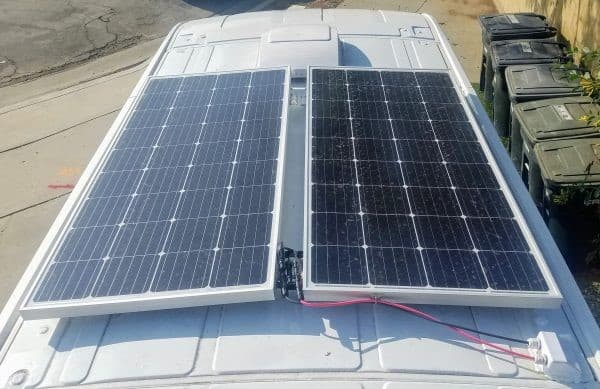
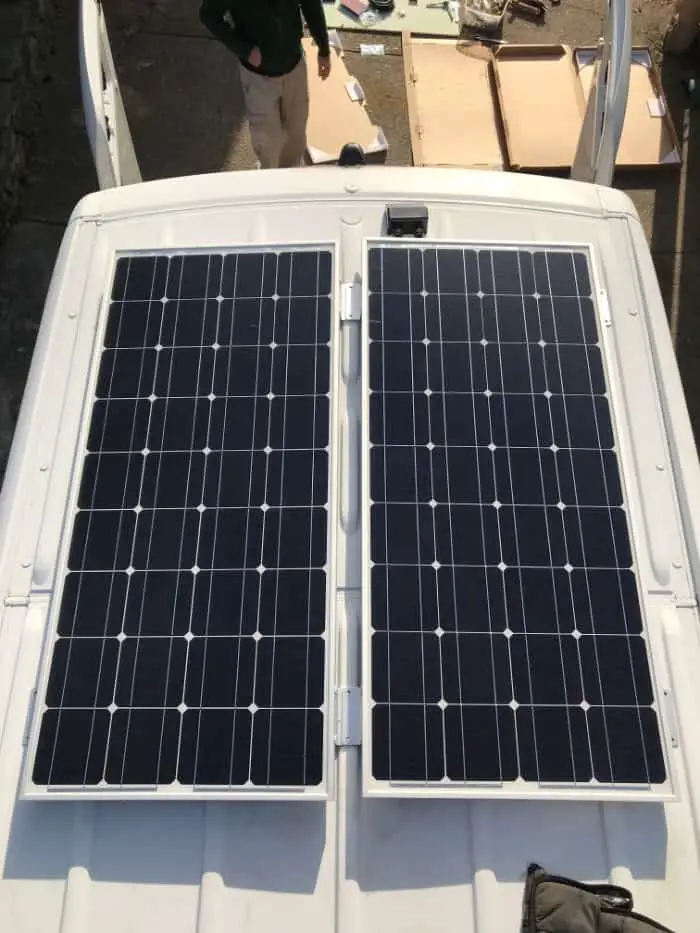
- I carefully lifted the solar panels to the RV roof and positioned them to where l wanted them to sit.
- I then decided to do a mock installation of the
solar panel to check if everything was lining up. This was an opportunity to dry mark my installation before the final installation. - You can test several layouts before settling on the best arrangement.
- Mark sure that the best layout suits your roof profile and that all mounts line up nicely.
- Using the attached z-mounts, I marked where each screw hole would sit using an erasable marker.
- I then removed the solar panels and set them down
Step 2: Drill Holes
- I drilled holes as per the template of the z-mounts.
- Because the roof wasn’t strong enough, l made wooden strips that l would act as an additional base for the mounts.
- Hopping back inside the van, I could see the holes in the roof where the panels’ eventual screws would go. Using the superglue spray, I glued the wood strips right under the holes.
- I then attached the four brackets to the bolt holes closest to the corners to hold the
solar panel in place. - The setup was that the bolts would be accessible from the van and that the
solar panel would sit on the roof column and would not unsafe when I am driving.
Step 3: Clean roof and apply the Loctite PL adhesive.
- For the adhesive to work well, l cleaned my roof with soapy water. I then used rubbing alcohol to clean the top and under the mounts.
- I spread a good layer of Loctite PL Marine Adhesive underneath the brackets. This adhesive is very effective and highly adhesive.
Related Articles:
Is Your RV Roof Turning Black? This Might Be Why
How do you clean flexible solar panels?
Best Adhesives for Flexible Solar Panels
Step 4: Bolting solar panels to the roof
Attaching the roof mounts with wooded strips provides better support for your
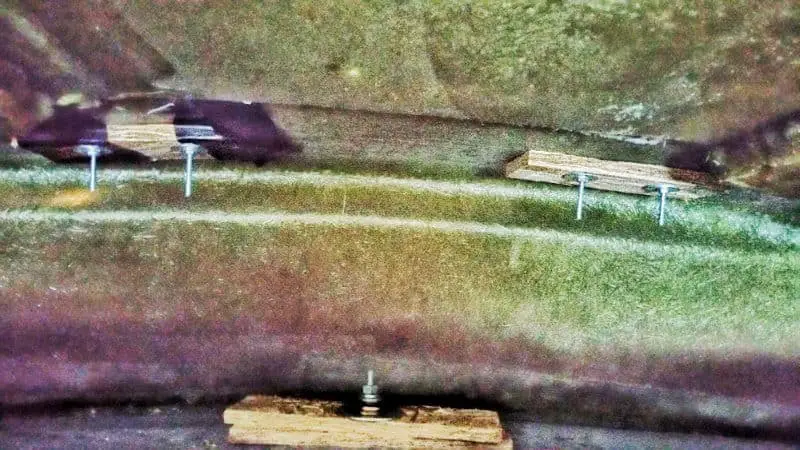
The wooden strips suits thin roof membrane than can collapse if the
- l bolted the solar mounts to the wooden strips, which provided a cushion for the mounts and reinforced the roof.
How to attach a
I recommend using this drill-less method to attach a
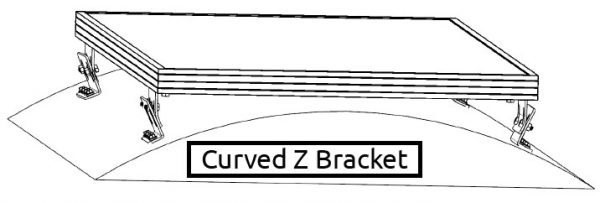
The first thing you ought to get is a [sherpa id=”068f9859″], which is designed for RV vans with a curvature roof. This is a two-piece mount component that consists of 2 sliding metals. The other part is mounted to the
Over time l wouldn’t recommend using this type of mounts. They are:
- More expensive than standard mounts
- They raise the solar panels a lot higher, and therefore, they are a lot more visible. It’s usually ugly and creates a lot of wind resistance.
- These mounts are difficult to adjust to get the right stance for the
solar panel
A comparison of the standard z bracket and curved z mount in an RV roof installation
Installation Instructions
- Follow all the steps to prepare your
solar panel for installation as in Method 1 above - Using brass expansion brackets, attach the mounts to the pre-drilled holes on the
solar panel frame. - This type of nut is self-sealing. It consists of a rubber inner part. The bolt’s mechanics are that when the bolt is being tightened, the inner rubber sleeve expands, pushing the sleeve out, thus providing a seal around the bolt. The rubber sleeve also acts as an anti-rattle cushion when driving.
- I then carried the solar panels to the roof for a mock installation and marked the locations where l would want to drill my holes.
- With a power drill, l drilled the mounting holes according to my mount bracket template, where l would insert my expansion bolts through.
- I put a grommet seal on the hole and sealed the edges with Dicor Lap Sealant to provide a waterproof tight seal.
- I inserted the expansion bolts through the holes to mount my lower part of the bracket mount.