A van with a solar power system installed allows you to be a lot more independent during your trip. It’s a luxury to charge your devices on the good without the need to look for a coffee place or restaurant with available plugs.
But I know how confused I was when I decided to install a solar system on my van. Unless you have some experience with electricity, batteries, and wiring, it can be challenging to understand everything. In this article, I’ll explain how a solar system works and its main components.
To understand how solar panels work in a van, you need to get the bigger picture first.
A solar system transforms the energy coming from the sun into electricity. This electricity is then either store in a battery bank or directly used to power something. Most of the time, the electricity generated by the sun will be stored in a battery bank to allow future usage of it. Solar panels are the main component of a solar system. They are responsible for collecting the sunlight and transforming it into electricity.
If you are not yet ready to install a solar system by yourself, don’t worry, this guide will help you during the whole process.

First, let’s have a look at the primary electrical terms.
Basic Electrical Terms
The subject of electricity can be a bit scary, confusing, and very technical for some. But, you will only need to understand the bare basics to assemble your functional solar setup.
- Circuit: a connection of electrical conductors that are interconnected.
- Current: the amount of electrical charge flowing in your circuit.
- Amperes (Amps): the base unit of an electric current.
- Volts (Voltage): electric potential difference unit, more on Wikipedia.
- Watts: the unit of power used to quantify the rate of energy transfer, more on Wikipedia.
- Ampere hour (Amp hour or Ah): Amount of power (amperes) available for 1 hour; batteries are usually sized against the power they can provide in an hour.
First, do you need a solar power system?
Before you start spending hundreds of dollars on a solar system, you have to ask yourself if this investment will have a real impact on your current lifestyle. Do you depend a lot on electricity at the moment? Are you always looking for a place to charge your material? Try to estimate your electricity needs and think about how much a solar system could make a difference.
Here’s a helpful list of questions you can ask yourself to see if solar power is right for your situation:
– What’s your current budget for electricity?
You should weigh the overall costs of going solar vs. your current spending on electricity. Would a generator be more suitable for you? Going green and off the grid with a solar system is excellent, but buying an RV generator and gas can be cheaper for many situations. Estimate your electricity costs for both solutions (for a year minimum), and then you’ll be able to decide if it’s a valuable investment or not.
– Are you spending a lot of time remote camping?
Are you spending most of your time in remote areas? What type of camping are you doing? If you’re going to be boondocking in the middle of nowhere a lot of time, having solar power can make a significant impact on your daily life. Running a generator can provide you with a reliable source of energy, but it’s noisy, not environment friendly, and you’ll have to pay for fuel to make it run.
– Do you like paid campgrounds or RV parks?
If you like spending most of your time at serviced camper grounds or RV parks, they generally have shore power, and having a solar system won’t make any difference.
How to calculate your needs for electricity
You weighted to pros and cons and decided to invest in a solar system. That’s great! We can now get started!
The first thing you want to do when planning your future solar system is to estimate how much power you’ll need for your installation. To do that, you simply have to sum up all your different electric items’ wattage and assess their average daily usage.
Renogy made a great tool that does exactly that. You can have a look at their Solar Calculator here.
Understanding How a Solar System works in a van
Solar intertie photovoltaic (PC) systems convert the sun’s energy into electricity, mainly thanks to solar panels.
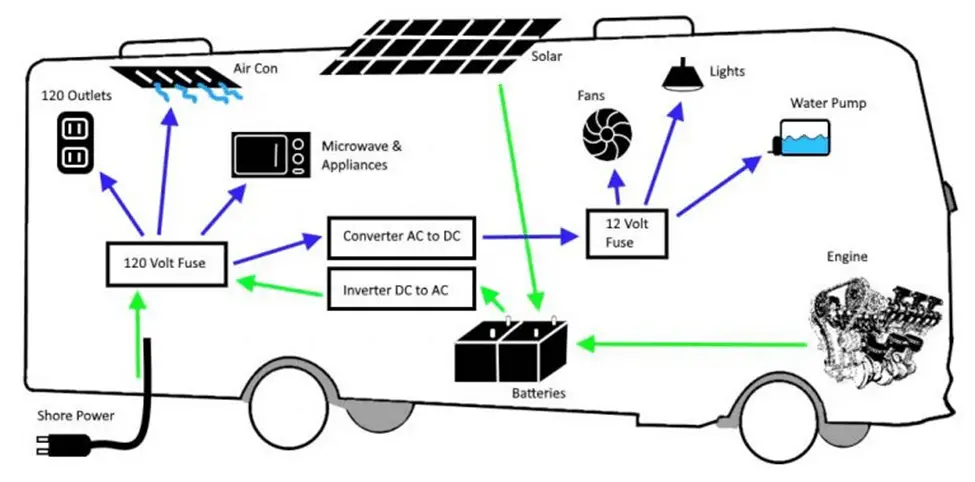
The basic solar-charging system consists of roof-mounted solar panels running through the charge controller and the batteries.
If you’re using a battery, you’ll also need an inverter to convert the DC power from the battery to usable AC power for your appliances.
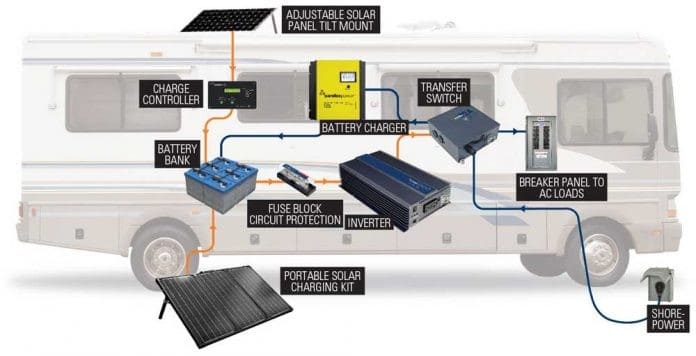
What are the Main Components of an RV’s Solar System?
Whatever your electrical needs are, you’ll always need these different elements in your solar installation. Let’s have a look at each of them:
Solar Panels
Solar panels are made of a complex array of photovoltaic solar cells. I can’t explain precisely how they work, and I don’t think you came here for that. There are still some important features to understand. Let’s have a look at the main ones:
Two main types of Solar Panels
– Monocrystalline
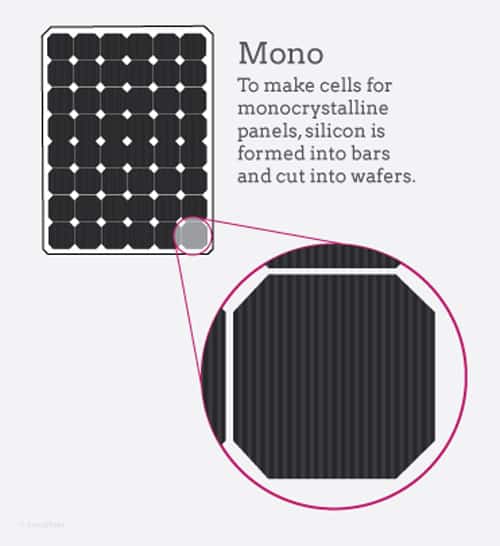
You can recognize them with their uniform black coating. They don’t have this mix of different blue layers like the polycrystalline solar panels. They are more efficient than polycrystalline solar panels but cost more as well. If you don’t have a lot of real estate available for your setup, you’ll want to have monocrystalline panels.
– Polycrystalline
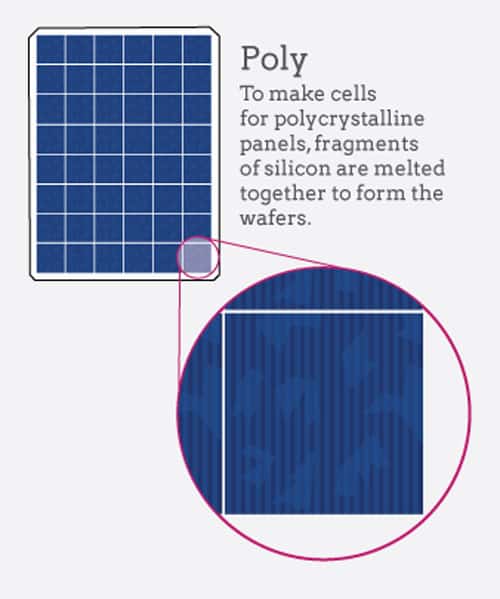
This type of
Which panels should I choose?
The answer to this question will depend on your situation, how much power you need, and the amount of surface you have available to mount your solar system. If you have a small budget, you’ll prefer to save some money and buy polycrystalline solar panels. If you can put the money, and especially if the roof of your van is small and you need a lot of power, you’ll choose monocrystalline solar panels.
– Rigid Panels or Flexible Panels?
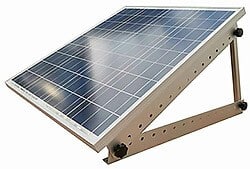
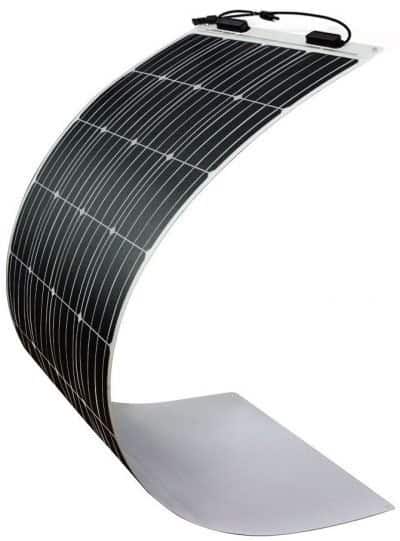
Going with a flexible panel can be a great option if you have a pitched roof. Pay attention to your flexible panels’ build quality and carefully look through the available reviews from other buyers. You don’t want to purchase flexible panels with an insufficient protection coating that could be scratch by some trees. Furthermore, to correctly fix your flexible solar panels check this complete guide we made.
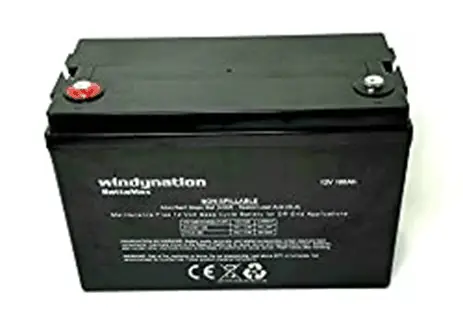
Batteries
Related Articles:
A guide to the best batteries for on the go solar
How many batteries does a campervan need?
There are different types of batteries, and it can be confusing and tough to know, which will best fit your installation.
Choosing your batteries is the most important decision (and the most expensive one) you need to make when planning your solar power system. Your battery bank stores all the energy your solar panels have been able to produce. A good rule of thumb is to have a sufficient capacity to be autonomous for at least four days in a row without sunlight.
Therefore, you need to carefully assess your electricity needs and estimate how many days a fully loaded battery bank could last for you.
Weight is also an important point to consider. When you’re living on the road, you want to save weight wherever it is possible. It will not only allow you to save money in the long run by consuming less gasoline, but it will also make your vehicle more secure and more comfortable to drive.
Enough talking, let’s have a look at the different types of battery available on the market:
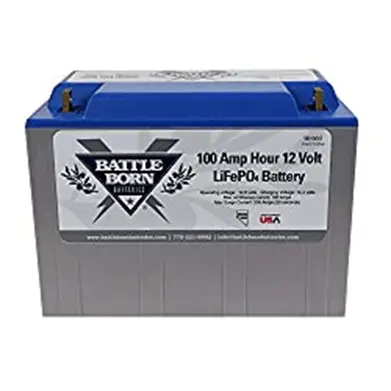
– Lithium-Ion
Lithium LiFePO4 batteries are currently the most efficient type of battery available. Unfortunately, they are also the most expensive ones.
![]() Pros:
Pros:
- Longer lifespan
- Higher Depth of Discharge
- Lighter
![]() Cons:
Cons:
- Expensive
– Lead Acid
This is the oldest technology in battery technology. If maintained properly, they still are the cheapest short-term and long-term. Maintenance is more involved and must be managed more carefully due to ventilation and liquid acid inside. It is not hard to do, but for small amateur systems, they aren’t as appealing
![]() Pros:
Pros:
- Cheap up-front cost
![]() Cons:
Cons:
- Short life
- Require regular maintenance
- Should only be discharged to 50%
- Have to be vented
- Need to sit upright at all times
- Longer re-charge time compared to Lithium-Ion
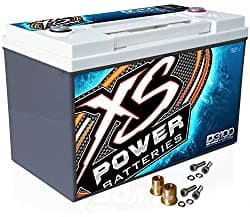
– AGM
Over the long term, this is the most expensive battery because they wear out faster than the other two. In the short term, they are cheaper than lithium. They are common and all-around a good starting point for most amateur installers.
![]() Pros:
Pros:
- Can be placed on their side
- Don’t require ventilation
![]() Cons:
Cons:
- Shorter life
- Should only be discharged to 50%
- Longer re-charge time compared to Lithium-Ion
Important points to consider when choosing your battery
Usable vs. Nominal Battery Capacity.
- Nominal Battery Capacity: This is the advertised (or named) capacity of the battery. They are often denoted in Ampere hours (Ah).
- Usable Battery Capacity: This is the percent of the battery’s nominal capacity that can be safely used without shortening the battery’s lifespan.
The battery chemistry itself causes the discrepancy between these two measures. When going under a certain level of charge, some chemistry will be altered and therefore lose their efficiency over time. This is why batteries have something called a Depth of Discharge, or DOD. It corresponds to the amount of discharge a battery can handle without any damage. The closest to 100% this number is, the better.
For example, Lithium batteries are currently the batteries that can handle the higher DOD, reaching almost 100%. On the contrary, a Lead-Acid battery will take only a 50% DOD. You need to check this DOD characteristic before any purchase, as it will significantly impact your solar system.
Of course, you can go under this advertised DOD, but this will quickly reduce the lifespan of your battery.
For example, to have 100Ah of usable battery capacity, you would need a nominal 200Ah Lead-Acid battery vs. just a nominal 100Ah Lithium battery.
It is advisable to consider the price per usable capacity rather than the nominal capacity of the battery.
Inverters
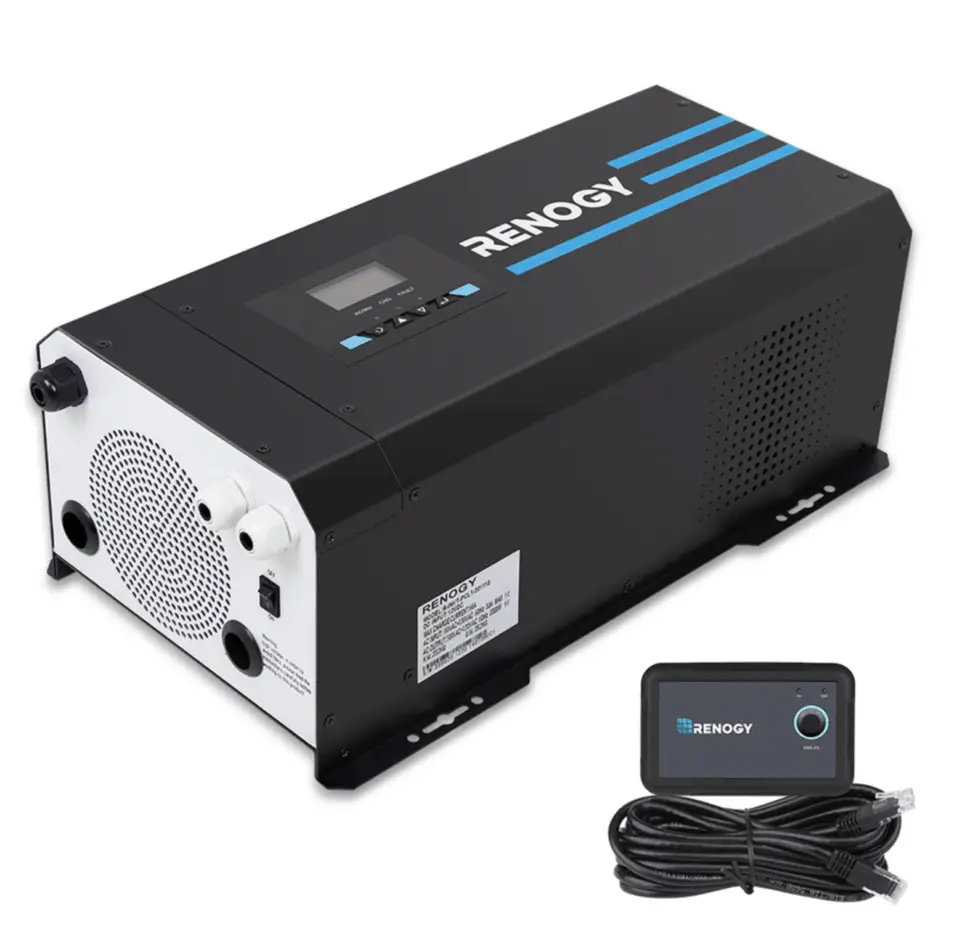
The current from your battery isn’t made to power your standard electronic tool. You need an inverter to convert the Direct Current (DC) from your battery to an Alternating Current (AC). Indeed, AC allows you to power any device powered by a regular plug. Most of the inverters will convert a standard 12 volts DC to a higher voltage (usually 120v) AC.
Furthermore, it’s essential to check for a Pure Sine Wave inverter to charge electronics like laptops and cameras correctly.
Besides, you can also purchase an inverter that can charge your battery as well. It means that you’ll be able to recharge your solar system whenever you are in a place with shore power.
Lastly, when you’re choosing your inverter, you want to pick one with sufficient watt capacity to support all of your devices. For example, appliances like toasters or kettles use a lot of power (watts) and might not work if your inverter can’t handle it.
Charge Controllers
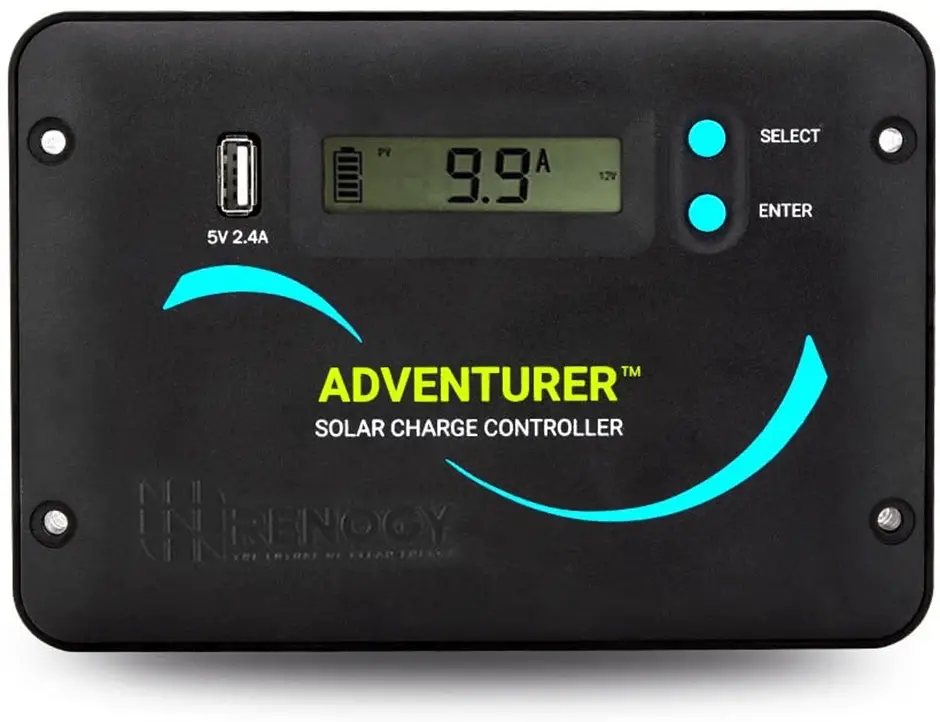
This device can be seen as the computer behind your RV system. It protects, and as its name suggests, it charges your batteries optimally. Pay attention to this component as it will dramatically impact how long your batteries are going to last.
Therefore, you want to avoid purchasing PWM (Pulse Width Modulated) and go for an MPPT (Maximum Power Point Tracking) charge controller. They are currently the best and most effective charge controller.
What does a solar charge controller do?
A solar charge controller limits your
If you do not connect a solar charge controller between your solar panels and your batteries, you may overload your system and cause fires, or your batteries can explode.
Here is a simple diagram of what this looks like.
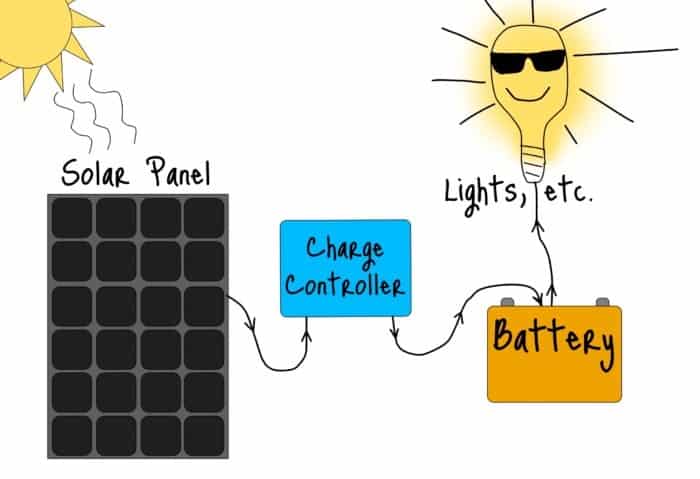
Simple enough, right? If you want to have a complete explanation, check this excellent video William did on his YT channel:
Okay, now let’s introduce a few more van life solar components and explain what they do.
Fuses
It can be defined as a bridge in a circuit that protects appliances in the event of a power surge. A fuse prevents the wiring from burning and causing fires. The fuse breaks the electrical connection if the electricity is unable. A fuse is always sized according to the amount of electricity flowing through it and the highest current it can resist
Bus
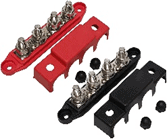
A bus provides a connection point according to the parity of the electricity flowing through it. It either be a negative or positive parity bus. It serves as a terminating point for several connections.
Fuse Box
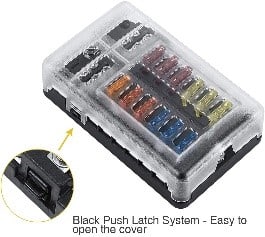
A Fuse Box is a combination of buses (one positive and one negative), with places to insert fuses along each circuit. This allows you to easily fuse all your connections while also keeping them safe and organized.
It can be described as an integrated bus with places to place fuses together, proving protection in an organized and coordinated structure.
See how there are only two wires connected to the battery, instead of all the cables running out of the DC devices. And the extra empty connections on the buses give you the ability to add more devices in the future easily.
Ground
This is a physical product but means a place where the electrical connection provides a pathway to the ground or earth.
In the case of a vehicle, like a van, your electrical system will be grounded to the van’s metal chassis. It is common to connect your grounding wire to a part of the van’s interior metal framing near your battery. The purpose of the ground is to provide a safe escape route for an electrical system that becomes faulty. Before a loose or damaged wire can cause a shock or fire, the dangerous electrical current will terminate at the ground.
Battery Monitor
Excellent addition to any solar system and will eliminate the guesswork from battery usage. This unit is able to monitor the amperage flowing out of the battery bank and will give an accurate state of charge reading on the LCD screen.
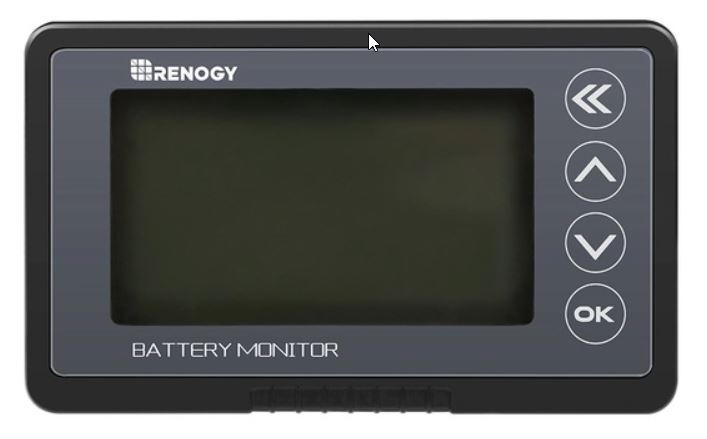
To keep track of the level of charge in your battery bank, you will need a battery monitor. While not technically required, a battery monitor is highly recommended to keep track of how much power you have so that you can keep them healthy.
These can range anywhere from $15 to over $200. The cheaper ones usually only have a display that shows the basic current battery stats. And the more expensive models, like this top-of-the-line Victron Battery Monitor, can connect to your phone via Bluetooth and show you all kinds of advanced statistics.
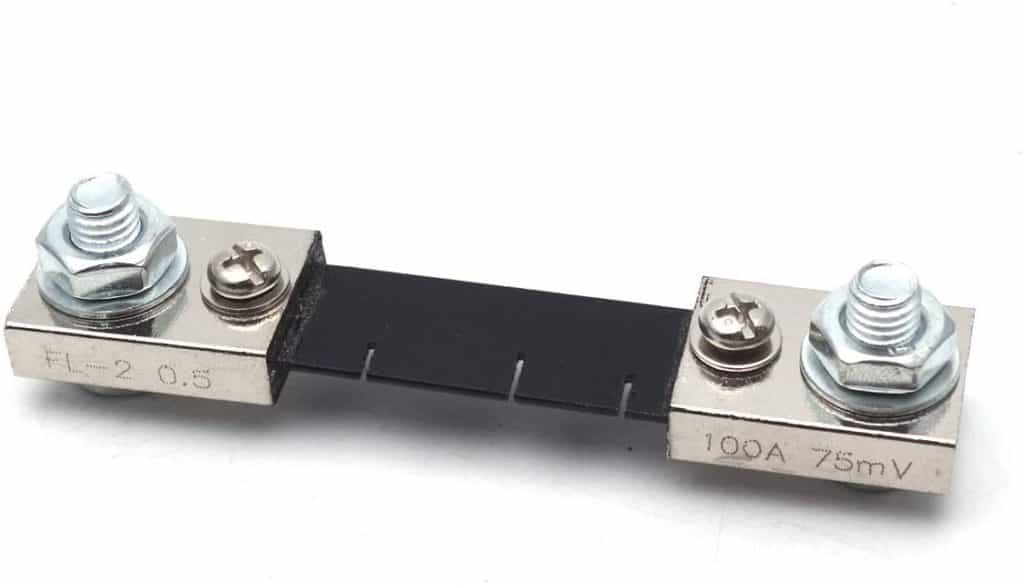
Shunt
It’s the tool that allows your battery monitor to do its job. Your battery monitor needs to measure all the power going in and out of your battery. And the shunt is where the battery monitor “sees” what’s passing through.
Instead of connecting all the negative wires directly to your battery’s negative post, all connections are attached across the shunt. You combine all negative wires to one side of the shunt and then just have a single wire that runs from the other side of the shunt to the negative battery terminal.
Then your battery monitor has a wire that’s connected to the middle of the shunt so that it can read all of the currents in and out and provide accurate readings. This is the grey wire in the diagram below.
Wiring
Wiring comes in many sizes and types. To properly determine if the wire you’re using is safe, you should make sure your wire size can handle the number of amps you will be placed through it. The main way to determine wire sizes and their ratings are to use the American Wire Gauge system (AWG). Most wires you purchase from the store will have a rating on them depending on their size.
Here are some standard sizes for wiring and how many amps they can usually handle:
- 14-gauge wire: 15 amps
- 12-gauge wire: 20 amps
- 10-gauge wire: 30 amps
- 8-gauge wire: 40 amps
- 6-gauge wire: 55 amps
- 4-gauge wire: 70 amps
- 3-gauge wire: 85 amps
- 2-gauge wire: 95 amps
Choose a pre-made solar system kit to avoid errors.
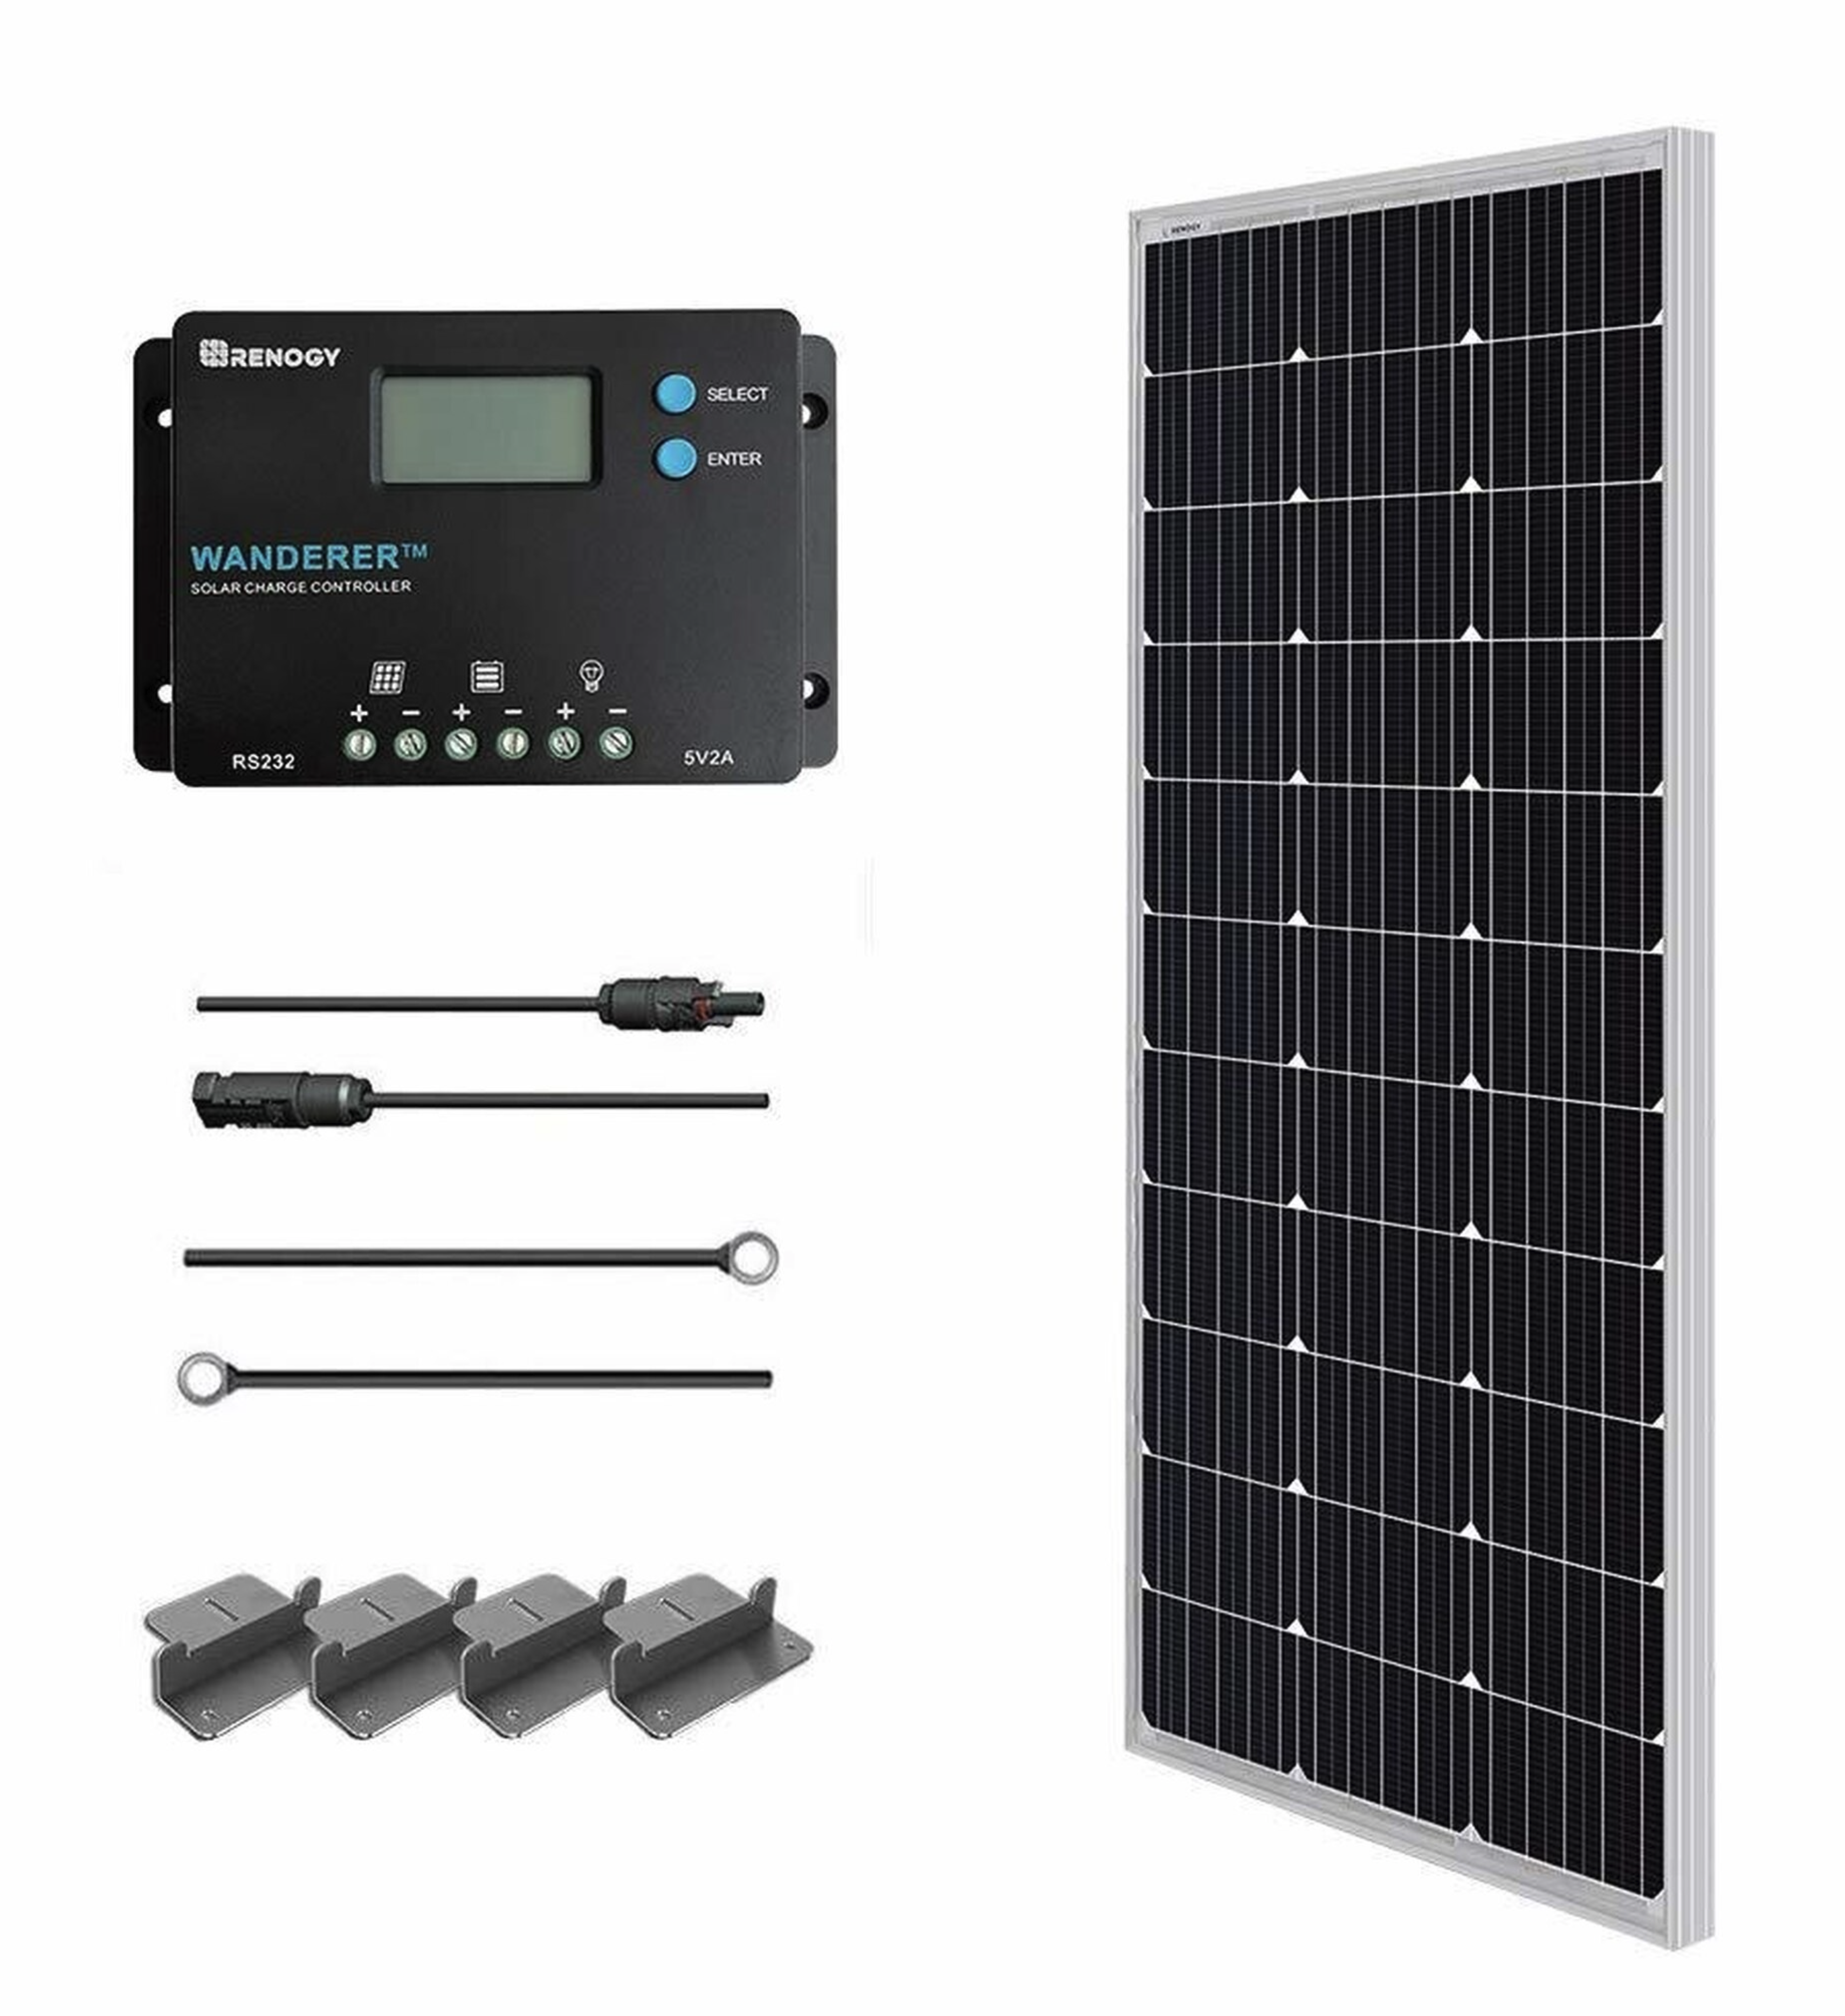
A helpful product available to consumers is solar kits with pre-chosen components that integrate well with each other. This saves you the trouble of picking all the parts individually. They can help beginners hit the ground running on assembling a solar setup. Here are a few solar kits from Renogy. They are offering three different kits based on the amount of energy you need.
The Renogy 100W Solar Power Starter Kit is perfect for new customers wanting to get a start in solar. The Starter Kit is great for off-grid applications, such as RVs, trailers, boats, sheds, and cabins.
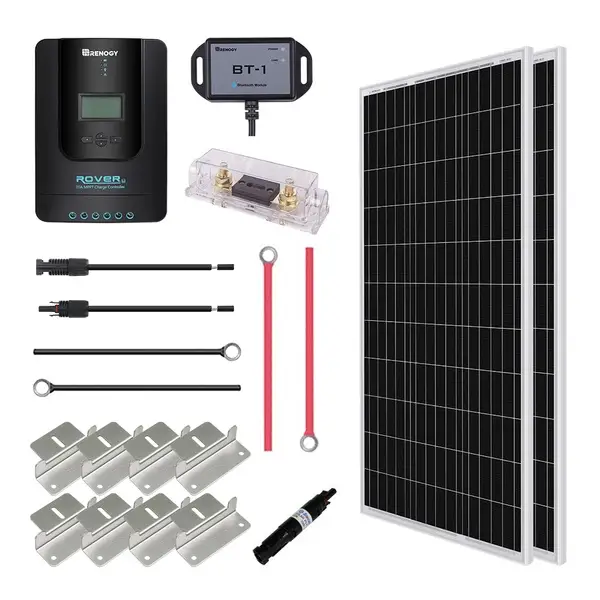
The Renogy 200W 12V Premium Kit uses our most efficient products to boost your off-grid system to its highest potential. This kit includes the new 100W Mono Solar Panel x2 which is not only sleek in size, weight, and color but are made of the highest efficiency solar cells that Renogy has to offer.
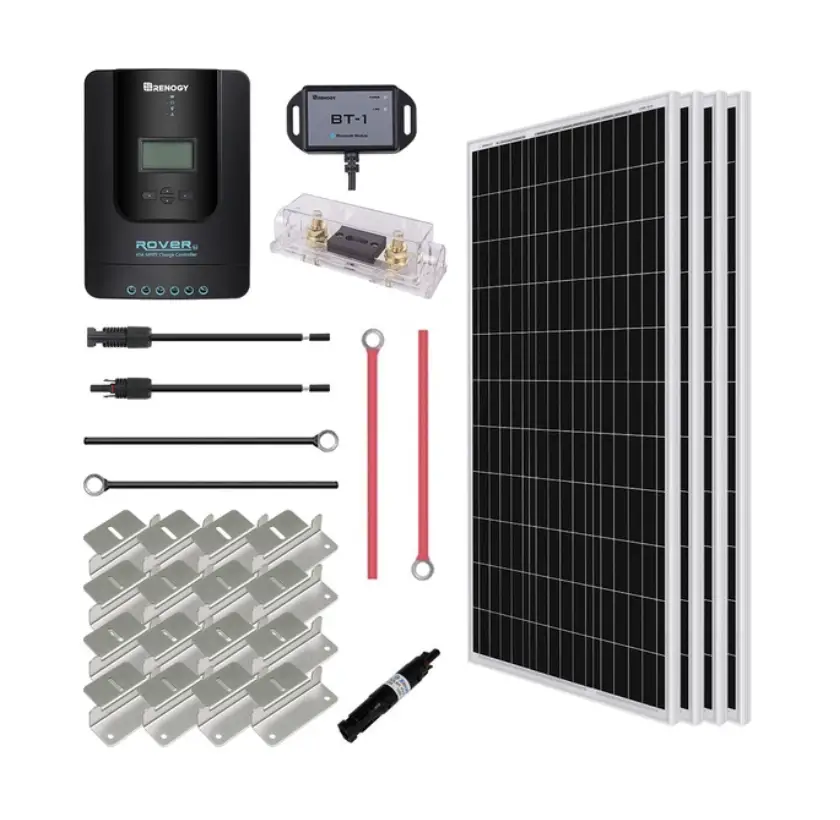
The Renogy 400W 12V Premium Kit is the most economical choice for the off-grid adventurer. With the ability to access energy wherever there is sun, the options for your journey are limitless.
Building a Solar Setup without a Kit
You can potentially save money if you buy all the parts for your solar setup individually. But I don’t recommend this method for beginners. For starters, this puts the pressure on you to understand the specific ratings and limitations of each component you choose to ensure that they will work together.
For example, if you buy 600 watts of solar panels, you need to ensure that your charge controller can handle the maximum power those panels can produce.
However, if you take the time to understand each component’s tech specs, then it’s possible to choose parts individually for your solar setup. And by shopping around for the absolute lowest price on each element, you could potentially save money.
Conclusion
I hope this post has helped you understand the basic concepts and products of van life solar components. Don’t be intimidated if you didn’t quite understand everything. Even experienced solar installers will occasionally have to research and relearn things as they work on their solar system.