Keeping moisture out of a camper is incredibly important because it can lead to mold, mildew, foul odors, bacterial growth, and more. If you don’t want to deal with these potentially harmful issues, it’s time to take action. Fortunately, there are plenty of solutions to make your camper comfortable and moisture-free. Keep in mind that all this information is particularly important for your van build.
To keep moisture out of a camper, use a dehumidifier, crack the windows and install a roof vent. Ventilation will dry the moisture before it can invite mold and mildew. You could also add rain guards over the windows and place a tarp over the camper to keep the rain out of it.
In this post, we’ll cover fifteen top-notch methods to keep your camper dry throughout the year. We’ll also discuss which ones are the most effective and budget-friendly. Enjoy!
Use a Dehumidifier
If you want to prevent moisture from entering your camper, a dehumidifier can make a significant difference. They absorb moisture in the air, preventing it from collecting in the windowsills, cabinets, under the mattress, and so on. There are several types of dehumidifiers, but we recommend using a portable low-power option.
SMALL & COMPACT: Lightweight, Compact and Portable Dehumidifiers for Home, Capable of removing up to 9 ounces of water per day with a 17-ounce water tank capacity. Ideal size dehumidifier for rooms of 1200-2200

The Pro Breeze Electric Mini Dehumidifier is a compact and portable dehumidifier designed for home use. It is capable of removing up to 18 ounces of moisture per day with a 52-ounce water tank capacity, making it an ideal size for rooms of up to 2200 cubic feet. It is also highly rated on Amazon, making it a popular choice for those in need of a reliable and effective dehumidifier.
Whether you prefer a battery-operated or plug-in dehumidifier, these tools have become irreplaceable for the van life and camping communities.
Crack the Windows and Use Bug Nets
Lowering the windows in your camper promotes optimal airflow and prevents moisture from causing problems. However, it can invite bugs into the vehicle.
Mount a bug net outside of the window to keep insects out and let cool air flow through the camper. It’ll provide the best of both worlds while also keeping you cool.
For the best results, open two windows that are as far apart from each other as possible. The goal is to create a cross breeze that flows from one side of the camper to the other. This method will limit moisture and make the camper feel much less stuffy and humid. It’ll also limit the amount of condensation on windows and metal components from a long night’s rest.
Related Article:
– Keep the bugs out with the Window open
Get a Roof Vent Fan to Keep Moisture Out of a Camper
For true comfort at your convenience, the Fantastic Vent has a built-in thermostat to take care of maintaining your desired temperature.

The Fan-Tastic Vent Van is an excellent example of a top-of-the-line vent that pulls moisture out of the vehicle. You can mount it to a travel trailer, RV, campervan, and any other vehicle you’d like to. These fans come with multiple settings that either pull air out or push air into the vehicle. You can use them as a part of the previously mentioned cross breeze technique, too.
Heat rises, which is why it’s essential to have a place for it to escape at the top of the camper. If it stays near the ceiling, the hot air can cause condensation to drip all over the place. Not only is it difficult to clean, but it also makes it hard to know where mold might grow.
If it’s rainy, you can lower the vent’s lid while still achieving a nice breeze.
Use Silicone Crystals for Moisture Absorption
KOA (Kampgrounds of America) explains silicone crystals can be useful for moisture absorption. Some campers prefer to use silicone crystals, including cat scentless cat litter, to stuff socks and soak moisture from the air. These crafty inventions last for quite some time. They might not absorb every drop of moisture, but they can aid your ventilation techniques.
You can also use alcohol wipes since they remove moisture. Ensure your camper’s windows are open to aerate the chemical odors, then clean the vehicle once or twice a week. This method will prevent moisture and get any remaining water out.
Find this content useful 🙂 ?
Subscribe to our Newsletter and get a free Solar Electric Diagram + shopping list.

Try Not to Cook Inside the Camper
Camping World details how cooking inside of your camper can cause countless issues. Some campers come with built-in microwaves, ovens, and stoves, but they should only be used if all of the windows are open. Using a camping stove in a camper can cause fumes to build up, condensation to grow from the warmth, and odors to soak into the fabric.
Condensation forms when a warm surface is matched by a cold front on the other side. If you cook in the camper, it’ll inevitably create heat on the walls. The cool outside air will hit the metal or fiberglass walls and make it humid.
The good news is a roof vent fan, such as the Fan-Tastic Fan mentioned earlier, can remove the warm air and let you cook inside more often.
Ventilate the Camper When You Shower
Showering in your camper (including a wet bath or traditional bath) will leave moisture all over the walls, bedding, and more. If you’re adamant about showering in the camper, we suggest opening a roof vent, using lukewarm water, and cracking the windows. Nothing’s worse than showering and ruining your camper!
According to RV Share, using campground showers is the best route. You should try only using your camper’s shower if you don’t have access to a campground’s facilities. Limiting your time in your vehicle’s bathroom will prevent condensation and mildew.
Heat absorbing design: This solar shower bag is made of environmentally friendly and leak-proof materials which are safe for human health. It heats water to 113°F (45°C) in 3 hours with direct sunlight.

You could also use a portable shower. Gravity-fed showers, such as the KIPIDA Solar Shower Bag, heat up from the sunshine and hang on a tree for a quick cleanup wherever you go.
Related Guide:
– Showering on the road – full guide
Never Hang-Dry Clothing Inside
Washing and drying your clothes by hand is often irreplaceable on the road. If you want to stay fresh and save money, you can wash your clothes in a bucket and hang-dry them on a line. However, drying your clothes in the camper will make all of the moisture escape into the fabric, wood, and bedding.
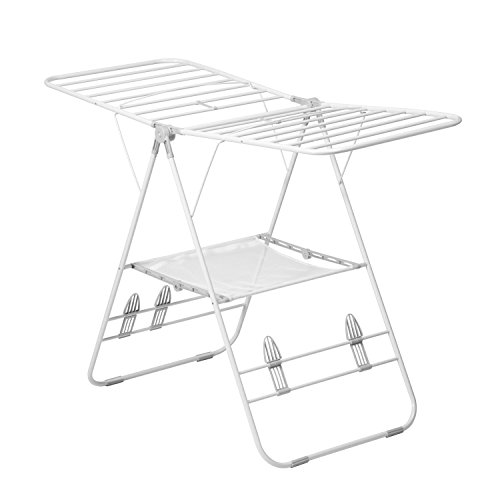
Instead, you can use a clothesline to keep your clothes dry. Hang it on a tree, your camper’s window, or anywhere else that can support the weight of your clothes. You could also place a portable, battery-powered fan nearby to dry them quicker. Remember, drying your clothes in the sun can make them ready much faster.
- Steel
- Made in USA or Imported
- Dry a large load with 46 linear feet of drying space
- Folds down to a slim 3-inch profile
Hand Dry Dishes If Possible
Moisture from any source can cause humidity and excess condensation, including from your dishes. Use paper towels or a soft microfiber cloth to get rid of the moisture on your dishes once you’re done washing them. You could also dry them outside if it’s sunny. A nice breeze will get rid of the water drops in no time!
If you don’t have the time to hand dry your dishes, we suggest using a drying rack. Place it over the sink to let water pours into the tub or disposal rather than the counters. Those who don’t have a sink can use an absorbent dish drying mat and dry it outside after the dishes are good to go.
Remove the Condensation Each Morning
It doesn’t hurt to have a cloth nearby every morning. Check the windows for condensation, especially on extra-cold nights when your breath can fog the glass.
While it goes away if you forget about it and don’t use a cloth, the water will drip into the windowsill and trap mold and bacteria where it’s hard to reach.
Fortunately, using all of the methods suggested throughout this page will drastically limit how much condensation builds on the windows. If the air is flowing through the roof vent and windows while getting absorbed by a dehumidifier, there won’t be too much moisture to remove by hand.
Condensation isn’t nearly as bad during hot summer nights. If you place your van life route or camping vacations in warm climates, you won’t deal with too much morning condensation (unless you camp in a humid state, such as Georgia, Florida, or the Carolinas).
Insulate the Camper Before Sleeping in It
Insulation is a crucial component of preventing and removing moisture from the inside of a camper. It’ll keep you warm and keep condensation from becoming a big issue.
Here are the three most common types of insulation:
- Spray foam: This insulation comes in a can that sprays all over the walls. Much like all types of insulation, it needs to be inside the interior panel of each wall and has to be seamless.
- Foam batts: These batts come in rolls and look like the cotton candy insulation found in attics. Wear a mask and goggles while installing this insulation since it contains fiberglass.
- Foam insulation boards: These boards are some of the easiest and most efficient forms of insulation. Cut them down to size, place them inside the camper’s walls, seal them with spray foam between all of the gaps, and you’re ready to go.
Upgrade the Weather Stripping
If your camper has old, worn weather stripping, the rain can get inside. Remove the old stripping, purchase a new set based on your vehicle’s make and model, and install the new stripping. This simple tip can prevent excess condensation, too. It’ll also stop warm or cold air from flowing into the camper from outside.
Weatherstripping is a crucial and irreplaceable part of owning a camper. If there’s not enough stripping, bugs, moisture, and other unwanted contaminants can find their way into your van or RV.
Regulate the Camper’s Temperature
Remember, a cold and warm front is what creates condensation. Condensation leads to mold, and mold ruins wood and fabric found throughout your camper. It’s also very dangerous for your health, especially in such a small space.
You can use your vehicle’s air conditioner or heater to regulate the temperature to match the outside temperature at night.
Make sure you don’t leave the vehicle running for too long. It’ll waste the battery and fuel while also causing a lot of noise for nearby campers. However, a short burst of hot or cold air every few hours can prevent condensation and discomfort.
Feel free to run fans (including your roof vent fan) to circulate the warm or cold air.
Additionnaly, you can use a Analog thermostat to better control the temperature inside your RV:
Easy to install wall-mounted thermostats control heating and cooling systems from one location.

Hang a Tarp During Rainy Days
If you don’t want to hear the patter of the rain or want to protect your roof vent from letting water into the camper, you could hang a tarp overhead. Another option is to use a canopy umbrella to prevent water from getting into the vehicle.
Tie the tarp to nearby trees and other high surfaces. It’s not advisable to drape the tarp over the camper while you’re sleeping inside because it won’t let the heat escape. This method can make the camper stuffy and unbearable, especially if it’s warm and rainy.
We suggest tilting the tarp to a slight angle, so the rainwater slides off instead of pooling in the middle of the tarp.
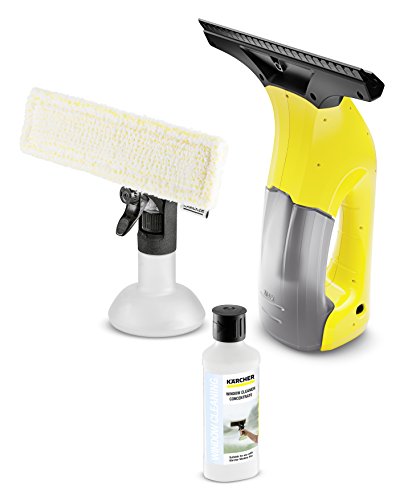
Fully Ventilate the Camper Once Per Week to Keep the Moisture Out
Find a nice, relaxing campground on a mild-temperature, breezy day and open all of the windows, vents, and doors. Turn on a fan or two and let the camper ventilate.
It’s best to do this essential tip once per week to get rid of moisture you might’ve missed deep in the crevices around windows and other hard-to-reach areas.
While you’re ventilating the van to remove moisture, you could clean it with the previously mentioned alcohol wipes. Sweep the camper with a broom, wipe down all of the surfaces, and take a couple of hours to perform a much-needed deep cleaning.
Install Rain Guards On the Windows
Rain guards cover the top of each window at an angle, letting the water from rain and other sources flow down the side. If you crack your windows for ventilation, they’re an absolute necessity.
A high-end rain guard is relatively inexpensive and is typically made of plastic. Snap them onto the upper edge of each window and watch as the water stays out of your camper.
These rain guards are also useful if you don’t want other people to know you have the windows cracked. They provide privacy from other campers and protection from the rain.