Hi-van is supported by its audience. When you purchase using our links, we may earn an affiliate commission (no added cost to you). Learn more
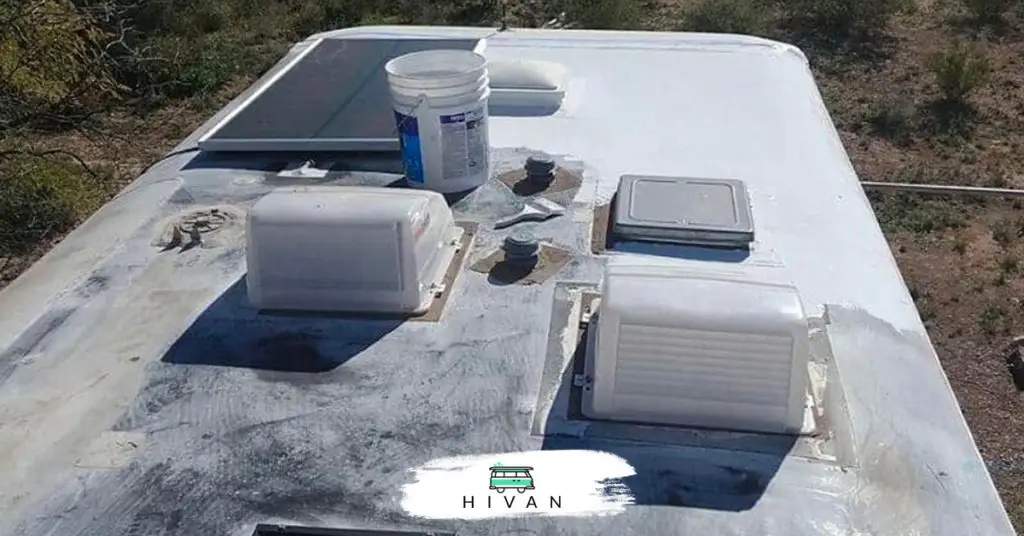
So, you’re planning to hit the road with your RV again after a winter at home. But when you go to pull it out of storage, you notice the roof is turning black! A black roof can not only be unsightly, but it may also indicate a problem that you need to deal with as soon as possible.
RV roofs usually turn black when there is mold growing on them or when the roof is reacting to industrial pollutants in the air. If your roof has turned or is in the process of turning black, you will need to clean the roof immediately and reseal it.

The rest of this article will explore ways to treat black RV roofs, including cleaning and reseal them.
Why Your RV Roof Is Turning Black
Today, most RV roofs are made of rubber, though you can find options with aluminum and fiberglass roofs. If you’re traveling on the road with your RV, you’ve probably experienced weather that is less than perfect. If your RV has been exposed to water, such as rain or melting snow, there’s a good chance some water has seeped into your roof’s seams.
When the water seeps into the roof seams, there are two risks you should be aware of. One is that it will damage the inside of your vehicle, including the wall panels and the framework. The other is the risk of mold and mildew.
Related Article:
– How to Clean and Remove Mold from an RV Awning
Mold and mildew grow quickly in damp conditions, such as those caused by waterlogged seams. Even if the water doesn’t get into your RV, it can still cause issues with your roof.
The other reason that your RV roof may turn black is due to air pollution. This cause is substantially less common, though it is possible. When this happens, it is because the rubber in your roof reacts with the industrial gases in the air and slowly turns black.
You should clean your roof as soon as you notice any black spots. If you leave them as they are for long, there’s a good chance the cause of the color change (whether that be mold or pollution) will bond to the roof surface, making it almost impossible to clean completely.
Tips for Cleaning Your RV Roof
Before you start cleaning the roof, make sure you’re safe. Remember, you’ll be working at a significant height, so you’ll need to have a secure ladder on hand. Additionally, have a spotter nearby, so you’ll have immediate help in the case of an accident.
Furthermore, make sure you wear gripping shoes that will reduce the risk of you slipping on a soapy, slippery roof.
Here are some other things to be careful of:
- Check the ingredients in your cleaning products. You should never use products that contain citric ingredients, petroleum distillates, or harsh abrasives, as these can cause further damage.
- Sweep your roof and inspect for damage. If you do spot any, get the problems fixed first before cleaning.
- Depending on how long it’s been since you cleaned your roof, you can use a power washer for the first round of cleaning. This won’t clean your roof completely. However, it will take care of the spots that aren’t too tightly bound to the roof, so you need to exert yourself less.
- Check whether you have an Ethylene Propylene Diene Monomer (EPDM) or Thermoplastic Polyolefin (TPO) roof. Depending on the type of roof you have, the cleaner you will need will differ – EPDM roofs are less resistant to solvents and oil.
- Choose your brush according to your cleaning needs. For example, tougher stains will need a soft bristle brush, while a medium bristle option works better for general cleaning.
- Work in sections. Once you have the cleaning solution mixed, start cleaning the roof in small areas so you can keep track of what you’ve already cleaned. Also, work front to back, so you won’t need to walk over the wet surface when climbing down.
- Once you’re done scrubbing the roof down, rinse it once more. This will help get rid of any dirt and grime you dislodged but didn’t remove completely.
You can also refer to this YouTube video to guide you on cleaning your RV roof:
It takes a look at how to clean your RV and use a power washer safely while doing so.
Ensure to clean your RV roof thoroughly a few times a year – most experts recommend doing so at least 4 times a year to reduce the risk of issues. Additionally, make sure the roof is covered when you store your RV away for the season, which again reduces the risk of mold growth and water damage. Furthermore, it is important to do the same and clean your solar panels if you have some.
Find this content useful 🙂 ?
Subscribe to our Newsletter and get a free Solar Electric Diagram + shopping list.
Tips for Resealing Your Roof
If you notice any damage to your roof while cleaning it, there is a good chance the roof needs to be resealed. The process of doing so is relatively simple, and you should be able to manage it without professional help.
The resealing process is similar to that of resealing an asphalt driveway. The preparation details will depend on the sealant you use, so read the instructions carefully and follow as directed. Once prepared, use the sealant to seal all roof joints. If there is a primer included in the sealant kit, use the sealant after applying the primer.
How often you will need to reseal your roof will depend on the type of rubber it is made from and how well you take care of the roof. While TPO roofs usually require less upkeep, EPDM roofs will need to be resealed every 3-4 years, regardless of how well you take care of them. The worse the state of your roof, the more frequently they will need to be resealed.
Conclusion
Most RV roofs are long-lasting and able to handle the effect of the elements well. However, they’ll need occasional care and cleaning to ensure they last as long as possible.
If your RV roof is turning black, it’s a good indicator that mold is growing on it. Clean the roof as soon as you notice those black spots – if you ignore them for too long, you risk them bonding permanently to the roof. This will make your roof unsightly to look at and reduce your RV roof’s lifespan, forcing you to invest in costly repairs and replacement quicker.

