Whether you’re concerned about the smell in your RV, or you suspect something is clogging your vent pipes, performing a test will help you figure out what’s going on. Fortunately, performing an RV vent test is easy as long as you have another person to help you.
Here’s how to test an RV vent pipe in 6 easy steps:
- Gather the necessary supplies for the test.
- Remove the vent cover and perform a quick inspection.
- Remove any nesting material from the pipe.
- Empty your black and gray water tanks.
- Flush out your tanks.
- Inspect your vent pipe again.
If you’re interested in more specific details about each of these steps, keep reading for an in-depth guide to testing your vent pipe. For more related van build resources, check this page.
1. Gather the Necessary Supplies for the Test
The first step to any task is to gather your supplies together. To perform a proper test on an RV vent pipe, you’ll need the following:
- Vent cover replacement: Your vent pipe cover may have sustained damage, and the replacement will protect the inner workings of the pipe.
- Caulk: Like the vent cover, caulk can get damaged from various things, including harsh weather, animals, and debris. Having caulk with you will ensure you can fix any damage you find.
- Pliers or tweezers: If you notice an animal nest inside the pipe, you’ll need pliers or tweezers to remove it carefully.
- Rinse wand and garden hose: You’ll use these when cleaning out your water tanks and the vent pipe.
- Black water tank enzymes: These will help break down the solid waste in your tank to make it easier to clean and prevent clogging.
- Sewer Drain Hose: It may be helpful to have multiple hoses just in case you need to extend the size to reach the drainage area.
- Sewer House Adapters: Water tank drainage sites will typically have these on hand, but it’s good to have multiple sizes to ensure the hose fits both your RV and the drain hole correctly.
It’s also worth noting that having an extra set of hands to help with this task will make the process go by much faster and with significantly less stress.
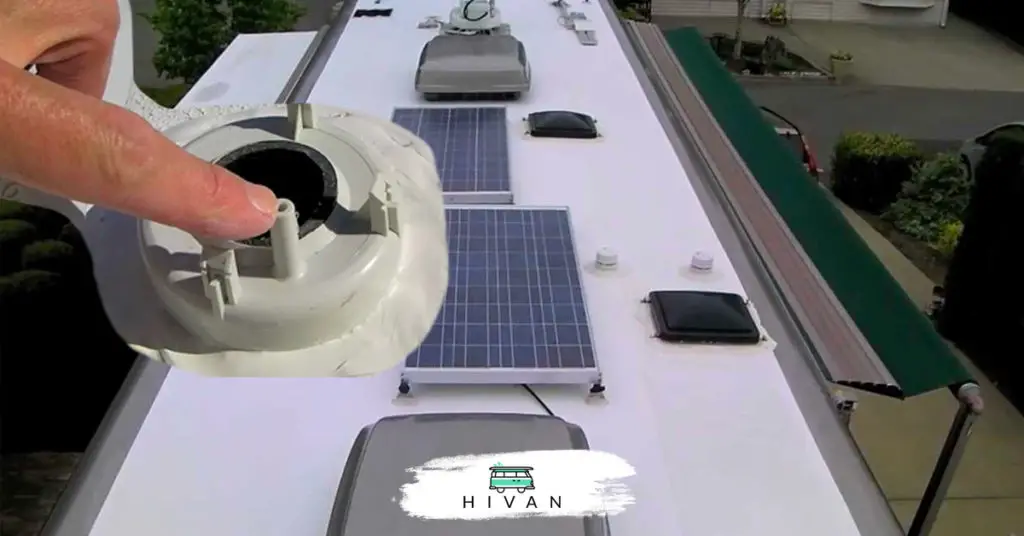
2. Remove the Vent Cover and Perform a Quick Inspection
Next, climb onto the roof to inspect the vent cover and the caulk around it. It’s common for vent covers to sustain damage from harsh weather or critters finding their way on the roof. If you determine that the cover has been compromised, be sure to replace it sooner than later to better protect the vent pipe.
Vent cover replacements will cost you anywhere from $10-$50, so depending on your budget you could either purchase one beforehand or wait until after the inspection to buy one if you see that you need it. They eventually need replacing though, so if you buy one and don’t need it now, you will use it later.
Find this content useful 🙂 ?
Subscribe to our Newsletter and get a free Solar Electric Diagram + shopping list.
3. Remove Any Nesting Material From the Pipe
After removing the current vent cover, investigate inside for any animal nesting material or other debris. Nesting debris very well could be the root of your concern, so use pliers or tweezers to remove it from the pipe carefully.
Take your time with this to avoid accidentally pushing any of the material further down into the pipe.
4. Empty Your Black and Gray Water Tanks
Once your pipe is visibly clear of debris, clear out your black and gray water tanks. To best utilize your time, you could drive to a designated dumpsite while leaving the pipe uncovered to air it out.
Your black water tank holds waste from your toilet, and your gray water tank holds all other dirty water. To empty each tank:
- Connect a drainage hose to the appropriate spot and open the drain valve.
- Drain the blank tank first so water from the gray tank can help flush any residue left in the black tank.
- Keep draining until you hear the flow stop.
- Follow the same process with the gray tank once the black tank is empty.
5. Flush Out Your Tanks
Draining and cleaning out your dirty water tanks will eliminate any smell that may confuse you while you’re testing your pipes later on. Experts recommend that you clean out your black water tank after each trip you take or every couple of days to once a week if you’re doing long-term travel. You won’t need to clean your gray water tank as often, but it’s still good to do it regularly.
After draining your black water tank, you’ll need to flush it out to clean it thoroughly. You can do this by going inside and opening your toilet bowl trap. Lock the trap so it stays open, then use a hose with a rinse wand attached to rinse out the bowl and any residual waste where the bowl meets the pipe.
Before moving on, make sure the tank’s drain valve is closed up. If you’re traveling longer than a few days at a time, you’re going to want to treat your water too. You can do this by adding a mixture of black water tank enzymes and water to your toilet bowl. Flush the toilet, and the enzymes will help with the breakdown of waste and toilet paper for the next couple of days.
6. Inspect Your Vent Pipe Again
Once you’ve cleaned everything out, have one person on the roof look inside the vent pipe while you do a few tests inside the RV. Flush the toilet a few times and run the sink and the shower for a minute.
As long as you don’t see any issues or smell anything coming from the pipe outside, you’re good to go. Replace the vent cover and recaulk as necessary.
Final Thoughts
RV camping is a fun and relaxing activity, but it’s not without work. Maintaining your vents will ensure you enjoy your RV for years to come. This step-by-step guide will help you if the smell is coming from a clogged vent or a full black tank. However, always seek the help of a certified RV mechanic if problems persist.