Hi-van is supported by its audience. When you purchase using our links, we may earn an affiliate commission (no added cost to you). Learn more
When it comes to setting up a versatile camping shelter on a budget, nothing beats a tube tarp tent. A moderately sized tarp, a few supplies, and a bit of ingenuity are all it takes to set up a shelter that can hold up against weather elements. But while most people have no problem purchasing the tarp and supplies, the ingenuity part of making a tarp tent with a floor can be tricky if you don’t know how to go about it.
Here’s how to make a tube tarp tent with a floor:
- Gather the necessary supplies.
- Run a paracord between two trees/poles.
- Drape the tarp over the paracord and bond the ends together.
- Spread the tarp into a triangular prism shape and secure it.
- Seal the triangular ends of the tent.
- Lay a thermal blanket on the floor.
Read on to learn more about the above steps, as well as an alternative way to build a tarp tent with a floor if the above process sounds intimidating or inconvenient.
1. Gather the Necessary Supplies
The first item on the supply list is the tarp. You can make a tube tarp tent with any 10’ x 10’ (3 m x 3 m) tarp or purchase a one-size tarp that’s specifically designed to be erected as a tube tent.
As far as your options go, the first option is ideal if you already own a tarp or are cash strapped, while the second option is all about convenience and ease of setting up. And as you might imagine, your supply list will depend on the option you choose.
The steps we’ll cover from now on are for someone working with a standard 10’ x10’ (3 m x 3 m) tarp. We’ll talk a bit more about using a tarp specifically designed for tube tents later on. Now that we’re on the same page, let’s look at what should feature on your supply list.
Here’s what you’ll need besides the tarp:
- A camping paracord/guy line
- Two trees or poles at least 10’ (3 m) apart
- Four stakes
- A rain poncho (optional)
- A thermal blanket (not necessary, but recommended for comfort).
Note: The tarp size above is merely the minimum, but you can always use a larger tarp as long as it’s square or rectangular.
2. Run a Paracord Between Two Trees/Poles
The paracord is what holds your tent in place, so be sure to secure it tightly at both ends, especially if you’re camping in extremely windy conditions. If you don’t have a guy line specifically designed for camping, you can improvise.
Just ensure whatever you use is strong enough to hold your tarp tent together when the wind blows.
3. Drape the Tarp Over the Paracord and Bond the Ends Together
Drape the tarp over the length of the paracord and bond the hanging ends of the tarp together.
For purposes of painting a clearer mental picture, bonding the ends together should transform what was once a square tarp into a hollow tube that the paracord runs through. You can use specially formulated plastic glue to bond the hanging ends of your tarp if it’s made of vinyl.
If you have a polyethylene tarp, tarp tape will do just fine, but just make sure it’s waterproof.
4. Spread Out the Tarp Into a Triangular Prism and Secure It
Look online to get an idea of what a triangular prism looks like, and spread your now hollow tube tarp into that shape. Your “triangular prism” tent should be such that one of its rectangular faces forms the floor, with two triangular faces on each side.
One or both can be the “door” to your tent.
Once you spread out your tarp into this shape, proceed to secure it into place with stakes. Drive down four stakes on each corner of the rectangular “floor” of the prism, ensuring enough tarp tension to prevent the “walls” from encroaching into your interior space.
5. Seal the Triangular Ends of the Tent
If you want to keep the triangular ends of the tent open, you don’t need this step. Just go ahead and enjoy your camping experience. But if you want them closed for protection against weather elements, use a rain poncho or any additional tarp you may have to close off the triangular ends of your tent.
6. Lay a Thermal Blanket on the Floor
While this is another optional step, it is highly recommended if you’re camping on damp ground or extremely cold areas. A thermal blanket is pretty self-explanatory, as it’s an insulative sheet meant to keep you warm in cold conditions.
Laying one on the floor adds an insulative barrier between you and the ground, preventing your body from losing heat when the ground below gets damp and cold. Laying down the sheet is pretty straightforward, too.
Simply spread it out such that it covers the floor, then secure it in place.
An Easier Way to Make a Tube Tarp Tent: A One-Size Tarp
If setting up a tube tarp tent with a conventional tent sounds a bit inconvenient or intimidating, there’s an easier alternative: purchasing a one-size tarp tent.
5-in-1 SURVIVAL Bracelet + Camping Tarp (improved tie points for MAX HOLD) + 6 CARABINERS (for fast 2 minute easy set up) + 6 Heavy Duty Ultra Lightweight STAKES + 7 Adjustable Guy Lines + Stake Bag + 1 All Gear Carrying Bag – Everything you need to stay SAFE & DRY – Don’t leave home without your survival gear!
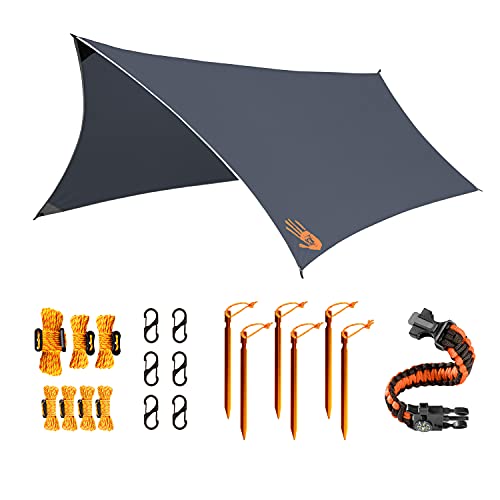
A one-size tarp is all about comfort, convenience, and easy setup. Everything you need to set up the tent is usually included, along with setup instructions. And if you choose an option like Camping Tent TARP from Amazon.com, you get to enjoy a great mix of versatility, comfort, and set-up convenience.
This versatile tube tarp shelter can be used as:
- An all-weather tarp for protecting your gear.
- A sleeping tent.
- A ground cloth.
- Thermal protection in emergencies.
- A means for emergency signaling.
This tarp’s versatility has a lot to do with its reverse side design. It’s aluminized for flame-retardant, water resistance, and thermal insulation capabilities.
The aluminum coating also makes that side of the tarp reflective, allowing for emergency signaling.
Set up is pretty straightforward too. All the instructions are conveniently scribbled on the stuff sack exterior for easy access. Steel stakes and guy lines are also included to ensure you don’t need to improvise or purchase anything separately.
There’s also a hidden zipper that instantly joins the ends of the tarp together to form a tube-shaped tent, eliminating the need for glue or tarp tape. Last but not least, the aluminized reverse side means you won’t need to lay a thermal blanket on the flow to keep warm.
Final Thoughts
A tarp tube tent is one of the most popular designs and understandably so. It’s relatively easy to set up and a great option for rainy conditions because its triangular shape allows moisture to flow off the tent easily. Its design also provides ample floor space for gear storage and maximizes headroom for tall individuals.
Now that you have two ways to set it up, don’t just take my word for it: give it a shot on your next camping adventures. Happy camping!
Find this content useful 🙂 ?
Subscribe to our Newsletter and get a free Solar Electric Diagram + shopping list.