Hi-van is supported by its audience. When you purchase using our links, we may earn an affiliate commission (no added cost to you). Learn more
Whether you want to save space or switch your van’s bed layout, installing a hammock could be quite an improvement. Hammocks are lightweight, reducing your van’s weight and saving money on gas. You only need a few tools, hooks, and other components to mount a long-lasting, comfortable hammock in a van.
To hang a hammock in a camper van, follow these seven steps:
- Find out how far apart the hammock’s hooks have to be in the van
- Drill the pilot holes with a drill bit that’s slightly smaller than the hook’s diameter
- Place a small amount of Loctite on each hole to stop rust and looseness
- Screw the hooks or bolts into the holes with a power drill
- Attach your hammock to both hooks
- Slowly sit in the hammock and make minor adjustments
- Paint the hooks or bolts to make them uniform with the camper van
In this post, we’ll discuss the whole process of adding a hammock to your campervan. We’ll also explain how to remove it, prevent rust, and stop it from squeaking.
Decide Where You Want the Hammock to Rest
Measure how long the hammock is and how much space it’ll take up in the campervan. In most cases, the ropes will have to be tied to opposite ends of the vehicle. Measure twice and drill once to ensure you don’t make mistakes.
Here’s how to do it:
- Move everything out of the van.
- Lay the hammock flat on the floor with the ropes stretched out as far as possible.
- Move the ropes up the wall until there are only about 12 inches of space between the wall and the hammock.
- Mark the spot with a permanent marker.
Drill Pilot Holes Inside the Camper Van
You’ll need a 2.25” drill bit to make the holes you marked from the previous section. Slowly drill the hole into the side of the van, ensuring you don’t go too deep. Most vans have extremely thin walls, so try to mount the hammock’s hooks on corners. You could also drill them into mounted wood planks or walls (if you added them over insulation).
Vanlife TV explains the pilot hole process in this video tutorial:
Apply Loctite to Secure the Bolts or Hooks
You can add Loctite to the bolts or holes, whichever you’re more comfortable with. Loctite is a heavy-duty sealant that prevents the bolts from loosening, corroded, or rusting. It also protects the metal surface of the van. You can use Loctite on wood, too.
If you don’t want to use this product, it’s essential to find something that will prevent rusting. Drilling holes into a metal van without protecting it from rust will corrode the van and lead to severe structural issues. Apply a thin bead of the sealant to each hook or hole, then proceed to the next step.
Mount the Metal Hooks into the Holes
2 x Ceiling hammock hooks; 8 x Pull explosion screws; 8 x stainless steel screws
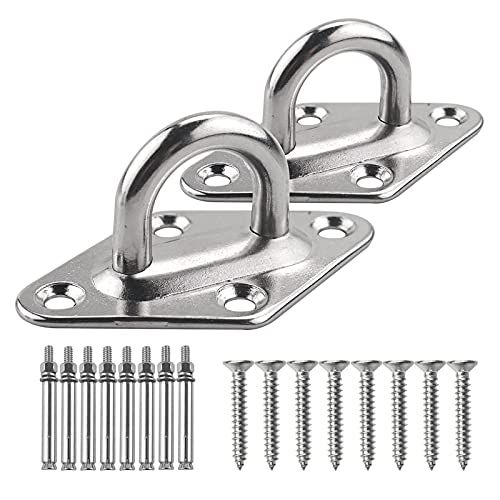
We recommend the TooTaci 1,000-Pound Hammock Hooks. They have a D-hook that prevents your hammock’s ropes from sliding off. This kit also includes the screws, so you don’t have to worry about buying them separately.
Regardless of which hooks you choose, you need to make sure they’re rated for your weight. The hooks we mentioned are great for up to 1,000 pounds, so you’ll have no problem relaxing in your hammock inside the camper van.
If you don’t want to use hooks, you can use wide bolts. These bolts can be removed to save space, but they’re not as reliable as D-hooks since the hammock’s ropes can slide off easily.
Attach a Heavy-Duty Hammock to Both Hooks
Just Vanlife recommends choosing a breathable material, such as cotton. Vans are small and can get quite humid. Your body heat will build up on polyester and other synthetic fibers, making the hammock uncomfortable to sleep in. Remember to make sure the hammock is short enough for the van, too.
The Tinton Life Brazilian Hammock comes with everything you need for your campervan hammock setup. It includes ropes, straps, and carabiners to mount your hammock to D-hooks, C-hooks, or bolts. There are quite a few colors to choose from, too. The hammock is 102 x 59 inches and holds up to 450 pounds.
Whichever hammock you choose, we highly suggest using ropes or straps. Chains tend to be quite loud inside a campervan, and they have the tendency to rust from excess moisture from your breath. Not only that but ropes and straps are much more adjustable than chains, so you can make changes whenever you want to.
Test the Hammock and Make Minor Adjustments
Once you have the hammock ready to go, it’s time for the fun part: Lying down and seeing how it feels. While the hard part is done, the process isn’t quite finished. Try the tips below to get the perfect level of comfort before calling it a day.
- Hammock Universe recommends your hammock sitting about 18 inches above the ground when you’re in it. This means it’ll likely end up being around 3 to 4 feet above the ground when you’re not laying down.
- Lay in the hammock and measure the space between you and the ground with a tape measure.
- Get out of the hammock and tighten the ropes on both sides by an extra inch or two.
- Test your adjustments and repeat the process until you’re comfortable with it.
Paint the Hooks to Match Your Van’s Color Scheme
Make sure the paint is designed for metal. Many types of paint will chip or fade if they’re not recommended for paint. If you’re sure you’ll use the hooks, it’s not a bad idea to spray paint them before installing them. Remember that the Loctite will prevent you from removing the hooks for the foreseeable future.
Some hammocks come with straps or ropes that cover all of the hooks. You can tie all of the extra rope around the hook or bolt until it’s completely covered, making it look much more natural.